Dinner · Part 2 of 3: Instructions
Slow Cooker Hunan Chicken for an Easy Weeknight Dinner Step-by-step instructions
- Prep
- Cook
- Total
- Serves
- 4
Before you start
Before you begin, ensure your slow cooker is clean and positioned on a level, heat-resistant surface. Prepare your ingredients by washing and chopping the carrots into uniform coins and cubing the chicken breast into bite-size pieces.
Having all your ingredients measured and ready before you start assembling makes the process smooth and quick. Check that your slow cooker lid fits securely to lock in moisture and heat during the cooking time.
Ingredients at a glance (5)
- 1 1/2 lb chicken breast, cut into bite-size cubes
- 2 cups carrot coins
- 1 cup whole baby corn
- 1 tsp red pepper flakes
- 1 cup Hunan sauce
Instructions
Preparation and assembly
- Assemble the ingredientsPlace the cubed chicken breast into the bottom of your slow cooker. Arrange the carrot coins and whole baby corn over the chicken evenly.Look for The slow cooker base is evenly covered with the chicken and vegetables.Tip Ensure the chicken pieces are roughly the same size to promote even cooking throughout the process.
At the end of this phase, the chicken and vegetables are layered neatly in the slow cooker. The ingredients are evenly distributed, and the sauce is poured over the top, ensuring everything is ready for the slow, consistent cooking process that will follow.
Seasoning and starting the cook
- Season and sauceSprinkle the red pepper flakes over the mixture in the slow cooker. Pour the Hunan sauce over the top, ensuring that the sauce coats the chicken and vegetables effectively.Look for The sauce is poured over the ingredients and begins to seep down into the chicken.Tip Shake the ramekin gently to distribute the pepper flakes uniformly across the surface.
Once the red pepper flakes are added and the lid is secured, the slow cooker begins to develop the base flavors of the dish. The aromatic components are sealed in, and the gentle heat starts to penetrate the ingredients, setting the stage for the sauce to thicken and harmonize.
Final cook and resting
- Cook and serveCover the slow cooker and cook on low for 4 hours until the chicken reaches an internal temperature of 165°F (74°C). Allow the dish to rest for 5 minutes before serving to ensure the sauce thickens slightly.Look for The chicken is tender, cooked through, and the sauce has thickened slightly and clings to the ingredients.Safe temperature 165°F (74°C) internal temperature (poultry)Tip Using a meat thermometer helps confirm the chicken is perfectly safe and ready to enjoy.
The dish is finished when the chicken is tender and fully cooked. The kitchen should smell savory and slightly spicy. Checking for the correct internal temperature ensures the meal is ready for a brief rest before serving, which helps the sauce achieve its final, perfect consistency.
Common mistakes
A common mistake is cutting the chicken and vegetables into uneven sizes, which leads to some pieces being overcooked while others remain undercooked. Ensure your knife work is consistent.
Another error is failing to use a meat thermometer to confirm the safe internal temperature of the poultry, which can result in either overcooking or safety concerns.
Avoid lifting the lid frequently during the cooking process, as this releases heat and moisture, significantly extending the cooking time and potentially drying out the chicken.
How to tell it’s done
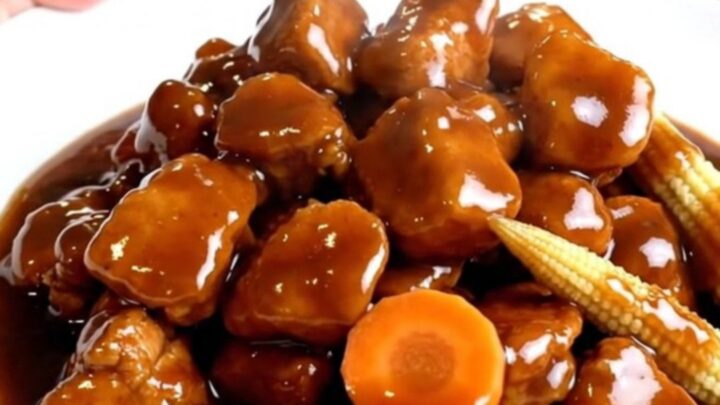
The chicken is done when it is opaque throughout and reaches an internal temperature of 165°F (74°C) as measured by a meat thermometer inserted into the thickest part of the meat. At this stage, the sauce should appear thickened and glossy, coating the chicken and vegetables evenly.
The carrots should be fork-tender but not mushy, maintaining their shape and color. Allow the dish to rest for at least 5 minutes before serving to let the sauce settle and reach the ideal consistency.
- Poultry: 165°F (74°C) in the thickest part
Up next · Part 3 of 3
2 variations · storage & make-ahead · 3 answers · printable card
Tips, FAQ & printable recipe (Part 3)← Back to the ingredients (Part 1)