Dinner · Part 2 of 3: Instructions
Slow Cooker Honey Hickory Spare Ribs Step-by-step instructions
- Prep
- Cook
- Total
- Serves
- 6
Before you start
Before you start, make sure you have a 6-quart slow cooker. Pat the ribs dry with paper towels, but there's no need to season them—the sauce and onions provide plenty of flavor. Slice the onions thinly, and measure out the brown sugar and barbecue sauce.
Have your cutting board and chef's knife ready for prepping. This recipe is truly dump-and-go, so there's no marinating or searing required. Just layer the ingredients in the order given and set the slow cooker.
Ingredients at a glance (4)
- 4 lb St. Louis style pork spare ribs
- 2 large Vidalia onions, thinly sliced
- 1/2 cup brown sugar, packed
- 1 1/2 cups honey hickory barbecue sauce
Instructions
Layer and Sauce
- Layer the Ribs and OnionsPlace the St. Louis style pork spare ribs in the bottom of a 6-quart slow cooker, arranging them in a single layer if possible, or slightly overlapping. Scatter the sliced Vidalia onions evenly over the ribs. Sprinkle the brown sugar over the onions and ribs, covering as much surface as you can.Look for The ribs should be mostly covered with onions and brown sugar.Tip If the ribs are too large, cut the rack into 2 or 3 pieces to fit better.
- Add the BBQ SaucePour the honey hickory barbecue sauce evenly over the onions and brown sugar. Use a spatula or spoon to spread the sauce over the top, making sure the ribs are well coated. Do not stir; just let the sauce sit on top.Look for The sauce should cover the onions and most of the ribs.Tip For extra coverage, use the back of a spoon to gently spread the sauce.
At this point, the slow cooker contains the raw ribs, topped with a layer of onions, brown sugar, and a generous amount of barbecue sauce. The onions are still crisp, and the sauce is thick and glossy. The brown sugar is visible in patches. This is the starting point, and everything should look neat and evenly distributed. Before moving on, make sure the sauce covers most of the onions and ribs.
Slow Cook to Tender
- Slow Cook on LowCover the slow cooker with the lid and set it to cook on low for 6 to 7 hours, until the ribs are tender and the meat pulls away from the bone easily. Avoid opening the lid during cooking to maintain a steady temperature. Let it rest for 3 minutes before slicing.Look for The sauce should be bubbling gently around the edges.Safe temperature 145°F (63°C) internal temperature (steaks, chops and roasts)Tip Cooking on low yields the most tender ribs; high heat can toughen the meat.
- Check for DonenessAfter 6 hours, check the ribs by piercing the meat with a fork. The meat should be very tender and easily pull apart. If not, continue cooking for another 30 to 60 minutes. When the ribs are done, let them rest in the slow cooker for 5 minutes.Look for The meat should shred easily and the bones should be clean.Safe temperature 145°F (63°C) internal temperature (steaks, chops and roasts)Tip If the sauce is too thin, remove the ribs and simmer the sauce on the stovetop to thicken.
After several hours, the slow cooker is filled with bubbling sauce and the aroma of sweet barbecue and caramelized onions. The ribs are submerged in a rich, dark glaze, and the onions have softened and turned translucent.
The meat is starting to pull away from the bones. When you insert a fork, it should meet little resistance. The sauce is simmering gently around the edges, and the kitchen smells incredible.
Serve and Enjoy
- Serve the RibsUsing tongs or a carving fork, carefully lift the ribs out of the slow cooker and transfer them to a cutting board or serving platter. Spoon some of the caramelized onions and sauce over the top. Serve hot, with extra sauce on the side if desired.Look for The ribs should be glistening with sauce and the onions jammy.Tip For a thicker glaze, skim some of the sauce from the slow cooker and reduce it in a saucepan.
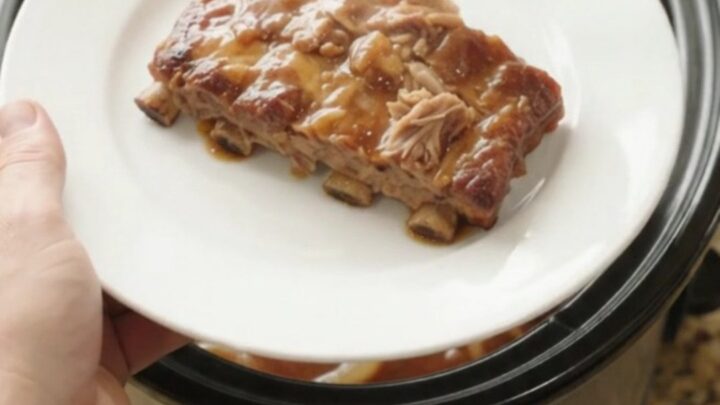
The ribs are now fork-tender and glistening with a sticky, caramelized sauce. The onions have melted into a jammy, sweet topping. When you lift the ribs with tongs, they bend slightly and the meat easily separates. The sauce is thick and coats the back of a spoon. The ribs are ready to be served, either on a platter or directly from the slow cooker, with extra sauce spooned over the top.
Common mistakes
A common mistake is lifting the lid too often to check on the ribs. Every time you open the slow cooker, heat escapes and adds to the cooking time. Trust the process and wait until the minimum time has passed.
Another mistake is using a barbecue sauce that's too thin or too spicy, which can overpower the dish. Stick with a sweet and smoky sauce. Also, don't skip the brown sugar—it helps create the caramelized glaze that makes these ribs so good.
How to tell it’s done
The ribs are done when the meat is fork-tender and easily pulls away from the bone. Insert a fork into the thickest part of the meat; it should slide in with little resistance, and the meat should shred easily.
The internal temperature of the pork should reach at least 145°F (63°C) for food safety, but for maximum tenderness, you'll want to cook it longer until it's falling apart. Let the ribs rest for at least 3 minutes before serving to allow the juices to redistribute.
- Steaks, chops and roasts: 145°F (63°C) in the thickest part, then a 3-minute rest
Up next · Part 3 of 3
4 variations · storage & make-ahead · 5 answers · printable card
Tips, FAQ & printable recipe (Part 3)← Back to the ingredients (Part 1)