Dinner · Part 2 of 3: Instructions
Slow Cooker Honey Ginger Pork Tenderloin Step-by-step instructions
- Prep
- Cook
- Total
- Serves
- 4
Before you start
Before starting, ensure your slow cooker insert is clean and dry. Take the pork tenderloin out of the refrigerator about 20 minutes before cooking to take the chill off, which promotes more even cooking.
Slice your onions into uniform rings so they cook at the same rate and provide a consistent base for the pork. Have your whisk and measuring tools ready, and clear a small space on your counter to assemble the dish efficiently.
Ingredients at a glance (5)
- 2 lbs pork tenderloin
- 1 large sweet onion, sliced into rings
- 1 tbsp ground ginger
- 1/2 cup honey
- 1 cup chicken broth
Instructions
Preparation and assembly
- Assemble the slow cookerPlace the pork tenderloins into the slow cooker insert, arranging them in a single layer. Scatter the onion rings over the pork, then sprinkle the ground ginger evenly over the top.Look for ensure the onions are spread outTip trim any excess silver skin from the pork before adding it to the cooker for a better texture.
The pork should be laid flat in the slow cooker with onions layered beneath or around it. The ginger should be distributed evenly to ensure the flavor permeates the meat.
Everything should look organized and ready for the liquid component, with the ingredients arranged in a way that allows the heat to circulate properly during the long, slow braising process ahead.
Adding the honey broth
- Prepare and add the liquidIn a separate container, whisk the honey and chicken broth until fully combined. Pour this mixture over the pork and onions in the slow cooker.Look for the liquid should partially submerge the porkTip whisking the honey into the broth first ensures the glaze distributes evenly during the cooking process.
The honey and broth mixture should be fully incorporated and pourable. Once added to the slow cooker, it should pool around the base of the pork. The liquid level should be sufficient to keep the bottom of the meat moist as it cooks, but it does not need to cover the tenderloins completely, as they will release their own juices during the process.
Cooking and final resting
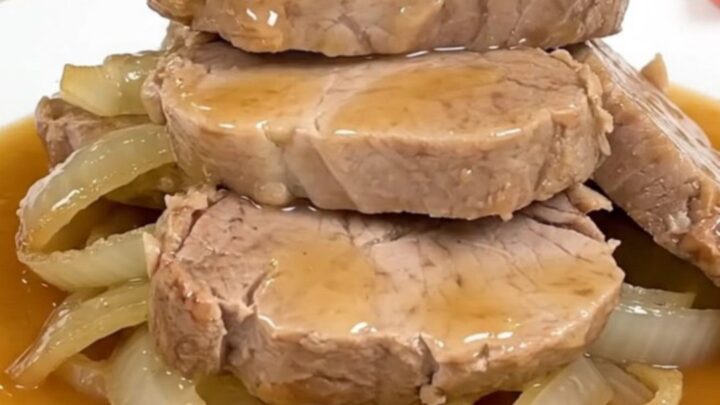
- Cook and serveCover and cook on low for 4 hours until the pork reaches an internal temperature of 145°F (63°C). Remove the pork, let it rest for 5 minutes, then slice and serve with the sauce.Look for the pork is tender and the sauce has thickenedSafe temperature 145°F (63°C) internal temperature (steaks, chops and roasts)Tip use a meat thermometer to check for safety without overcooking the lean meat.
At the end of the cooking phase, the pork will be visibly tender and the sauce will have reduced slightly, appearing glossy and aromatic. The onions should be soft and translucent. Before slicing, the meat must rest for 5 minutes, which allows the muscle fibers to relax and ensures the meat is at its most succulent state for serving your dinner guests.
Common mistakes
A common mistake is cooking the tenderloin on a high setting for too long, which can cause the lean meat to dry out quickly. Always stick to the low setting for the best texture.
Another error is failing to let the meat rest; resting for at least 5 minutes is essential to allow the juices to redistribute throughout the meat, ensuring that every slice remains moist and flavorful instead of releasing its juices onto the cutting board.
How to tell it’s done
The pork is perfectly cooked when it reaches an internal temperature of 145°F (63°C). At this point, the meat should be opaque, tender enough to slice easily, and slightly springy to the touch.
It is crucial to use a meat thermometer inserted into the thickest part of the tenderloin to verify the temperature. Overcooking will result in dry, tough meat, so check the progress towards the end of the cooking time.
- Steaks, chops and roasts: 145°F (63°C) in the thickest part, then a 3-minute rest
Up next · Part 3 of 3
2 variations · storage & make-ahead · 3 answers · printable card
Tips, FAQ & printable recipe (Part 3)← Back to the ingredients (Part 1)