Dinner · Part 2 of 3: Instructions
Slow Cooker Honey Garlic Short Ribs Step-by-step instructions
- Prep
- Cook
- Total
- Serves
- 4
Before you start
Before you begin, ensure your slow cooker is clean and placed on a stable, heat-resistant surface. Take the beef short ribs out of the refrigerator about 20 minutes before you start to take the chill off, but do not leave them out for longer than 30 minutes.
Gather all your measuring tools and ingredients so that assembly is quick and efficient. Having everything ready will allow you to fill the slow cooker in just a few minutes, keeping the process streamlined and simple.
Ingredients at a glance (4)
- 4 lb beef short ribs
- 4 tbsp minced garlic
- 1 tsp black pepper
- 1 1/2 cups honey soy sauce
Instructions
Assembly Phase
- Prepare the Slow CookerPlace the raw beef short ribs in a single layer at the bottom of the slow cooker. Ensure the pieces are evenly distributed to allow for uniform cooking throughout the process.Look for Ribs are placed flat in the cooker.Tip Avoid overcrowding the slow cooker to ensure the meat cooks evenly.
At the end of this phase, the ribs should be neatly arranged in the bottom of the slow cooker without overlapping excessively. The garlic and pepper should be distributed across the surface, and the honey soy mixture should be poured evenly.
The slow cooker is now ready to be covered and turned on, marking the beginning of the long, gentle cooking process that will transform the raw ingredients into a tender, flavorful meal.
Cooking Phase
- Season and Add GlazeSpoon the minced garlic directly over the beef. Sprinkle the black pepper evenly across the ribs, then pour the honey soy sauce over the entire mixture to coat the meat thoroughly.Look for Sauce covers the meat completely.Tip Use a spatula to scrape every bit of the sauce from the measuring cup.
During this phase, the kitchen will begin to smell savory and sweet as the garlic and soy sauce infuse the beef. The ribs will gradually darken and soften. You should not open the lid during this time to maintain a consistent temperature. By the end of this phase, the meat should be visibly soft, and the sauce will have integrated with the rendered beef juices to create a rich, aromatic glaze.
Resting and Serving Phase
- Cook and ServeCover and cook on low for 8 hours until the meat is fork-tender. Ensure the internal temperature of the ribs reaches 145°F (63°C), then allow the meat to rest for at least 3 minutes before serving on a plate.Look for Meat pulls away easily from the bone.Safe temperature 145°F (63°C) internal temperature (steaks, chops and roasts)Tip Serve with the remaining juices from the cooker for extra flavor.
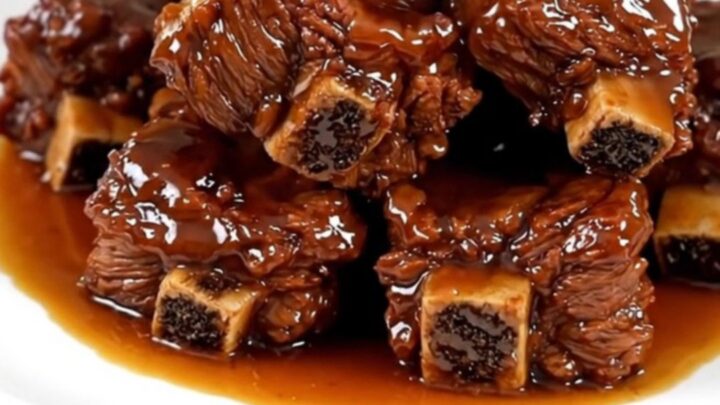
Once the timer goes off, the ribs should be carefully removed from the cooker, as they will be very fragile and may fall off the bone. After a brief rest of at least 3 minutes, they are ready to be plated. The final dish should feature glossy, deep-brown ribs that are moist and tender. Check that the sauce has coated each piece well before serving the dish immediately while it is hot.
Common mistakes
A common mistake is skipping the rest period after cooking, which can lead to drier meat. Another error is checking the slow cooker too frequently; every time you lift the lid, you release valuable heat and moisture, which adds time to the cooking process.
Finally, ensure you do not use too high a temperature setting for the entire duration, as this can cause the meat to become tough rather than tender; stick to the low setting for the best results.
How to tell it’s done
The ribs are done when the meat is extremely tender and pulls away from the bone with very little resistance. Using a meat thermometer, ensure the thickest part of the meat reaches an internal temperature of at least 145°F (63°C).
The sauce should be glossy and slightly thickened, coating the meat uniformly. Allow the meat to rest for at least 3 minutes after removing it from the cooker to ensure the juices redistribute throughout the fibers for the best possible texture.
- Steaks, chops and roasts: 145°F (63°C) in the thickest part, then a 3-minute rest
Up next · Part 3 of 3
2 variations · storage & make-ahead · 3 answers · printable card
Tips, FAQ & printable recipe (Part 3)← Back to the ingredients (Part 1)