Dinner · Part 2 of 3: Instructions
Slow-Cooker Honey Garlic Beef Tips for an Easy Dinner Step-by-step instructions
- Prep
- Cook
- Total
- Serves
- 4
Before you start
Start by setting up your station. Ensure the beef is cut into uniform, bite-sized pieces to promote even cooking. Peel and mince the garlic finely to ensure the flavor distributes evenly throughout the sauce. Have your slow cooker clean and ready on a heat-safe surface.
If using a slow cooker liner, insert it now to simplify the cleanup process later. Measure your honey and soy sauce into a separate bowl for easy mixing.
Having these components ready before you begin will streamline the assembly process and ensure the beef is submerged properly from the start.
Ingredients at a glance (5)
- 2 lb beef chuck roast, cut into 1-inch cubes
- 1 large yellow onion, chopped
- 1/2 cup honey
- 1/2 cup soy sauce
- 3 cloves garlic, minced
Instructions
Assembly Phase
- Prepare the IngredientsPlace the cubed beef chuck roast and chopped onions into the basin of the slow cooker. Ensure the pieces are evenly distributed to allow for consistent cooking throughout the process.Look for Beef is arranged in a single layer at the bottom of the slow cooker insert.Tip Trimming excess fat from the beef roast before cutting ensures a cleaner sauce finish.
The beef is evenly cubed and placed in the slow cooker, mixed with fresh onions. Everything is ready to be combined with the sauce for the long, slow cook process that will follow.
Cooking Phase
- Combine and Slow CookIn a small bowl, whisk together the honey, soy sauce, and minced garlic until smooth. Pour this mixture over the beef and onions in the slow cooker. Cover and cook on low for 8 hours until the meat is fork-tender and reaches an internal temperature of 145°F (63°C). Let the meat rest for at least 3 minutes before serving.Look for Sauce is well combined and coats all the meat pieces thoroughly.Safe temperature 145°F (63°C) internal temperature (steaks, chops and roasts)Tip Avoid lifting the lid during the first 6 hours to maintain a steady temperature.
The house begins to smell of savory garlic and sweet honey. The beef is submerged in the simmering liquid, and the onions have softened significantly into the sauce as it cooks.
Finishing Phase
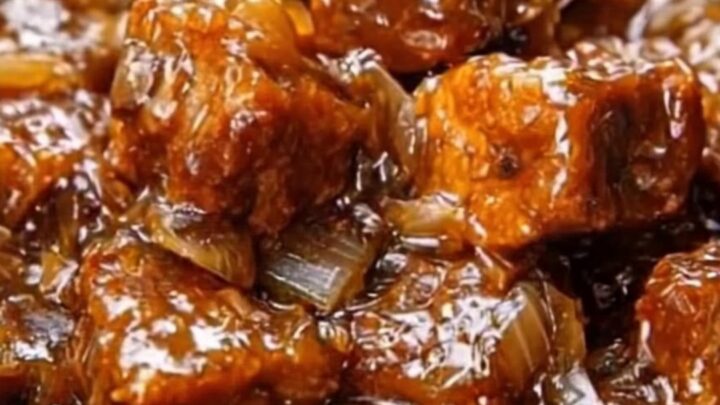
- Final RestingOnce the cooking time is complete, ensure the meat has reached an internal temperature of 145°F (63°C). Let the beef tips rest in the slow cooker for at least 5 minutes before serving to allow the sauce to thicken slightly and the juices to redistribute.Look for The sauce appears glossy and clings to the beef, and the beef is tender when pierced with a fork.Safe temperature 145°F (63°C) internal temperature (steaks, chops and roasts)Tip If the sauce is too thin, remove the lid for the final 30 minutes of cooking to help it reduce.
The sauce is thick, dark, and glossy. The beef is tender and pulls apart with a fork, ready to be served hot after a brief rest period to ensure perfect texture.
Common mistakes
A common mistake is overcrowding the slow cooker, which can prevent the sauce from circulating and lead to uneven cooking. Ensure there is enough space for the liquid to surround the meat.
Another error is using a cut of meat that is too lean, such as sirloin, which may dry out during the long cook time. Stick to chuck roast for the best results. Finally, do not skip the resting time, as it allows the sauce to settle and the beef to reabsorb some of its juices.
How to tell it’s done
The beef tips are done when they reach an internal temperature of at least 145°F (63°C) and are fork-tender. This means the meat should offer no resistance when pierced with a fork or knife.
The sauce should be dark, glossy, and thick enough to coat the back of a spoon. If the meat feels tough or rubbery, it generally requires more time, so return the lid and continue cooking for another 30 to 60 minutes before retesting.
- Steaks, chops and roasts: 145°F (63°C) in the thickest part, then a 3-minute rest
Up next · Part 3 of 3
2 variations · storage & make-ahead · 3 answers · printable card
Tips, FAQ & printable recipe (Part 3)← Back to the ingredients (Part 1)