Dinner · Part 2 of 3: Instructions
Slow Cooker Hibachi Chicken with Garlic Butter Step-by-step instructions
- Prep
- Cook
- Total
- Serves
- 4
Before you start
Before starting, ensure all vegetables are thoroughly washed and dried. Prepare the chicken by trimming any excess fat and cutting it into uniform, bite-size pieces.
Measuring out the soy sauce and melting the butter in advance will make the assembly process efficient and smooth. Ensure your slow cooker is clean and placed on a stable, heat-resistant surface with clear access to an electrical outlet.
Ingredients at a glance (6)
- 1.5 lb boneless skinless chicken breast, cut into bite-size pieces
- 2 medium zucchini, sliced into half-moons
- 1 large yellow onion, sliced into strips
- 1 tbsp garlic powder
- 1/2 cup soy sauce
- 1/2 cup unsalted butter, melted
Instructions
Prep Phase
- Prepare the IngredientsCut the chicken breasts into uniform bite-size chunks to ensure even cooking. Slice the zucchini into half-moons and the yellow onion into strips of similar thickness so they reach the desired tenderness simultaneously during the slow cooking process.Look for Chicken pieces should be cut into roughly one-inch cubes for consistent results.Tip Keep the pieces uniform in size to ensure the chicken cooks through evenly in the slow cooker.
At the end of this phase, all ingredients should be uniformly chopped and ready for assembly. The chicken should be cleaned and cut into consistent chunks, and the vegetables should be sliced to ensure they cook evenly alongside the meat. Having everything prepped ensures the assembly is fast and organized.
Assembly Phase
- Assemble the Slow CookerPlace the prepared chicken, zucchini, and onion into the slow cooker insert. Sprinkle the garlic powder evenly over the mixture. Drizzle the soy sauce and melted butter over the top to coat the ingredients effectively for a flavorful braise.Look for Ensure the ingredients are evenly distributed for consistent flavor infusion.Tip Avoid over-stacking if using a small slow cooker to allow the heat to circulate properly.
The slow cooker should be loaded with the chicken, vegetables, and sauce ingredients. Everything should be arranged to ensure proper heat distribution.
Verify that the soy sauce and butter have been drizzled evenly across the top, setting the stage for a well-integrated and flavorful braised dish once the cooking starts.
Cooking Phase
- Slow Cook and ServeCover the slow cooker and cook on low for 4 hours. Once the time is up, verify the chicken has reached an internal temperature of 165°F (74°C). Let the chicken rest for 5 minutes before serving to ensure tenderness and optimal texture.Look for The chicken is done when it is opaque throughout and tender to the touch.Safe temperature 165°F (74°C) internal temperature (poultry)Tip The vegetables should be soft and well-coated in the garlic butter sauce upon serving.
During this phase, the chicken and vegetables slow cook until tender and fully infused with the garlic butter sauce. The final check involves ensuring the chicken has reached the safe temperature of 165°F (74°C) and that the vegetables are tender, signaling that the dish is ready to be served.
Common mistakes
Avoid overcrowding the slow cooker, as this can lead to uneven cooking and excess liquid that may dilute the sauce. Additionally, ensure the chicken is cut into uniform pieces; if the chunks are too large, they may remain undercooked while the vegetables become too soft.
Finally, avoid lifting the lid frequently during the cooking cycle, as this releases heat and moisture, significantly increasing the total cooking time required.
How to tell it’s done
The chicken is fully cooked when the internal temperature reaches 165°F (74°C) measured with a meat thermometer at the thickest part of the meat.
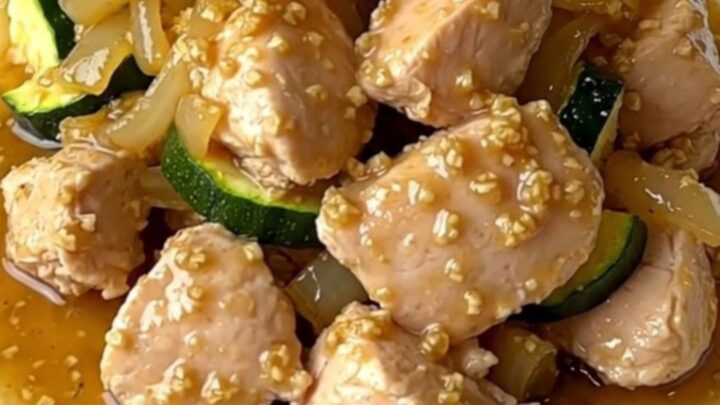
The chicken should be opaque, tender, and easily pierced with a fork. The vegetables should be soft and have absorbed the garlic butter sauce, appearing vibrant and slightly translucent without being mushy.
- Poultry: 165°F (74°C) in the thickest part
Up next · Part 3 of 3
2 variations · storage & make-ahead · 3 answers · printable card
Tips, FAQ & printable recipe (Part 3)← Back to the ingredients (Part 1)