Dinner · Part 2 of 3: Instructions
Slow Cooker Herb Pot Roast with Tender Potatoes and Carrots Step-by-step instructions
- Prep
- Cook
- Total
- Serves
- 6
Before you start
Before beginning the cooking process, ensure all ingredients are properly prepped and measured to streamline the assembly. Retrieve the beef chuck roast from the refrigerator about twenty to thirty minutes prior to searing to take the chill off, which helps achieve an even, beautiful crust.
Wash the baby potatoes thoroughly, leaving the skins on for texture and structure. Peel the carrots and slice them into thick, uniform chunks. Gather the fresh herbs, and measure out the savory broth so everything is ready to go.
Ingredients at a glance (6)
- 3 lb beef chuck roast
- 2 tbsp cooking oil
- 1 lb baby potatoes, washed
- 4 carrots, cut into chunks
- 2 cups savory broth
- 1 bunch fresh herbs
Instructions
Searing the Meat
- Sear the BeefHeat the cooking oil in a large skillet over medium-high heat until it shimmers. Carefully place the beef chuck roast into the hot skillet and sear for four to five minutes per side, without moving it, until a deep, golden-brown crust forms. Use sturdy tongs to turn the meat, ensuring all edges are thoroughly browned before transferring the roast to a clean plate.Look for A deep, golden-brown crust forms on all sides of the beef.Tip Do not crowd the skillet and make sure the pan is hot enough to achieve a proper sear.
At the end of this phase, the beef chuck roast should have a highly aromatic, deeply caramelized, and sizzling golden-brown crust on all sides.
The kitchen will be filled with a rich, savory aroma of browning beef, and the skillet will have flavorful browned bits stuck to the bottom, signaling that the Maillard reaction has successfully locked in the base flavors.
Assembling the Slow Cooker
- Layer Vegetables and HerbsArrange the whole baby potatoes and carrot chunks in an even layer at the bottom of the slow cooker insert. Place the fresh herbs directly on top of the vegetables. This strategic layering ensures the root vegetables sit in the direct heat at the bottom, allowing them to soften perfectly while absorbing the rich juices dripping from the beef above during the long cooking process.Look for Vegetables and herbs are evenly layered at the bottom.Tip Keeping the potatoes whole prevents them from breaking down too much during cooking.
- Position Beef and Pour BrothPlace the seared beef chuck roast directly on top of the bed of vegetables and fresh herbs. Pour the savory broth carefully around the sides of the roast, taking care not to wash off the beautiful caramelized crust you created during the searing step. The broth will combine with the natural juices released by the meat to form a rich, savory cooking liquid.Look for The beef sits securely on top of the vegetables.Tip Pour the liquid along the edge of the insert to keep the crust intact.
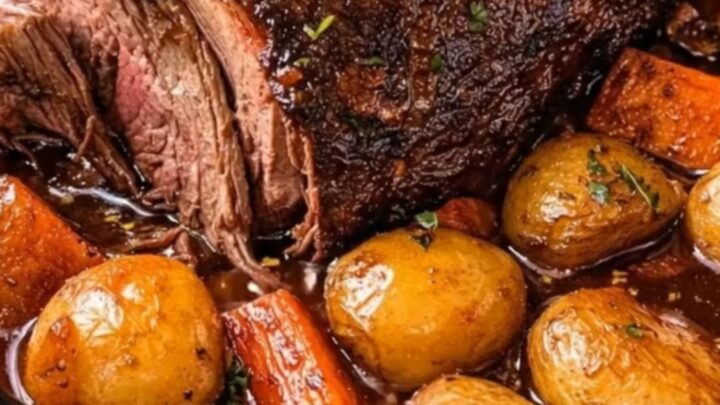
At this stage, the slow cooker is fully assembled with the vibrant orange carrots and golden baby potatoes nestled at the bottom, topped with fragrant green herbs, the seared roast, and the savory broth. The ingredients should look clean, organized, and ready for the slow-cooking process, with the broth partially submerging the vegetables.
Slow Cooking and Resting
- Slow Cook Until TenderCover the slow cooker and cook on low for eight to nine hours, or on high for five to six hours, until the beef is incredibly tender. Ensure the internal temperature of the beef roast reaches at least 145°F (63°C) for food safety. Once cooked, let the meat rest in the warm broth for at least 3 minutes before serving to lock in the juices.Look for The beef pulls apart effortlessly with a fork.Safe temperature 145°F (63°C) internal temperature (steaks, chops and roasts)Tip Letting the meat rest for 3 minutes helps lock in the juices before serving.
By the end of this final phase, the beef roast will be glistening, exceptionally tender, and practically falling apart when gently pressed. The baby potatoes and carrots will be perfectly tender and glazed, resting in a deeply colored, rich, and highly aromatic herb gravy that bubbles softly around the edges of the slow cooker insert.
Common mistakes
One of the most common mistakes when making pot roast is skipping the searing step entirely. While it is tempting to just dump all the ingredients into the slow cooker to save time, skipping the sear results in a gray, less flavorful roast and a bland, watery broth.
Another frequent error is cooking the roast on high heat for too short a time; collagen requires steady, gentle heat to fully break down, so cooking on low for a longer duration is always preferred for the absolute tenderest results.
How to tell it’s done
To determine if your pot roast is perfectly done, perform the fork test: insert a dinner fork into the center of the beef and twist gently. The fork should slide in with absolutely no resistance, and the meat fibers should slide apart effortlessly.
While the minimum safe internal temperature for whole cuts of beef is 145°F (63°C) followed by a three-minute rest, a pot roast must be cooked to an internal temperature of 195°F to 205°F (91°C to 96°C) to guarantee the collagen has completely liquefied and the meat is truly fork-tender.
- Steaks, chops and roasts: 145°F (63°C) in the thickest part, then a 3-minute rest
Up next · Part 3 of 3
2 variations · storage & make-ahead · 3 answers · printable card
Tips, FAQ & printable recipe (Part 3)← Back to the ingredients (Part 1)