Dinner · Part 2 of 3: Instructions
Slow Cooker Ham and Root Vegetable Dinner Step-by-step instructions
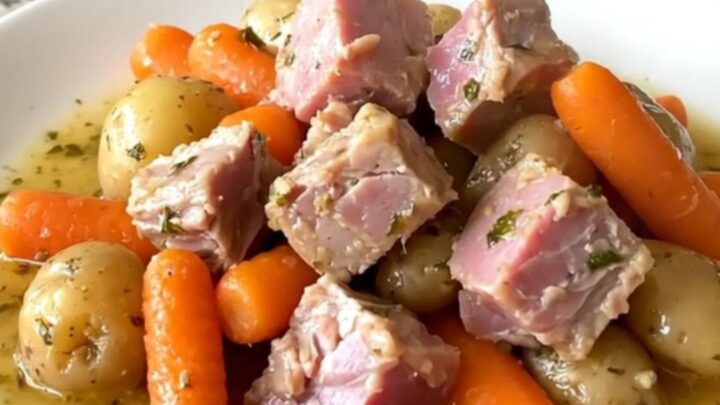
- Prep
- Cook
- Total
- Serves
- 6
Before you start
Before you start, ensure your slow cooker is clean and positioned on a stable, heat-resistant surface. Gather all your ingredients and measure them out to keep the process efficient. Since this is a dump-and-go recipe, the most important step is having your ham and vegetables prepped and ready to go.
If you are using fresh herbs instead of dried, adjust the quantity accordingly, though dried herbs are recommended for this specific cooking duration to ensure they do not lose their potency. Keep your slow cooker lid clean and ready to seal the unit as soon as you have finished adding the ingredients.
Ingredients at a glance (7)
- 2 lbs cooked ham, cut into thick chunks
- 1 lb baby carrots
- 1.5 lbs baby potatoes, halved
- 1 tsp dried thyme
- 1 tsp onion powder
- 2 cups chicken broth
- 3 tbsp unsalted butter, melted
Instructions
Initial Assembly
- Prepare the BasePlace the thick chunks of cooked ham into the bottom of the slow cooker insert. Ensure the ham is evenly distributed to create a solid base for the vegetables.Look for Ham is spread across the bottom of the slow cooker.Tip Cut the ham into uniform, large chunks so they stay tender during the long cooking time.
The ham is properly cubed and arranged as a base. The slow cooker is ready for the layering process. Ensure that the counter space is clear and your ingredients are within reach for a smooth assembly. The focus here is on creating a solid foundation for the subsequent layers.
Layering the Ingredients
- Add Vegetables and SeasoningAdd the baby carrots and halved baby potatoes over the ham. Sprinkle the dried thyme and onion powder evenly over the top of the vegetables to ensure all components are well seasoned.Look for Vegetables are layered and spices are distributed.Tip Avoid over-seasoning the top, as the liquid will help distribute the flavors throughout the dish as it cooks.
The carrots and potatoes are placed over the ham, and the seasonings are evenly distributed. Everything looks organized and ready for the liquid. This stage is about ensuring the seasoning is well-dispersed so that every bite is flavorful once the cooking is complete.
Cooking and Final Touch
- Add Liquid and CookWhisk the melted butter into the chicken broth in a small bowl, then pour the mixture over the ham and vegetables. Cover the slow cooker and cook on low for 4 hours, or until the potatoes are fork-tender and the ham is heated through to 145°F (63°C).Look for Liquid covers the ingredients and the slow cooker is covered.Safe temperature 145°F (63°C) internal temperature (steaks, chops and roasts)Tip Ensure the lid is secure to trap the steam, which helps cook the vegetables evenly.
The broth and melted butter are poured over, and the lid is secured. The slow cooker is set to the appropriate temperature. At the end of this phase, the kitchen should smell savory and fragrant, indicating that the vegetables are tender and the ham is perfectly heated through.
Common mistakes
Avoid over-crowding the slow cooker, as this can lead to uneven cooking and may prevent the liquid from distributing properly.
Do not remove the lid frequently during the cooking process, as this releases heat and moisture, significantly increasing the total cooking time and potentially drying out the meal.
Ensure that you do not add too much liquid, as the vegetables and ham will release their own juices during the process. Finally, avoid using vegetables that are cut too small, as they will turn mushy during the long, slow cook time.
How to tell it’s done
The dish is ready when the potatoes are fork-tender and the ham has reached an internal temperature of at least 145°F (63°C). The vegetables should be soft enough to be pierced easily with a fork without falling apart, and the broth should be aromatic with the scent of thyme.
If the potatoes still feel firm, continue cooking for another 30 minutes. Always check the ham in the center of the slow cooker to ensure it is thoroughly heated. Let the dish rest for at least 3 minutes before serving to allow the juices to settle.
Up next · Part 3 of 3
2 variations · storage & make-ahead · 3 answers · printable card
Tips, FAQ & printable recipe (Part 3)← Back to the ingredients (Part 1)