Dinner · Part 2 of 3: Instructions
Slow-Cooker Guinness Corned Beef for Tender Results Step-by-step instructions
- Prep
- Cook
- Total
- Serves
- 8
Before you start
Before beginning, ensure the brisket is removed from its packaging and patted dry with clean paper towels. Prepare your workspace by setting up the slow cooker on a heat-safe countertop and having the dark stout ready at room temperature.
If the brisket is especially long, trim any excess loose fat along the edges, leaving a steady layer of fat on top to shield the beef throughout the long braising duration.
Ingredients at a glance (2)
- 4 lb seasoned corned beef brisket
- 1 pint dark stout beer
Instructions
Cooker setup
- Place the brisket in the cookerPlace the seasoned corned beef brisket into the base of the slow cooker bowl, positioning it flat with the fat layer facing upwards to baste naturally while cooking.Look for The brisket should fit snugly within the base of the slow cooker.Tip Ensure the fat side of the brisket is facing upward to allow the fat to render and baste the meat as it cooks.
The seasoned brisket sits level in the bottom of the slow cooker insert with its fat cap pointing up.
Check that the meat rests flat against the base and that the appliance is plugged into a safe, dedicated kitchen outlet before any liquid is introduced into the ceramic pot.
Stout braising
- Add stout and braisePour the dark stout beer slowly over the seasoned beef in the slow cooker until liquid surrounds the base. Cover with the lid and cook on low for 8 hours until the meat registers an internal temperature of at least 145°F (63°C). Transfer the cooked beef to a board and let it rest for at least 3 minutes.Look for The liquid should gently bubble around the edges of the beef.Safe temperature 145°F (63°C) internal temperature (steaks, chops and roasts)Tip Do not lift the lid during the first 6 hours of cooking to maintain a consistent temperature and moisture level inside the vessel.
The dark stout is poured in, pooling around the beef. As the slow braise progresses under a secure lid, a steady, gentle bubbling action occurs in the pan juices. The kitchen fills with a roasted, malty aroma signaling the slow breakdown of beef collagen into rich gelatin.
Resting and shredding
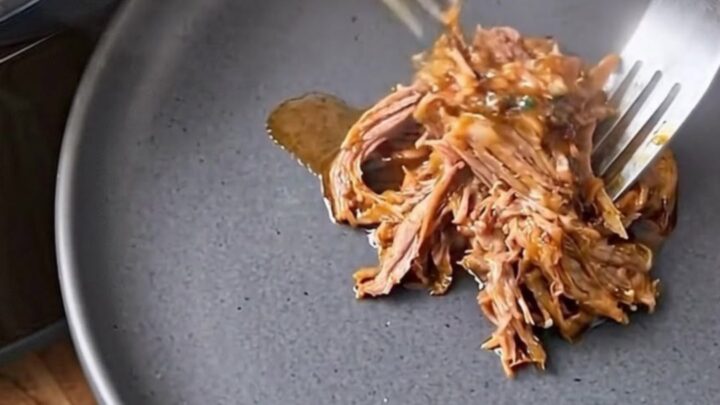
- Shred and serveUse two forks to easily shred the tender beef directly on a board or dark plate, discarding any excessive fat pockets. Spoon a few tablespoons of the rich bubbling pan juices over the shredded beef to keep every bite succulent before serving warm.Look for The meat should be dark, moist, and fall apart with minimal pressure from the forks.Tip Save a small amount of the cooking liquid to drizzle over the shredded meat to keep it moist before serving.
The corned beef has rested for several minutes to allow hot juices to settle into the meat grain. Check the texture with two forks; the brisket strands should pull apart smoothly and easily with rising steam, ready to be moistened with warm cooker juices.
Common mistakes
A common mistake is rushing the cooking process by using a higher temperature setting; always cook on low to ensure the connective tissues break down properly. Another error is failing to let the meat rest after cooking.
Resting is vital as it allows the juices to redistribute throughout the fibers, preventing the meat from becoming dry when shredded. Finally, avoid boiling away the cooking juices rapidly, keeping the cooker covered to retain moisture.
How to tell it’s done
The corned beef is fully cooked and tender when it reaches an internal temperature of at least 145°F (63°C), with a required rest of at least 3 minutes after removing it from the slow cooker.
Visually, the meat will have shrunk slightly and developed deep, dark coloration. When tested with a fork, the meat fibers should yield effortlessly without resistance, falling apart smoothly at the touch.
- Steaks, chops and roasts: 145°F (63°C) in the thickest part, then a 3-minute rest
Up next · Part 3 of 3
2 variations · storage & make-ahead · 3 answers · printable card
Tips, FAQ & printable recipe (Part 3)← Back to the ingredients (Part 1)