Dinner · Part 2 of 3: Instructions
Slow-Cooker Guinea Fowl with Bacon and Peas Step-by-step instructions
- Prep
- Cook
- Total
- Serves
- 4
Before you start
Before starting, ensure the guinea fowl is properly thawed if previously frozen. Pat the meat dry with paper towels to remove excess surface moisture, which helps the flavors adhere better.
Prepare the bacon by cutting it into uniform lardons, and peel the pearl onions carefully. Have your measuring cups ready for the broth and peas. Verify that the slow cooker is clean and the power cord is accessible, ensuring a stable and safe workspace for the cooking process.
Ingredients at a glance (6)
- 2 lb guinea fowl pieces
- 4 oz bacon lardons
- 1 cup pearl onions
- 1 dried bay leaf
- 1 cup poultry broth
- 1 cup peas
Instructions
Preparing the slow cooker
- Assemble the basePlace the raw guinea fowl pieces at the bottom of the slow cooker. Scatter the bacon lardons and pearl onions evenly over the top of the meat.Look for The slow cooker base is evenly covered with meat and aromatics.Tip Ensure the guinea fowl pieces are arranged in a single layer if possible for even cooking.
At the end of this phase, the ingredients are layered neatly in the slow cooker. Check that the bacon lardons are distributed evenly over the meat and onions, which allows the fat to render and flavor the guinea fowl as it cooks. Ensure the bay leaf is positioned near the center to help distribute its herbal aroma throughout the dish while the slow cooker heats up slowly.
Adding broth and aromatics
- Add aromatics and liquidPlace the dried bay leaf on top of the ingredients. Carefully pour the poultry broth over the mixture, ensuring it coats the ingredients without overflowing the cooker.Look for The liquid levels should just partially submerge the meat and vegetables.Tip Use a low-sodium broth if preferred to control the final saltiness of the dish.
The broth is poured over the ingredients to create a flavorful braising liquid. Ensure the liquid does not exceed the maximum fill line of your slow cooker. The bay leaf should be visible on top, partially submerged in the broth. This ensures that the essential oils are released into the cooking liquid, creating a fragrant environment that will tenderize the guinea fowl over the next several hours.
Final cooking and resting
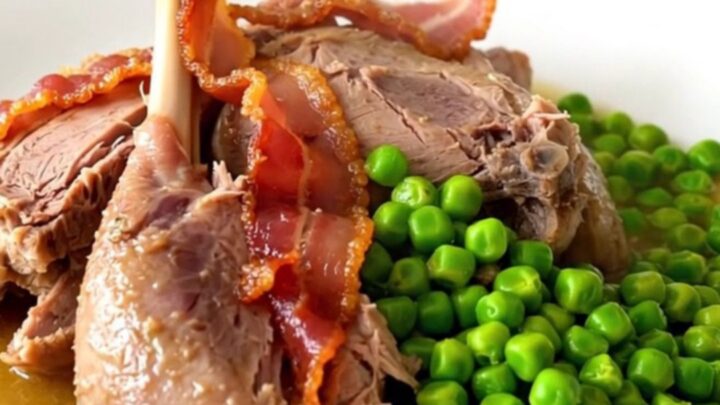
- Cook and finishCover and cook on low for 4 hours until the guinea fowl reaches 165°F (74°C). Stir in the peas during the last 15 minutes of cooking. Let the meat rest for 5 minutes before serving.Look for The meat is tender and easily pulls away from the bone.Safe temperature 165°F (74°C) internal temperature (poultry)Tip Adding the peas at the end ensures they maintain a bright green color and fresh texture.
The meat is now tender and the peas are bright green. Before serving, verify the internal temperature of the guinea fowl. The kitchen will smell deeply savory and aromatic.
Let the dish rest briefly to allow the juices to redistribute throughout the meat fibers, ensuring each bite is moist, succulent, and perfectly seasoned, providing the best possible texture for your final presentation on the plate.
Common mistakes
Avoid overcooking the peas by adding them too early, as this will cause them to lose their color and texture. Ensure the meat is not crowded in the slow cooker, as this can lead to uneven cooking.
Do not lift the lid during the first few hours of cooking, as this releases heat and steam, significantly extending the cooking time. Finally, ensure the meat is fully thawed before beginning, as cooking frozen poultry in a slow cooker is unsafe.
How to tell it’s done
The guinea fowl is ready when the meat is tender enough to pull away from the bone with a fork. Using a digital meat thermometer, ensure the thickest part of the poultry reaches an internal temperature of at least 165°F (74°C).
The juices should run clear when the meat is pierced. The bacon should be cooked through and have rendered much of its fat, and the peas should be vibrant green and heated through but not mushy.
- Poultry: 165°F (74°C) in the thickest part
Up next · Part 3 of 3
2 variations · storage & make-ahead · 3 answers · printable card
Tips, FAQ & printable recipe (Part 3)← Back to the ingredients (Part 1)