Dinner · Part 2 of 3: Instructions
Slow Cooker Grape Jelly Chili Sauce Short Ribs Step-by-step instructions
- Prep
- Cook
- Total
- Serves
- 4
Before you start
Before starting, ensure your slow cooker is clean and placed on a stable, heat-resistant surface. Take the beef out of the refrigerator about 20 minutes before you begin to take the chill off, though do not let it sit out for longer than 30 minutes for food safety reasons.
Have your onions sliced and your seasoning measured out so that you can assemble the dish quickly. A well-organized workspace makes the process seamless and helps you get dinner into the slow cooker in just a few minutes.
Ingredients at a glance (4)
- 3 lb bone-in beef short ribs
- 2 medium yellow onions, sliced into half-moons
- 1 tbsp garlic pepper seasoning
- 1 cup grape jelly chili sauce
Instructions
Preparation and Assembly
- Prep and AssemblePlace the beef short ribs into the base of the slow cooker, packing them tightly. Arrange the onion slices evenly over the top of the meat.Look for The ribs should fit snugly in the bottom of the ceramic insert to ensure even cooking.Tip If the ribs are very large, trim excess fat to avoid an overly greasy final sauce.
At this phase, the beef should be neatly arranged in the slow cooker with the onion slices providing a base. Everything should be packed snugly but not forced.
Ensure your work area is clean and that all ingredients are ready for the next step, which involves seasoning and glazing the meat thoroughly.
Seasoning and Glazing
- Season and GlazeSprinkle the garlic pepper seasoning over the onions and beef. Pour the grape jelly chili sauce over the entire mixture, ensuring it covers the ribs well.Look for Ensure the sauce reaches the bottom of the slow cooker by drizzling it slowly around the edges.Tip Use a silicone spatula to scrape all the sauce from the bowl to ensure no flavor is wasted.
The ribs should be evenly coated with the garlic pepper seasoning and the grape jelly chili sauce. The sauce should be distributed around the ribs to ensure full coverage. Check that the onions are well-distributed to provide a consistent flavor base as the dish begins its long, slow cooking cycle.
Slow Cooking and Finishing
- Slow Cook and ServeCover and cook on low for 8 hours. Once finished, check that the meat reaches an internal temperature of 145°F (63°C). Let the meat rest for at least 5 minutes before serving to ensure tenderness.Look for The meat should be extremely tender and pull away from the bone easily with a fork.Safe temperature 145°F (63°C) internal temperature (steaks, chops and roasts)Tip Skim any excess fat from the surface of the sauce before serving for a cleaner flavor profile.
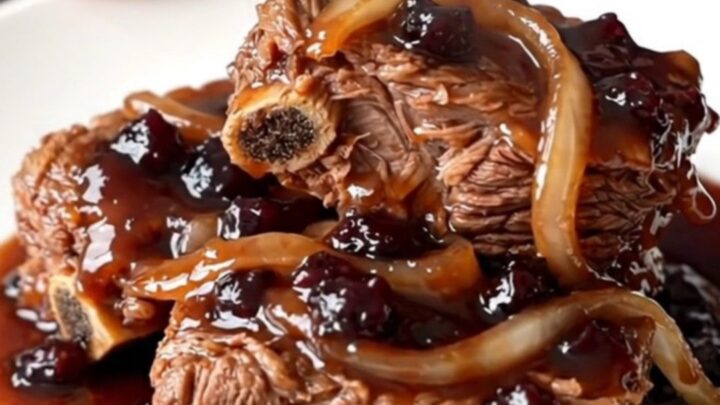
The meat is ready when it is falling off the bone and the sauce has thickened into a rich, glossy glaze. The onions should be soft and translucent. Check for the final temperature of 145°F (63°C) and ensure the meat has rested sufficiently before serving to guarantee the best texture and flavor.
Common mistakes
A common mistake is overcrowding the slow cooker, which can lead to uneven cooking and excess liquid that dilutes the sauce. Ensure the ribs are arranged in a single layer or stacked loosely so that the heat can circulate effectively.
Another mistake is lifting the lid too frequently during the cooking process; every time you open the slow cooker, you release heat and moisture, which significantly increases the cooking time. Keep the lid secure and trust the process to achieve the best texture.
How to tell it’s done
The short ribs are done when the meat is extremely tender and begins to pull away from the bone. Use a meat thermometer to ensure the internal temperature reaches at least 145°F (63°C). The meat should offer very little resistance when pierced with a fork.
Always allow the ribs to rest for at least 5 minutes before serving, as this allows the juices to redistribute throughout the meat, resulting in a more succulent and flavorful dining experience.
- Steaks, chops and roasts: 145°F (63°C) in the thickest part, then a 3-minute rest
Up next · Part 3 of 3
2 variations · storage & make-ahead · 3 answers · printable card
Tips, FAQ & printable recipe (Part 3)← Back to the ingredients (Part 1)