Dinner · Part 2 of 3: Instructions
Slow Cooker Gochujang Beef Tips for an Easy Dinner Step-by-step instructions
- Prep
- Cook
- Total
- Serves
- 4
Before you start
Before starting, ensure the beef is trimmed of any large, hard pieces of exterior fat and cut into uniform one-inch cubes. This uniformity is crucial for ensuring that every piece of meat cooks at the same rate.
Have all your sauce ingredients measured out and ready, as the assembly process is very quick once the meat is prepared. Verify that your slow cooker is clean and that the insert is properly seated in the base before adding any ingredients to avoid uneven cooking.
Ingredients at a glance (4)
- 2 lb beef chuck, cut into bite-size cubes
- 1/2 cup gochujang
- 1/4 cup brown sugar
- 1/4 cup soy sauce
Instructions
Preparation and Setup
- Prepare the beefPlace the cubed beef chuck into the insert of the slow cooker. Ensure the pieces are distributed in an even layer to promote consistent cooking throughout the braising process.Look for The beef should be cut into uniform bite-size pieces.Tip Removing excess surface fat before cubing helps create a cleaner sauce.
At this stage, the beef should be neatly cubed and arranged in a single, even layer at the bottom of the slow cooker insert. The meat should look fresh and raw, with no signs of seasoning or sauce yet.
This is the time to confirm that your cubes are roughly uniform in size to ensure they will finish cooking at the same time.
Sauce Integration
- Mix and add sauceIn a separate container, whisk together the gochujang, brown sugar, and soy sauce until fully combined. Pour this mixture evenly over the raw beef cubes in the slow cooker insert.Look for The sauce should be smooth and pourable.Tip Whisking the sauce ingredients before adding them ensures the sugar dissolves properly.
The sauce mixture should be fully emulsified, appearing as a smooth, vibrant red liquid. When poured over the beef, it should begin to settle into the crevices between the meat cubes. The aroma of the gochujang should be present, and the sauce should appear thick enough to coat the meat thoroughly as it begins to heat up.
Braising and Finishing
- Slow cook and serveCover the slow cooker and cook on low for 8 hours until the beef is fork-tender. Ensure the internal temperature reaches at least 145°F (63°C). Let the beef rest for 5 minutes before serving.Look for The sauce will thicken and the beef will pull apart easily with a fork.Safe temperature 145°F (63°C) internal temperature (steaks, chops and roasts)Tip Checking the internal temperature ensures the meat is perfectly cooked through.
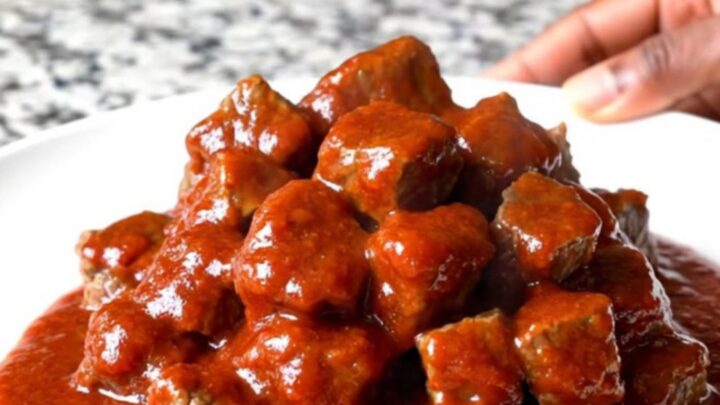
After the full cooking time, the beef should appear dark, glossy, and coated in a thickened, reduced sauce. The meat should feel soft and yield easily to the touch of a fork. The kitchen should be filled with a savory, slightly sweet aroma, and the sauce should be pooled around the tender pieces of beef.
Common mistakes
Avoid lifting the lid of the slow cooker frequently during the cooking process, as each time the lid is opened, heat escapes and the cooking time increases significantly.
Also, ensure the meat is not cut into pieces that are too small, as they may overcook and become mushy during the long braising time. Finally, do not skip the resting period, as cutting into the beef immediately will cause the juices to run out, leaving the meat feeling dry despite the sauce.
How to tell it’s done
The beef is done when it is fork-tender, meaning it can be easily pierced and pulled apart with minimal pressure. The sauce should have reduced slightly, appearing thick and glossy rather than watery.
For food safety, use a digital thermometer to confirm the beef has reached an internal temperature of at least 145°F (63°C). Allowing the meat to rest for a few minutes after cooking is essential, as this helps the juices redistribute and ensures the texture remains succulent and tender during service.
- Steaks, chops and roasts: 145°F (63°C) in the thickest part, then a 3-minute rest
Up next · Part 3 of 3
2 variations · storage & make-ahead · 3 answers · printable card
Tips, FAQ & printable recipe (Part 3)← Back to the ingredients (Part 1)