Dinner · Part 2 of 3: Instructions
Slow Cooker Glazed Beef Cheeks with Root Vegetables Step-by-step instructions
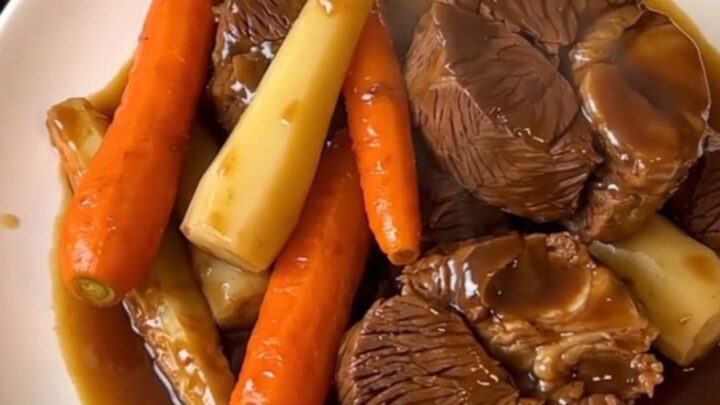
- Prep
- Cook
- Total
- Serves
- 4
Before you start
Before starting, ensure all vegetables are thoroughly washed, peeled, and chopped into bite-sized, uniform chunks. Trimming the beef cheeks of excess surface fat and silver skin will help the final dish achieve a cleaner, more refined texture.
Have your measuring cups ready and ensure the slow cooker insert is clean and dry before adding the ingredients. Preparing your workspace beforehand makes the assembly process smooth and efficient, allowing for a quick transition from the kitchen to the slow cooker.
Ingredients at a glance (5)
- 2 lb beef cheeks, trimmed of excess fat
- 3 medium parsnips, peeled and cut into chunks
- 3 medium carrots, peeled and cut into chunks
- 1 packet veal stock powder
- 1 1/2 cups beef broth
Instructions
Assembly Phase
- Prepare the Slow CookerPlace the beef cheeks into the base of the slow cooker ceramic insert. Arrange the prepared chunks of parsnips and carrots evenly over the meat, ensuring they are distributed to cook thoroughly.Look for The beef should be at the bottom to absorb the liquid.Tip Ensure the pieces are uniform in size to promote even cooking.
At the end of this phase, the beef cheeks should be resting at the bottom of the slow cooker, topped with the root vegetables. The arrangement should look organized and clean, with the ingredients ready to be seasoned. Ensure all pieces are placed in a single layer or slightly overlapping to ensure uniform heating and consistent cooking throughout the long process ahead.
Seasoning Phase
- Season and Add LiquidSprinkle the veal stock powder over the vegetables and meat. Pour the beef broth over the entire mixture to provide the braising liquid needed for the slow cooking process.Look for The liquid should partially submerge the ingredients.Tip Do not stir, as the slow cooker will naturally blend the flavors.
The seasoning phase is complete when the veal stock powder is evenly distributed and the beef broth has fully covered the base ingredients. The liquid should be clear and fragrant, setting the stage for the deep flavors that will develop. Check that the broth is poured carefully to avoid splashing the sides of the ceramic insert, which keeps the presentation neat.
Braising Phase
- Slow Cook and ServeCover the slow cooker and cook on low for 8 hours until the beef is fork-tender. The meat should reach an internal temperature of 145°F (63°C). Let the meat rest for at least 3 minutes before serving.Look for The meat should be tender enough to pull apart easily.Safe temperature 145°F (63°C) internal temperature (steaks, chops and roasts)Tip Check that the liquid has reduced into a glossy glaze.
The final phase concludes when the beef is succulent, tender, and easily pierced with a fork. The kitchen should be filled with a savory, deep aroma, and the braising liquid should have thickened into a glossy, dark glaze.
The vegetables should be tender but still hold their shape, indicating that the slow, gentle braising has been successful and the dish is ready to serve.
Common mistakes
A common mistake is cutting the vegetables too small, which can cause them to become mushy during the long cooking time. Aim for chunks of about one inch for the best texture.
Another error is checking the slow cooker too frequently; each time the lid is lifted, heat escapes, extending the cooking time. Trust the process and keep the lid closed until the final hour of cooking to ensure the temperature remains consistent throughout.
How to tell it’s done
The beef is perfectly done when it is fork-tender and pulls apart with minimal pressure. Using a digital meat thermometer, ensure the thickest part of the beef cheeks reaches an internal temperature of at least 145°F (63°C).
The vegetables should be soft and fully cooked through, and the braising liquid should have reduced into a thick, glossy, and flavorful glaze that coats the back of a spoon.
- Steaks, chops and roasts: 145°F (63°C) in the thickest part, then a 3-minute rest
Up next · Part 3 of 3
2 variations · storage & make-ahead · 3 answers · printable card
Tips, FAQ & printable recipe (Part 3)← Back to the ingredients (Part 1)