Dinner · Part 2 of 3: Instructions
Slow-Cooker Ginger Scallion Honey Soy Chicken Drumsticks Step-by-step instructions
- Prep
- Cook
- Total
- Serves
- 4
Before you start
Before starting, gather all ingredients and equipment. If the drumsticks are frozen, thaw them overnight in the refrigerator—do not place frozen chicken in the slow cooker. Wash and julienne the ginger (peeling is optional), and cut the scallions into 2-inch pieces.
Measure the honey and soy sauce into a small bowl so they're ready to pour. Have a slow cooker with at least a 5-quart capacity ready. No need to preheat the slow cooker; it will heat up gradually as it cooks. This prep takes about 10 minutes.
Ingredients at a glance (5)
- 8 chicken drumsticks
- 2 tbsp fresh ginger, julienned
- 4 scallions, cut into 2-inch batons
- 1/3 cup honey
- 1/4 cup soy sauce
Instructions
Layer and Glaze
- Layer the Chicken and AromaticsArrange the chicken drumsticks in the bottom of a slow cooker in a single layer, standing them upright if needed to fit. Scatter the julienned ginger and scallion batons over the chicken, tucking some between the drumsticks so the aromatics infuse the meat as it cooks.Look for The drumsticks should be snug but not crowded; the ginger and scallions should cover most of the chicken.Tip Trimming the drumsticks of excess skin is optional; leaving it on adds richness to the sauce.
- Pour the Honey-Soy GlazeIn a small bowl, stir together the honey and soy sauce until the honey is fully dissolved. Pour the mixture evenly over the chicken and aromatics, tilting the slow cooker insert slightly to distribute the liquid. No need to stir; the sauce will blend as it cooks.Look for The liquid should pool around the chicken, not cover it completely—the slow cooker will create enough steam.Tip If the honey is too thick to stir smoothly, warm it for 10 seconds in the microwave before combining.
After arranging the chicken and scattering the aromatics, you'll see the drumsticks nestled together with ginger and scallions tucked between. The honey-soy mixture pools around the meat, looking like a thin, dark liquid. The raw chicken is pale pink, the ginger bright, and the scallions vivid green. Everything is ready to cook; the slow cooker will transform these simple ingredients into a rich, aromatic dish.
Slow Cook to Tender
- Cook on Low Until TenderCover the slow cooker and cook on low for 4 to 5 hours, or until the chicken is fall-off-the-bone tender and the internal temperature reaches 165°F (74°C). Avoid lifting the lid during the first 3 hours to keep the heat steady. The sauce will reduce and thicken slightly as the chicken releases its juices.Look for The sauce will be bubbling gently around the edges and the chicken will look glossy and darkened.Safe temperature 165°F (74°C) internal temperature (poultry)Tip If the sauce seems too thin at the end, remove the chicken and simmer the sauce on the stovetop or set the slow cooker to high with the lid off for 15 minutes.
After 4 to 5 hours on low, the slow cooker will be bubbling gently. The chicken will be deeply browned and glossy from the sauce, and the aroma of ginger, scallions, and soy will fill the kitchen.
The sauce will have reduced and thickened, coating the drumsticks. The meat should easily pull away from the bone with a fork. The scallions will have softened and darkened, and the ginger will have infused the sauce with its fragrance.
Finish and Serve
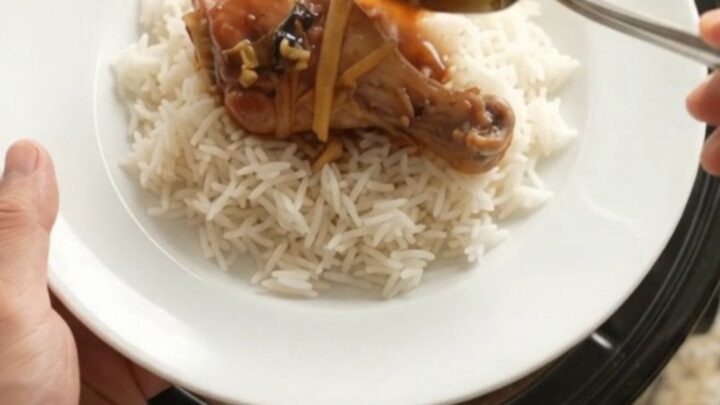
- Finish and ServeOnce the chicken is cooked through, use a spoon to gently baste the drumsticks with the sauce in the slow cooker. Transfer the chicken to a serving platter, spoon the ginger and scallions over the top, and drizzle with extra sauce from the pot. Serve hot over steamed rice if desired.Look for The chicken should be so tender that the meat easily pulls away from the bone with a fork.Tip For a thicker glaze, let the sauce sit for a few minutes after removing the chicken; it will continue to reduce as it cools.
When you lift the lid, steam rises and the sticky glaze glistens on the chicken. The sauce is a deep amber color, thick enough to cling to a spoon. The ginger pieces are tender and aromatic, and the scallions are soft with slightly charred edges. The chicken is so tender that it falls apart with minimal pressure. Spoon the sauce over the top and serve immediately, with the glaze pooling on the plate.
Common mistakes
One common mistake is lifting the lid to check on the chicken too often, which lets heat escape and extends cooking time. Trust the slow cooker and keep the lid on. Another error is using too little liquid—the honey and soy sauce may not seem like much, but the chicken releases juices that combine with the sauce.
Avoid adding extra water, as it will dilute the flavor. Finally, don't rush the cooking; if the chicken isn't tender after 4 hours, give it another 30 minutes.
How to tell it’s done
The chicken is done when it is fall-off-the-bone tender and the internal temperature registers 165°F (74°C) in the thickest part of the drumstick, avoiding the bone. When you pierce the meat with a fork, it should easily separate from the bone.
The sauce will have darkened and thickened slightly, clinging to the chicken. If the sauce is still thin, remove the chicken and simmer the sauce on the stovetop until it reaches a syrupy consistency, then return the chicken to coat.
- Poultry: 165°F (74°C) in the thickest part
Up next · Part 3 of 3
4 variations · storage & make-ahead · 5 answers · printable card
Tips, FAQ & printable recipe (Part 3)← Back to the ingredients (Part 1)