Dinner · Part 2 of 3: Instructions
Slow-Cooker Garlic Guajillo Braised Short Rib Burrito Bowls Step-by-step instructions
- Prep
- Cook
- Total
- Serves
- 6
Before you start
Before you begin, ensure your slow cooker is clean and positioned on a stable surface away from any water sources. Dice the onion evenly to ensure it softens uniformly during the long cooking time.
Prepare your toppings—shred the cheese, dice the avocado, and chop the cilantro—so that everything is ready to go the moment the beef is tender. Having these components prepped ahead of time will make the final assembly process smooth and stress-free, allowing you to serve the bowls at their peak temperature.
Ingredients at a glance (12)
- 3 lb boneless beef short ribs
- 2 cups roasted guajillo-ancho chile sauce
- 6 cloves garlic, peeled
- 1 whole onion, diced
- 1 tbsp lime juice
- 1 cup Oaxaca cheese, shredded
- 3 cups steamed white rice
- 1 cup charred corn
- 1 whole avocado, diced
- 1/2 cup Mexican crema
- 1/4 cup fresh cilantro, chopped
- 6 wedges lime wedges
Instructions
Layering the Ingredients
- Combine IngredientsPlace the boneless beef short ribs, roasted guajillo-ancho chile sauce, garlic cloves, diced onion, and lime juice into the ceramic slow cooker basin. Ensure the meat is evenly coated with the sauce.Look for The slow cooker should be about half full with the ingredients submerged in the sauce.Tip Ensure the garlic cloves are distributed evenly to infuse the meat during the long cooking process.
At this stage, your slow cooker should contain all the raw components, with the meat submerged in the sauce. The garlic and onions are distributed throughout, ensuring the base for the braise is ready. The kitchen should begin to smell slightly of the aromatic chile sauce as you close the lid and initiate the slow-cooking process, setting the foundation for the deep, complex flavors that will develop over the next eight hours.
Slow Cooking and Melting
- Slow CookCover the slow cooker and set it to the low heat setting. Allow the beef to cook for eight hours. The meat is ready when it is spoon-tender and shreds easily with a fork. Ensure the beef reaches an internal temperature of at least 145°F (63°C) and let the meat rest for at least 3 minutes before shredding.Look for The beef should be falling apart, and the sauce should be thick and fragrant.Safe temperature 145°F (63°C) internal temperature (steaks, chops and roasts)Tip Avoid lifting the lid frequently to maintain a consistent temperature inside the cooker.
- Melt CheeseOnce the beef is tender, shred the meat directly into the sauce using two forks. Sprinkle the shredded Oaxaca cheese over the top of the beef mixture, cover, and let it sit for five minutes until the cheese is melted and bubbling.Look for The cheese should be completely melted and stringy, creating a creamy texture on top of the shredded beef.Tip Use a heat-resistant spatula to fold the cheese slightly into the top layer of the beef.
After eight hours, the beef should be incredibly soft, breaking apart easily under the pressure of a fork. The sauce will have reduced slightly, becoming thick and glossy. When you add the Oaxaca cheese, watch for it to melt into a creamy, stretchy layer that coats the beef. The mixture should sound soft and bubbly, and the aroma will be rich, savory, and distinctly smoky from the guajillo and ancho chiles.
Final Bowl Assembly
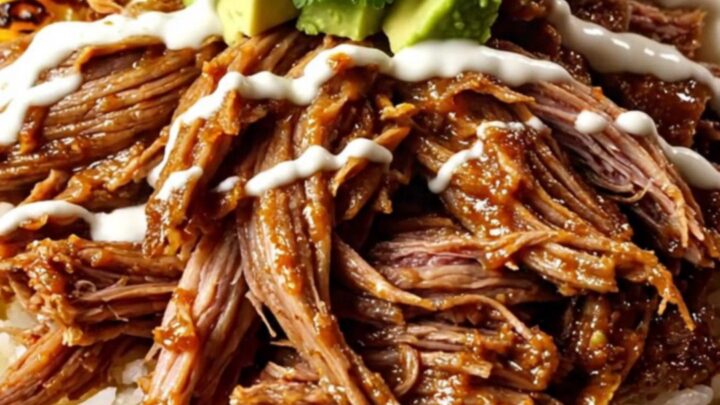
- Assemble BowlsDivide the steamed white rice among six serving bowls. Top each portion with a generous scoop of the shredded beef and cheese mixture. Garnish with charred corn, diced avocado, a dollop of Mexican crema, fresh cilantro, and a lime wedge.Look for The bowls should look vibrant, with the deep red of the beef contrasting against the green avocado and cilantro.Tip Squeeze the fresh lime wedge over the bowl just before eating to brighten the deep flavors.
The final assembly brings everything together. The rice should be light and fluffy, providing a neutral base for the intense flavor of the braised beef. The addition of the fresh toppings—the cool avocado, crisp corn, and sharp cilantro—creates a balanced presentation.
The bowls should look visually appealing, with the vibrant colors of the garnishes standing out against the deep, rich hues of the shredded beef and melted cheese mixture.
Common mistakes
A common mistake is overcrowding the slow cooker, which can prevent the sauce from circulating properly. Ensure you use a slow cooker that is large enough for the meat to sit comfortably without being packed too tightly.
Another error is checking on the cooking process too often; lifting the lid releases heat and steam, which can significantly increase the required cooking time. Finally, do not forget to shred the beef while it is still warm, as it becomes more difficult to manage once it cools down.
How to tell it’s done
The beef is perfectly cooked when it reaches a tender, shredded consistency. Use a digital thermometer to ensure the beef has reached an internal temperature of at least 145°F (63°C).
Because it is a slow-cooked dish, the meat will likely be well beyond this temperature, ensuring it is safe and extremely tender. Always let the meat rest for at least 3 minutes after the slow cooking phase before you begin the shredding process to allow the juices to redistribute properly.
- Steaks, chops and roasts: 145°F (63°C) in the thickest part, then a 3-minute rest
Up next · Part 3 of 3
2 variations · storage & make-ahead · 3 answers · printable card
Tips, FAQ & printable recipe (Part 3)← Back to the ingredients (Part 1)