Dinner · Part 2 of 3: Instructions
Slow Cooker Garlic Butter Spareribs with Potatoes Step-by-step instructions
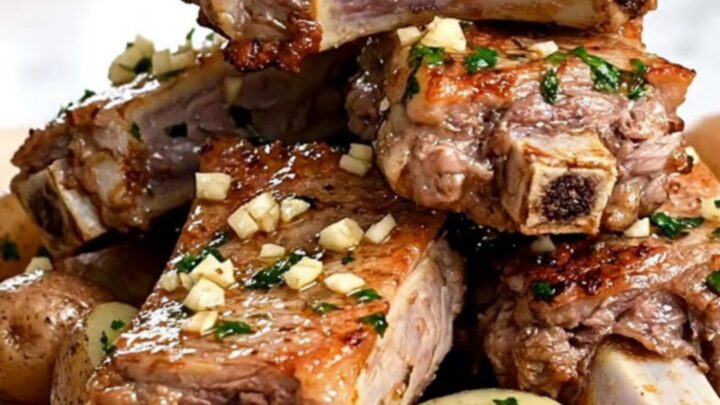
- Prep
- Cook
- Total
- Serves
- 4
Before you start
Before beginning, ensure the slow cooker insert is clean and dry. Prepare the pork spareribs by patting them dry with paper towels to remove excess moisture. If the ribs are connected as a full rack, use a sharp knife to cut them into individual sections between the bones.
Scrub the baby potatoes thoroughly and cut them into equal halves to promote even cooking. Have all ingredients measured and ready to assemble to ensure the process remains efficient.
Ingredients at a glance (5)
- 2 lb pork spareribs, cut into sections
- 1 lb baby potatoes, halved
- 3 tbsp minced garlic
- 2 tbsp fresh parsley, chopped
- 4 tbsp unsalted butter, cut into pats
Instructions
Preparation and assembly
- Arranging the ribsPlace the pork sparerib sections into the slow cooker in a vertical ring pattern against the walls of the insert to ensure even heat distribution and space in the center.Look for Ribs are standing upright against the wall.Tip Avoid overcrowding the center to allow the potatoes to cook properly.
The ribs should be arranged in a tight vertical circle around the inner perimeter of the slow cooker. Ensure the potatoes are nestled firmly in the center.
The garlic and parsley should be distributed evenly over the top of the ingredients, and the butter pats should be placed strategically to melt down through the layers as the temperature increases.
Slow braising
- Adding aromatics and butterTuck the halved baby potatoes into the center of the rib ring. Sprinkle the minced garlic and chopped fresh parsley over the ribs and potatoes, then distribute the pats of butter evenly across the top.Look for Butter is distributed evenly across the ingredients.Tip Using cold butter helps it melt slowly as the slow cooker heats up.
During the cooking phase, the slow cooker will emit a savory, garlic-heavy aroma. The butter will melt and combine with the rendered pork fat to create a thin, flavorful sauce. Check that the lid is tightly sealed to maintain the necessary humidity, which is essential for achieving the tender texture characteristic of this slow-cooked dish.
Resting and serving
- Slow cookingCover the slow cooker with the lid and cook on low for 8 hours. Ensure the internal temperature of the pork reaches 145°F (63°C) and let the meat rest for at least 5 minutes before serving to retain juices.Look for Meat is fork-tender and pulls away from the bone.Safe temperature 145°F (63°C) internal temperature (steaks, chops and roasts)Tip Check the temperature at the thickest part of the meat away from the bone.
After the cooking time has elapsed, the meat should appear soft and slightly browned, though not charred. The potatoes should be tender when pierced with a fork. Before plating, verify the internal temperature of the meat. Allow the dish to rest briefly, which allows the garlic butter sauce to thicken slightly and coat the ribs and potatoes evenly.
Common mistakes
A common mistake is overcrowding the slow cooker, which prevents steam from circulating properly and can lead to uneven cooking. Avoid lifting the lid frequently during the cooking process, as each time the lid is opened, heat escapes and the cooking time must be extended.
Additionally, ensure the ribs are positioned securely so they do not fall over, which could result in some pieces being submerged in juices while others remain dry.
How to tell it’s done
The ribs are done when the meat is tender and pulls away easily from the bone with a fork. Using a digital meat thermometer, verify the internal temperature of the pork has reached at least 145°F (63°C).
Once the temperature is confirmed, allow the ribs to rest for at least 5 minutes before serving to ensure the natural juices redistribute throughout the meat, resulting in a more succulent texture.
- Steaks, chops and roasts: 145°F (63°C) in the thickest part, then a 3-minute rest
Up next · Part 3 of 3
2 variations · storage & make-ahead · 3 answers · printable card
Tips, FAQ & printable recipe (Part 3)← Back to the ingredients (Part 1)