Dinner · Part 2 of 3: Instructions
Slow Cooker French Onion Macaroni and Cheese Step-by-step instructions
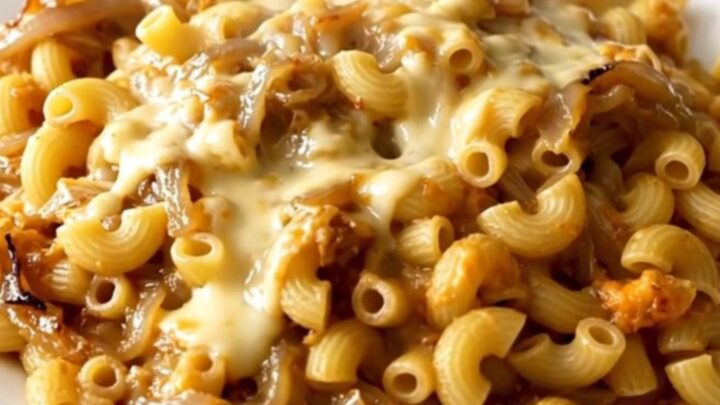
- Prep
- Cook
- Total
- Serves
- 6
Before you start
Prepare for this recipe by ensuring the slow cooker insert is clean and properly seated on the base. Have all ingredients measured and ready to go before starting the layering process. Thinly slice the onions to ensure they soften quickly and evenly.
Ensure the beef broth is at room temperature to avoid a drastic drop in the initial cooking temperature. Having your workspace organized allows for a seamless transition into the cooking phase, ensuring that all components are prepared and ready for the slow cooker.
Ingredients at a glance (4)
- 1 lb elbow macaroni
- 2 cups sliced onions
- 1 packet onion soup mix
- 4 cups beef broth
Instructions
Layering the ingredients
- Layering the ingredientsPlace the raw elbow macaroni into the bottom of the slow cooker insert. Evenly scatter the sliced onions over the pasta, followed by the onion soup mix. Carefully pour the beef broth over all the ingredients to ensure everything is submerged.Look for Ensure the broth covers the pasta completely.Tip Adding the broth last helps distribute the seasoning packet evenly.
At this stage, all ingredients are neatly layered in the slow cooker. The macaroni forms the base, with the onions and seasoning mix distributed on top. The broth has been poured over, ready to facilitate the cooking process. Everything should look organized and ready to be covered, ensuring no ingredients are left dry on top of the pile.
Slow cooking
- Slow cooking the dishCover the slow cooker with the lid and cook on high for three hours. This slow process allows the pasta to absorb the beef broth and the onions to soften into the sauce, creating a rich, cohesive texture without the need for constant stirring.Look for The pasta should be tender and the sauce thickened.Tip Avoid opening the lid frequently as this releases essential heat and steam.
During this phase, the slow cooker maintains a steady heat, transforming the raw ingredients into a cohesive dish. You will notice a savory, aromatic scent filling the kitchen as the onions and beef broth combine.
The pasta is undergoing a transformation, absorbing the liquid and starch to create the signature creamy texture of the final dish.
Finalizing
- Finalizing and servingOnce the cooking time is complete, turn off the slow cooker and allow the dish to rest for five minutes. Stir the macaroni and cheese gently to incorporate any remaining sauce from the bottom before serving immediately on warm plates.Look for The mixture should be creamy and steaming.Tip If the sauce appears too thick, stir in a small amount of warm broth.
The final stage involves a brief rest to allow the sauce to thicken and the flavors to meld. The macaroni should look perfectly cooked, coated in a rich, savory sauce. A gentle stir will reveal the integrated onions and the creamy consistency, signaling that the dish is ready to be portioned and enjoyed immediately.
Common mistakes
A common mistake is using too much liquid, which can result in a watery sauce that fails to thicken properly. Always stick to the recommended measurements to maintain the correct ratio of pasta to broth.
Another error is opening the lid too frequently, which allows heat to escape and interrupts the cooking cycle, potentially leaving the pasta undercooked. Finally, ensure the onions are not sliced too thickly, as they may remain crunchy while the pasta becomes overcooked if the pieces are uneven.
How to tell it’s done
The dish is considered done when the pasta reaches an al dente texture and has absorbed most of the beef broth, resulting in a thick, creamy sauce. The onions should be completely soft and translucent, having integrated fully into the mixture.
Because there are no raw proteins involved, the visual cues of texture and consistency are the primary indicators that the dish is ready to be served. Let the mixture sit for a few minutes to allow the sauce to stabilize.
Up next · Part 3 of 3
2 variations · storage & make-ahead · 3 answers · printable card
Tips, FAQ & printable recipe (Part 3)← Back to the ingredients (Part 1)