Dinner · Part 2 of 3: Instructions
Slow Cooker French Onion Beef Roast for Tender Results Step-by-step instructions
- Prep
- Cook
- Total
- Serves
- 6
Before you start
Before starting, ensure your slow cooker is clean and positioned on a stable, heat-resistant surface. Have your beef chuck roast ready and at room temperature for about 30 minutes to ensure even cooking.
Prepare the onions by peeling and slicing them into uniform half-moons, and ensure you have your beef broth measured and ready to pour once the meat is placed in the cooker.
Ingredients at a glance (3)
- 3 lb beef chuck roast
- 3 large yellow onions, sliced
- 2 cups beef broth
Instructions
Layering the base
- Prepare the basePlace the sliced yellow onions into the bottom of the slow cooker to create an even bed for the meat. This will help the onions caramelize slowly in the beef juices.Look for Onions cover the bottom of the crock.Tip Slice the onions into uniform strips to ensure they cook evenly throughout the long simmering process.
The onions should be distributed evenly across the bottom of the slow cooker crock to provide a solid foundation. You should see a uniform layer that will protect the meat from the direct heat of the base while providing a steady release of flavor throughout the cooking process.
Placement
- Assemble the roastPlace the beef chuck roast directly on top of the bed of onions in the slow cooker.Look for Beef is nestled securely on the onions.Tip Pat the beef dry with paper towels before placing it in the cooker to help the surface sear slightly.
The beef should be placed securely on top of the onions, ensuring it sits flat. The meat should be positioned to allow the heat to circulate around it, ensuring the flavor penetrates the roast, creating a savory texture as the meat begins to release its own juices.
Slow cooking and resting
- Slow cook and servePour the beef broth over the meat. Cover and cook on low for 8 hours until the beef reaches an internal temperature of at least 145°F (63°C). Let the roast rest for 10 minutes before shredding with a fork and serving with the savory onion gravy.Look for Beef pulls apart easily with a fork.Safe temperature 145°F (63°C) internal temperature (steaks, chops and roasts)Tip The residual heat from the slow cooker will keep the roast warm while it rests.
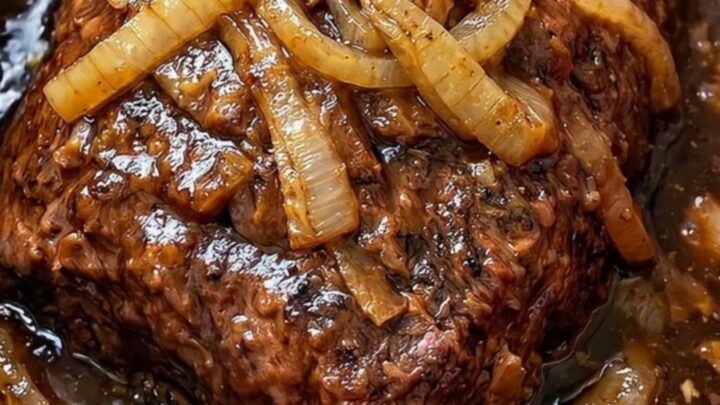
At the end of the cooking time, the beef should be extremely tender and the broth should have reduced into a rich, dark sauce. The meat must be allowed to rest for 10 minutes to allow the juices to redistribute, ensuring every bite remains moist and flavorful.
Common mistakes
A common mistake is overcrowding the slow cooker with too many ingredients, which can prevent the meat from cooking evenly.
Another error is lifting the lid too frequently, which releases steam and heat, significantly increasing the total cooking time and potentially resulting in unevenly cooked meat.
Ensure the roast is positioned correctly to avoid uneven cooking, as the long cooking time can dilute flavors if not balanced correctly.
How to tell it’s done
The roast is perfectly done when the meat is fork-tender and pulls apart with minimal resistance. Use a meat thermometer to check the thickest part of the roast; it should reach an internal temperature of at least 145°F (63°C).
The onions should be soft, golden, and translucent, having absorbed the juices from the roast to form a rich, savory gravy.
- Steaks, chops and roasts: 145°F (63°C) in the thickest part, then a 3-minute rest
Up next · Part 3 of 3
2 variations · storage & make-ahead · 3 answers · printable card
Tips, FAQ & printable recipe (Part 3)← Back to the ingredients (Part 1)