Dinner · Part 2 of 3: Instructions
Slow Cooker Four Cheese Penne — Dump-and-Go Dinner Step-by-step instructions
- Prep
- Cook
- Total
- Serves
- 6
Before you start
Before anything goes into the crock, set out all five ingredients and check the slow cooker insert for cracks and cleanliness. Dice the gorgonzola into roughly half-inch pieces and slice the goat cheese log into half-inch rounds; cold cheese cuts much more cleanly, so take both straight from the fridge.
Measure the cream into a glass measuring cup so it can be poured in one motion. Have a spoon ready for spreading the pasta and stirring at the end, and clear a spot on the counter where the cooker can sit with a few inches of airflow behind it.
Ingredients at a glance (5)
- 1 lb penne pasta (dried)
- 6 oz gorgonzola cheese, crumbled or diced
- 8 oz fresh chèvre, cut into slices
- 1 vegetable bouillon cube, crumbled
- 2 cups heavy cream
Instructions
Build the base
- Layer the penne in the crockPour the dried penne into the bottom of the slow cooker insert and spread it into an even layer with a spoon. Keeping the pasta in one flat layer helps every piece sit in the liquid and cook at the same rate, so the finished penne stays tender rather than turning gummy in spots.Look for The penne should form a fairly level bed across the bottom, with no tall piles at the edges.Tip Break apart any clumps of pasta that stuck together in the box before layering.
- Scatter the gorgonzola and goat cheeseScatter the diced gorgonzola evenly over the penne, then lay the goat cheese slices across the top. Spreading the cheeses out rather than leaving them in one spot lets each piece melt into a different pocket of cream, giving the finished sauce that layered, four cheese character instead of one uniform flavor.Look for Both cheeses should be visible across the whole surface, not gathered on one side.Tip Chill the goat cheese briefly so it slices into clean rounds without smearing on the knife.
- Crumble the bouillon over the topCrumble the vegetable bouillon cube between your fingers and sprinkle it directly over the cheese and pasta. The cube dissolves into the cream as everything heats, seasoning the sauce from within and giving the penne enough savory depth that no extra salt is needed at the start.Look for The crumbs should fall across the surface in a light, even dusting.Tip If the cube is stubborn, crush it in a small bowl with the back of a spoon first.
- Pour in the creamPour the heavy cream evenly over everything in the insert, aiming for the corners as well as the center. The cream is the only cooking liquid here, so make sure the pasta is mostly covered; nudge any dry penne down into the liquid with the spoon before the lid goes on.Look for Cream should be visible around the edges when you tilt the insert slightly.Tip Rinse the measuring cup with a spoonful of milk and pour that in too, so no cream is wasted.
By the end of this phase, the insert holds four distinct layers: an even bed of penne, a scattering of blue and white cheese across the top, a light dusting of crumbled bouillon, and cream poured over everything to just below the surface of the pasta.
Nothing should be stirred yet; the layering is deliberate, because the cheeses melting from different positions is what gives the sauce its range of flavor. Before closing the lid, tilt the insert slightly and confirm that cream reaches the corners, then nudge any dry-looking penne down into the liquid. The lid should close cleanly without pressing on the food.
Slow cook the penne
- Cover and cook on lowPut the lid on the slow cooker and set it to low for about two and a half hours. Resist lifting the lid during the first two hours: every peek releases heat and steam the pasta needs, and each interruption can add twenty minutes or more to the total cooking time.Look for After about an hour, the kitchen should smell of warm cream and blue cheese.Tip If the schedule allows, high for about an hour and a half also works; check early either way.
- Stir and check for tendernessNear the end of cooking, lift the lid and stir the penne well, folding the melted cheeses through the cream until the sauce looks uniform. Taste a piece of pasta: it should be tender all the way through with no chalky center. If it needs more time, cover and keep cooking in twenty minute bursts.Look for The sauce should coat the back of the spoon and look creamy, not watery.Tip Stir from the bottom up so no penne stays hidden under the cheese where it can overcook.
- Adjust the sauce consistencyIf the sauce looks thicker than a glossy mac and cheese, stir in a splash of cream or milk a little at a time until it loosens. If it seems thin, leave the lid off, switch to high and let it reduce for ten to fifteen minutes, stirring now and then until it clings to the pasta.Look for The finished sauce should slowly drop from the spoon in a thick ribbon.Tip Cheese sauces tighten as they cool, so stop reducing just before they look perfect.
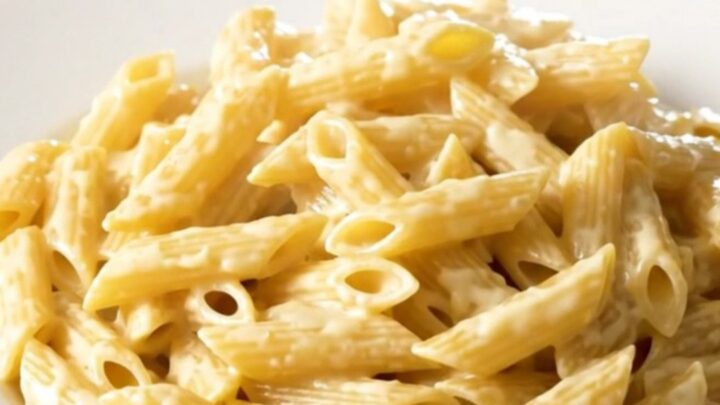
After roughly two and a half hours on low, the pot should smell richly of warm cream and blue cheese, with gentle bubbles visible at the edges when the lid comes off. The penne should be plump and tender, and the once-distinct cheeses should have merged with the cream into a pale, glossy sauce.
Stir thoroughly from the bottom up and taste a piece of pasta for tenderness. If the sauce looks watery, keep the lid off on high briefly; if it looks tight, loosen it with a splash of cream. This is the moment to correct the texture before serving.
Finish and serve
- Rest before servingTurn the slow cooker off, leave the lid on and let the penne rest for about five minutes. This short pause lets the sauce settle and thicken slightly, so it clings to every piece of pasta instead of pooling at the bottom of the insert when it is plated.Look for The surface should look glossy and calm, with no liquid separating at the edges.Tip Give one last gentle stir right before the first serving goes out.
- Plate and serve hotSpoon the penne onto warm plates while the sauce is still steaming and stretchy. Serve it straight away as a main dish, offering extra cracked pepper at the table if liked. The pasta is at its best in the first thirty minutes, while the four cheese sauce is smooth and pourable.Look for Each plate should carry a generous, glossy nest of penne with sauce clinging to it.Tip Warm the plates in a low oven for a few minutes so the sauce stays fluid longer.
After the short rest, the sauce should have settled into its final texture: thick, glossy and clinging to every piece of penne, with no liquid pooling at the edges of the insert. A spoon drawn through the pasta should leave a slow-closing trail. Plate the penne while it is steaming, when the sauce is at its most fluid and stretchy, and serve immediately. If the pot sits longer than half an hour, the sauce will tighten noticeably, so time the rest of the meal so that the first plates go out soon after the lid comes off.
Common mistakes
The most common slip is underestimating how much liquid dried pasta drinks: if the cream barely covers the penne at the start, the edges will cook dry. Nudge every piece down into the liquid before covering, and add a splash of cream if the top layer looks exposed. Lifting the lid repeatedly is the second culprit; each peek costs heat and stretches the cooking time unpredictably.
Stirring too rarely lets the cheeses melt into uneven pockets, while stirring too early breaks up the pasta before it has softened. Finally, resist cooking on high from the start unless time truly demands it: the gentle low setting is what keeps the cream from separating around the edges.
How to tell it’s done
The penne is done when every piece is tender through the center with no chalky white core, which is easy to check by biting one straight from the pot. The sauce should look glossy and uniform, thick enough to coat a spoon but still flowing slowly when tilted; melted cheese should no longer be visible as separate pieces. Since the dish contains no raw meat, poultry, fish or eggs, there is no internal temperature target to meet: doneness is judged entirely on pasta texture and sauce consistency.
Up next · Part 3 of 3
4 variations · storage & make-ahead · 5 answers · printable card
Tips, FAQ & printable recipe (Part 3)← Back to the ingredients (Part 1)