Dinner · Part 2 of 3: Instructions
Slow Cooker Five-Spice Char Siu Pork for Tender Results Step-by-step instructions
- Prep
- Cook
- Total
- Serves
- 4
Before you start
Before beginning, ensure that your slow cooker is clean and positioned on a level, heat-resistant surface. Prepare the pork by removing any large, hard pieces of skin or excessive surface fat, then cut the meat into uniform, 2-inch chunks.
This size helps the meat cook through evenly and absorb the glaze effectively. Measure out all your ingredients beforehand, and make sure your soy-honey mixture is well-combined, as the honey can settle at the bottom of the measuring cup.
Ingredients at a glance (4)
- 2 lb pork shoulder, cut into chunks
- 4 cloves garlic, minced
- 1 tbsp five-spice powder
- 1/2 cup soy-honey mixture
Instructions
Assembly Phase
- Prepare the Slow CookerPlace the pork shoulder chunks into the bottom of the slow cooker. Ensure the pieces are distributed evenly to allow for uniform cooking throughout the process.Look for Pork should be arranged in a single or slightly overlapping layer.Tip Trimming excess fat before adding to the cooker helps achieve a cleaner sauce at the end.
- Add Aromatics and SeasoningScatter the minced garlic over the pork, then sprinkle the five-spice powder evenly across the meat to ensure every piece is coated in the aromatic blend.Look for Garlic and spices should cover the surface of the pork chunks.Tip Rubbing the spices into the meat helps the flavors penetrate more deeply during the slow cooking process.
The pork should be evenly distributed in the cooker with the aromatics and spices sprinkled clearly over the top. Everything is layered and ready for the liquid to be added.
Slow Cooking Phase
- Add Glaze and CookPour the soy-honey mixture over the pork. Cover the slow cooker and cook on low for 6 hours or on high for 3 to 4 hours until the meat is tender and cooked to an internal temperature of 145°F (63°C). Let the meat rest for at least 3 minutes before serving.Look for Meat should be very tender and easily pierced with a fork.Safe temperature 145°F (63°C) internal temperature (steaks, chops and roasts)Tip Avoid lifting the lid during cooking to maintain a consistent temperature and moisture level.
The kitchen should begin to fill with the fragrant scent of five-spice and caramelized soy. The meat should be submerged in the liquid and look significantly more tender and cooked through.
Finishing Phase
- Rest and ServeRemove the pork from the slow cooker and let it rest for at least 3 minutes before slicing or serving. This allows the juices to redistribute for a better texture.Look for Meat should be glossy and hold its shape when sliced.Tip You can boil down the leftover cooking liquid in a small saucepan until it thickens into a syrup to drizzle over the finished pork.
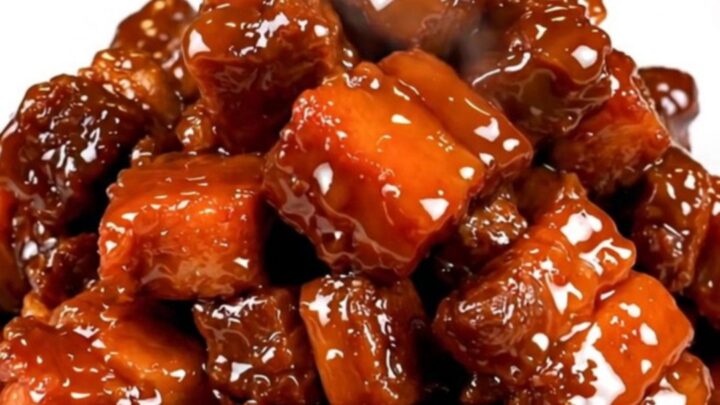
The pork is removed and looks glossy, dark, and tender. It should rest on the plate for at least three minutes before being served to ensure the juices are settled.
Common mistakes
A common mistake is overcrowding the slow cooker, which can lead to uneven cooking and excess liquid that prevents the sauce from properly glazing the meat.
Another error is checking the meat too frequently; lifting the lid releases heat and steam, which can significantly extend the cooking time.
Finally, ensure you do not skip the resting period, as cutting the meat immediately causes the juices to run out, leaving the pork dry and less flavorful.
How to tell it’s done
The pork is done when it reaches an internal temperature of 145°F (63°C). Visually, the meat should be deeply colored by the glaze and should pull apart easily when prodded with a fork.
If the meat feels tough or resistant when tested, it needs more time to break down. Always use a meat thermometer inserted into the thickest part of the largest chunk to ensure safety and perfect texture.
- Steaks, chops and roasts: 145°F (63°C) in the thickest part, then a 3-minute rest
Up next · Part 3 of 3
2 variations · storage & make-ahead · 3 answers · printable card
Tips, FAQ & printable recipe (Part 3)← Back to the ingredients (Part 1)