Dinner · Part 2 of 3: Instructions
Slow Cooker Fall-Off-The-Bone Barbecue Baby Back Ribs Step-by-step instructions
- Prep
- Cook
- Total
- Serves
- 4
Before you start
Before starting, ensure the slow cooker bowl is clean and dry. Remove the ribs from their packaging and pat them dry with paper towels.
Check if the ribs have a membrane on the back; if so, peel it off carefully using a paper towel for grip. Gather all ingredients and measure the vinegar and barbecue sauce ahead of time so the assembly process remains smooth and quick.
Ingredients at a glance (4)
- 2 lb baby back ribs
- 1/4 cup vinegar
- 2 tbsp dry rub
- 1 cup barbecue sauce
Instructions
Arrangement and Seasoning
- Prepare and SeasonPlace the raw baby back ribs upright around the inner sides of the slow cooker bowl. Pour the vinegar evenly over the ribs. Sprinkle the dry rub generously over the entire surface of the meat, ensuring all sides are coated.Look for The ribs should be arranged in a circular formation around the slow cooker wall.Tip Removing the silverskin from the back of the ribs before cooking helps them become more tender.
The ribs should be securely positioned around the sides of the slow cooker, creating a stable ring. The vinegar should be poured at the base, and the dry rub should be visible on every surface of the pork. Ensure no rub has clumped significantly, as a light, even dusting is key to creating a balanced flavor profile across the entire rack.
Slow Cooking
- Add Sauce and Slow CookPour the barbecue sauce over the seasoned ribs, ensuring they are well-covered. Cover the slow cooker with its lid and cook on low heat for 8 hours. This slow process breaks down the connective tissues effectively.Look for The sauce will thicken and coat the ribs as they release their natural juices.Tip Avoid lifting the lid during the first 6 hours to maintain the consistent cooking temperature.
During the cooking phase, the slow cooker should maintain a steady, low hum. The sauce will begin to bubble and thicken, creating a rich aroma throughout the kitchen.
Check the exterior of the slow cooker to ensure the lid is properly seated and no steam is escaping, which is vital for maintaining the internal moisture and temperature required for the meat to soften.
Final Glazing and Resting
- Finish and ServeCarefully remove the ribs from the slow cooker once they are fully tender. Ensure the internal temperature of the pork has reached at least 145°F (63°C). Let the ribs rest on a serving plate for at least 5 minutes before slicing and serving.Look for The meat should pull away easily from the bone when tested with a fork.Safe temperature 145°F (63°C) internal temperature (steaks, chops and roasts)Tip For an extra caramelized finish, transfer the cooked ribs to a baking sheet and broil for 3 minutes.
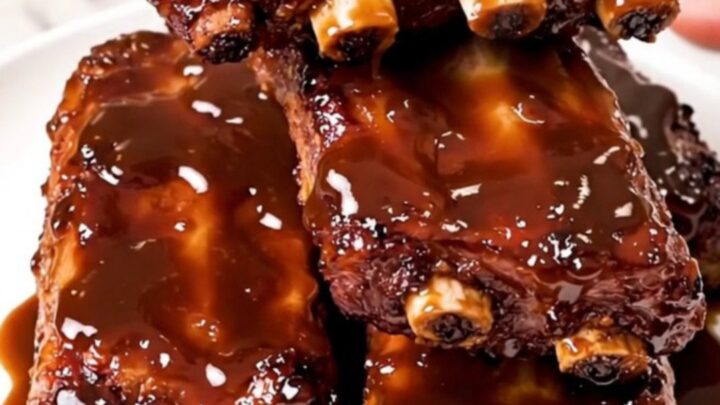
At the final stage, the ribs should appear dark, glazed, and exceptionally tender. The meat should be pulling away from the bone ends.
Once removed, the resting period is crucial; the juices must redistribute throughout the meat, ensuring that every bite remains succulent and flavorful. The ribs should look glossy, steaming, and ready to be served immediately upon the completion of the rest.
Common mistakes
A common mistake is overcrowding the slow cooker, which prevents even cooking and can lead to uneven textures. Another error is removing the lid too frequently, which releases heat and drastically increases the total cooking time.
Always avoid adding too much extra liquid, as the ribs and the sauce will release significant moisture during the cooking process; excess liquid will result in a thin, diluted sauce.
How to tell it’s done
The ribs are perfectly done when the meat has shrunk back from the bone ends by about half an inch. When pierced with a fork, the meat should be incredibly tender and offer no resistance. Ensure an internal temperature of at least 145°F (63°C) is reached at the thickest part of the meat. The sauce should be thick, glossy, and clinging to the ribs rather than watery.
- Steaks, chops and roasts: 145°F (63°C) in the thickest part, then a 3-minute rest
Up next · Part 3 of 3
2 variations · storage & make-ahead · 3 answers · printable card
Tips, FAQ & printable recipe (Part 3)← Back to the ingredients (Part 1)