Dinner · Part 2 of 3: Instructions
Slow Cooker Crozet Pasta Gratin with Leeks and Beaufort Cheese Step-by-step instructions
- Prep
- Cook
- Total
- Serves
- 4
Before you start
Before beginning, prepare the ingredients by thoroughly cleaning the leeks to remove any grit and slicing them into thin, consistent rounds. Grate the Beaufort cheese finely so that it melts evenly across the top of the dish.
Ensure the slow cooker is clean and dry. Have your liquid mixture of cream and broth ready in a measuring cup, stirred well to combine the flavors before pouring. Having all components prepped and measured makes the assembly process fast and straightforward.
Ingredients at a glance (5)
- 6 oz bacon, sliced into strips
- 2 large leeks, cleaned and sliced
- 8 oz crozet pasta
- 1 1/2 cups cream and chicken broth mixture
- 1 cup grated Beaufort cheese
Instructions
Assembly and Layering
- Layering the basePlace the sliced bacon strips into the base of the slow cooker. Add the cleaned and sliced leeks on top of the bacon. Scatter the dry crozet pasta evenly over the leeks.Look for ensure the ingredients are distributed evenly across the bottom of the slow cooker for consistent cookingTip slicing the leeks into uniform rounds ensures they cook at the same rate as the pasta
At this stage, the slow cooker contains a well-distributed layer of bacon, leeks, and dry pasta. The ingredients should be arranged in an even layer to ensure they heat uniformly.
Everything is ready for the liquid and cheese to be added, setting the stage for the slow-cooking process that will meld the flavors together into a cohesive, delicious meal.
Liquid and Cheese Integration
- Adding liquid and cheesePour the cream and chicken broth mixture over the pasta and leeks. Top the entire mixture with the grated Beaufort cheese, ensuring it covers the pasta to create a golden crust as it melts.Look for the liquid should just barely submerge the pasta to allow it to steam and absorb the flavorsTip use a high-quality broth for a richer flavor profile in the final sauce
The liquid has been poured over the ingredients, and the Beaufort cheese is spread across the top. The contents should look moist but not flooded. The cheese is ready to begin its transformation into a golden crust as the heat begins to rise, signaling that the slow cooker is ready to be covered and left to do its work.
Cooking and Final Texture
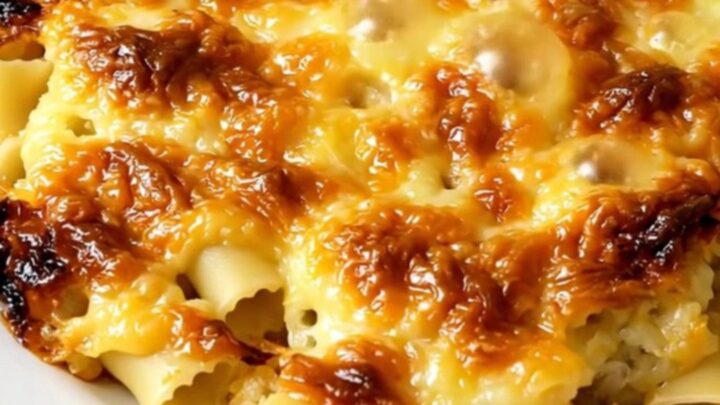
- Cooking and servingCover and cook on low for three hours until the pasta is tender and the cheese is bubbly and golden brown. Let the gratin rest for five minutes before serving on a plate.Look for the cheese should be melted and slightly browned on top, with a glossy, thickened sauce underneathTip resting the dish allows the sauce to thicken slightly and makes serving much easier
The gratin is now fully cooked, with the pasta tender and the cheese beautifully melted. The kitchen should smell rich and savory. The dish is ready to be served, having reached the perfect balance of creamy sauce, soft pasta, and a golden, flavorful top layer that defines a classic gratin.
Common mistakes
A common mistake is using too much liquid, which can result in a soupy rather than creamy consistency. Follow the measurements closely to ensure the pasta absorbs the liquid perfectly.
Another error is neglecting to clean the leeks properly; always rinse them well under cold running water to avoid any sandy texture in the final dish. Additionally, avoid lifting the lid frequently during the cooking process, as this releases the heat and steam necessary to cook the pasta evenly throughout.
How to tell it’s done
The gratin is done when the pasta is tender to the bite and the liquid has been mostly absorbed, leaving a creamy, thick sauce. The Beaufort cheese should be fully melted, with a golden-brown, bubbly appearance on the surface.
If you gently move the edge of the pasta with a spoon, you should see a glossy sauce bubbling beneath. The aroma should be savory, nutty, and slightly sweet from the cooked leeks.
Up next · Part 3 of 3
2 variations · storage & make-ahead · 3 answers · printable card
Tips, FAQ & printable recipe (Part 3)← Back to the ingredients (Part 1)