Dinner · Part 2 of 3: Instructions
Slow Cooker Creamy Mushroom Beef Stew Step-by-step instructions
- Prep
- Cook
- Total
- Serves
- 6
Before you start
Before you begin, ensure your slow cooker insert is clean and dry. Prepare your ingredients by cutting the beef into uniform one-inch cubes and cleaning the mushrooms thoroughly to remove any grit. If you are using a whole packet of gravy mix, have it ready along with the condensed soup.
It is also helpful to clear enough space on your countertop for the slow cooker, ensuring it is placed on a heat-resistant surface away from any water sources. Having your ingredients prepped and ready to layer will make the assembly process seamless and quick.
Ingredients at a glance (4)
- 2 lb beef stew meat, cut into 1-inch cubes
- 16 oz cremini mushrooms, cleaned and sliced
- 1 packet brown gravy mix
- 1 can condensed cream of mushroom soup
Instructions
Layering
- Layering the ingredientsPlace the cubed beef stew meat into the bottom of the slow cooker insert. Distribute the sliced cremini mushrooms evenly over the top of the beef.Look for ensure the beef is spread in an even layer across the base of the insert.Tip trim any excess fat from the beef cubes before adding them to the slow cooker for a cleaner final sauce.
At this stage, you should see a neat layer of beef at the bottom of the cooker with the mushrooms clearly visible on top. The ingredients should be distributed evenly to ensure consistent heat penetration. Ensure the insert is properly seated in the base before moving to the next phase.
Seasoning
- Seasoning and saucingSprinkle the packet of gravy mix over the mushrooms. Pour the condensed cream of mushroom soup over the entire mixture, ensuring it covers the ingredients.Look for the soup should be poured evenly to help coat the mushrooms and beef as it cooks.Tip use a spatula to scrape every bit of the soup from the measuring cup to ensure the proper consistency.
Once the gravy mix and mushroom soup are added, the pot will look quite full. The soup should mostly cover the surface. Ensure there are no large clumps of dry gravy mix visible, as these will need to dissolve into the sauce during the cooking process.
Cooking
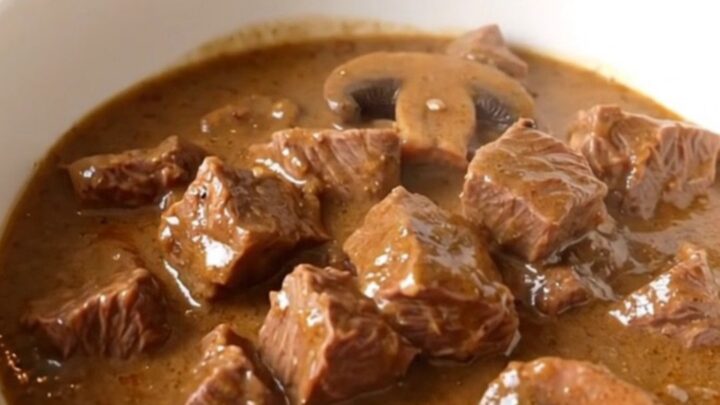
- Cooking and servingCover and cook on low for 8 hours until the beef is tender. Ensure the internal temperature reaches at least 145°F (63°C). Let the stew rest for 5 minutes before serving.Look for the beef should be fork-tender and the sauce thickened into a rich, creamy consistency.Safe temperature 145°F (63°C) internal temperature (steaks, chops and roasts)Tip check the doneness by testing a piece of beef with a fork to ensure it yields easily.
As the cooking finishes, the kitchen should smell savory and earthy. The stew will have reduced slightly, and the liquid will have transformed into a thick, creamy, and dark gravy. The beef will have shrunk slightly and should appear soft and fully cooked throughout.
Common mistakes
A common mistake is overcrowding the slow cooker or not cutting the meat into uniform pieces, which can lead to uneven cooking where some pieces are tender while others remain tough.
Another error is lifting the lid too frequently during the cooking process; every time you open the slow cooker, heat escapes and the cooking time is extended by about fifteen to twenty minutes.
Finally, avoid using meat that is too lean, as it may become dry during the long cooking time; a little bit of marbling is actually beneficial for this type of slow-cooked stew.
How to tell it’s done
To determine when the stew is ready, you must ensure the beef has reached a safe internal temperature of 145°F (63°C). Beyond the temperature, the best way to tell is by the texture of the meat; it should be fork-tender, meaning it falls apart with very little pressure.
The sauce should be rich, glossy, and thick, coating the back of a spoon. If the meat still feels firm or chewy, continue cooking for another thirty minutes before testing again, as slow cookers can vary significantly in their heat intensity.
- Steaks, chops and roasts: 145°F (63°C) in the thickest part, then a 3-minute rest
Up next · Part 3 of 3
2 variations · storage & make-ahead · 3 answers · printable card
Tips, FAQ & printable recipe (Part 3)← Back to the ingredients (Part 1)