Dinner · Part 2 of 3: Instructions
Slow Cooker Creamy Garlic Herb Kielbasa and Green Beans Step-by-step instructions
- Prep
- Cook
- Total
- Serves
- 4
Before you start
Before starting, ensure all vegetables are thoroughly washed and trimmed. Slice the kielbasa into uniform coins to promote even cooking. Measure out the broth and seasoning, and ensure the cream cheese is removed from the refrigerator at least thirty minutes prior to cooking so it can soften.
Check that the slow cooker vessel is clean and dry. Having all ingredients prepared and ready to add to the cooker will make the assembly process seamless and efficient, allowing for a quick transition to the cooking phase.
Ingredients at a glance (5)
- 1 lb kielbasa, sliced into coins
- 1 lb green beans, trimmed
- 2 tbsp garlic herb seasoning
- 8 oz cream cheese, softened
- 1/2 cup chicken broth
Instructions
Layering the ingredients
- Assemble the basePlace the sliced kielbasa coins at the bottom of the slow cooker vessel. Distribute the trimmed green beans evenly over the sausage layer to ensure they cook consistently throughout the process.Look for Kielbasa should form a single layer at the base of the insert.Tip Slice the kielbasa into uniform half-inch coins for even cooking.
The kielbasa coins should be arranged in a single, even layer at the bottom of the slow cooker to ensure they cook evenly. The green beans should be scattered over the top, providing a stable foundation for the seasoning and the block of cream cheese to sit upon.
Adding the sauce components
- Add aromatics and liquidsSprinkle the garlic herb seasoning over the green beans. Place the block of cream cheese directly in the center of the mixture and pour the chicken broth around the sides of the slow cooker to help create the base for the sauce.Look for Cream cheese sits centered, surrounded by the broth.Tip Ensure the cream cheese is at room temperature to help it melt smoothly.
The seasoning must be spread evenly over the beans, and the cream cheese should be placed right in the center. The broth should be poured carefully around the edges so it does not displace the seasoning, ensuring that all components are set correctly before the lid is closed.
Cooking and finishing
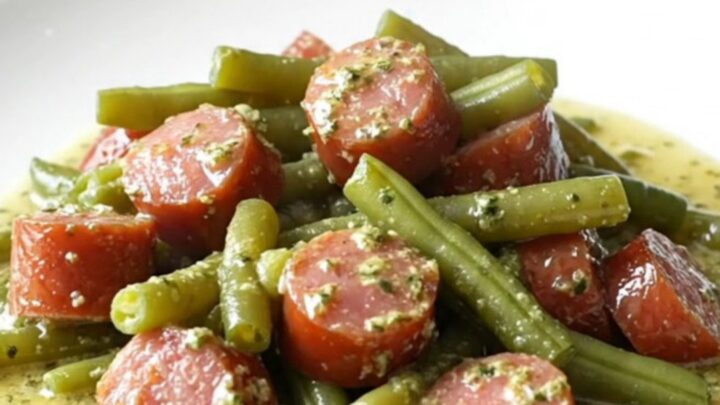
- Slow cook and serveCover and cook on low for 4 hours until the internal temperature of the sausage reaches 160°F (71°C). Stir the mixture thoroughly to combine the melted cream cheese with the juices to form a creamy sauce before serving.Look for Sauce is smooth and creamy with no lumps remaining.Safe temperature 160°F (71°C) internal temperature (ground meat)Tip Stir well before serving to ensure the sauce coats the beans and sausage.
After four hours of cooking, the sausage will be fully cooked and the sauce will have developed a rich, creamy texture. The final stir is vital; the mixture should look smooth, glossy, and fully integrated with no visible lumps of cheese remaining.
Common mistakes
A common mistake is using cream cheese directly from the refrigerator, which can result in clumps that do not melt properly into the sauce. Always soften it beforehand. Another error is overcooking the green beans; if they become mushy, they have been cooked too long.
Keep a close eye on the cooking time, especially if using a slow cooker that runs hot, as excessive heat can cause the cream cheese to separate. Never skip the final stirring step, as this is essential for achieving the desired creamy consistency.
How to tell it’s done
The dish is considered done when the kielbasa has reached an internal temperature of at least 160°F (71°C).
At this point, the green beans should be tender but still possess a slight snap, and the cream cheese should be fully melted and incorporated into the broth to form a thick, cohesive sauce.
If the sauce remains thin, stir vigorously to incorporate the fats. Ensure the sausage is heated through completely to guarantee food safety and optimal texture before serving.
- Ground meat: 160°F (71°C) in the thickest part
Up next · Part 3 of 3
2 variations · storage & make-ahead · 3 answers · printable card
Tips, FAQ & printable recipe (Part 3)← Back to the ingredients (Part 1)