Dinner · Part 2 of 3: Instructions
Slow Cooker Cranberry Onion Pork Loin Step-by-step instructions
- Prep
- Cook
- Total
- Serves
- 6
Before you start
Before you begin, ensure your slow cooker insert is clean and dry. Remove the pork loin from its packaging and pat it dry with paper towels to help the seasonings adhere better. Have all your ingredients measured and ready to go.
Since this is a dump-and-go recipe, preparation is minimal, but taking a moment to organize your workspace will make the process even faster. Ensure your slow cooker is placed on a stable, heat-resistant surface with adequate space around it for ventilation during the cooking cycle.
Ingredients at a glance (4)
- 2 lb pork loin
- 1 large onion, sliced into rings
- 1 packet onion soup mix
- 1 can (14 oz) whole berry cranberry sauce
Instructions
Layering the ingredients
- Prepare the slow cookerPlace the pork loin into the base of the slow cooker, ensuring it sits flat. Arrange the onion rings around the sides of the pork to ensure even cooking and flavor distribution during the braising process.Look for The pork should be centered in the slow cooker insert.Tip Ensure the onions are distributed evenly to flavor the juices.
The pork should be nestled securely in the slow cooker with the onion rings tucked snugly around the edges. There is no need for extra liquid, as the onions and pork will release plenty during the cooking process. Ensure the onion soup mix is sprinkled evenly over the top for consistent seasoning.
Adding the sauce
- Add seasonings and sauceSprinkle the onion soup mix evenly over the top of the pork loin. Spoon the whole berry cranberry sauce over the soup mix and onions, spreading it lightly to cover the top of the meat.Look for The pork should be covered by the cranberry sauce and soup mix.Tip Do not stir the ingredients; let the slow cooker do the work.
The cranberry sauce should be spooned over the top of the pork and onion mixture. It will slowly melt and combine with the onion soup mix and juices as the temperature rises. Everything should look compact and neatly arranged before placing the lid on the slow cooker.
Braising and finishing
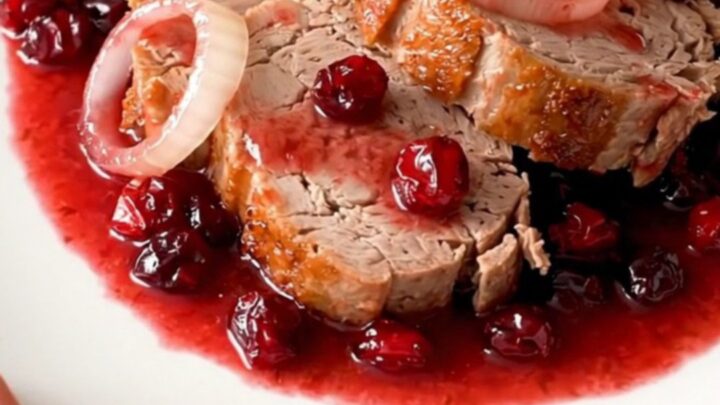
- Slow cook and serveCover the slow cooker and cook on low for 4 to 6 hours or on high for 3 to 4 hours. Once the pork reaches an internal temperature of 145°F (63°C), remove it from the slow cooker, let it rest for at least 3 minutes, then slice and serve with the warm onion cranberry sauce.Look for The meat is fork-tender and the sauce is thickened.Safe temperature 145°F (63°C) internal temperature (steaks, chops and roasts)Tip Resting the meat is essential for juicy, tender slices.
After the cooking time, the pork should look opaque and tender, with the onions softened into the sauce. The sauce should have a rich, glossy appearance and a savory-sweet aroma. Check the internal temperature to ensure it has reached 145°F (63°C) before proceeding to the final resting and slicing stage.
Common mistakes
A common mistake is using pork tenderloin instead of pork loin; tenderloin is too lean and small for this long cooking process and will dry out quickly.
Another error is lifting the lid too frequently, which releases the trapped heat and steam, significantly increasing the total cooking time and potentially leading to uneven results.
Finally, do not skip the resting period; slicing the meat immediately after removing it from the slow cooker will cause the juices to escape, resulting in dry, less flavorful slices.
How to tell it’s done
The pork loin is done when it is tender and shreds easily with a fork, but still holds its shape when sliced. Use a digital meat thermometer inserted into the thickest part of the roast to confirm it has reached an internal temperature of 145°F (63°C).
Once this temperature is reached, it is vital to let the meat rest on a cutting board for at least 3 minutes before slicing. This allows the juices to redistribute, ensuring every slice remains succulent and flavorful when served.
- Steaks, chops and roasts: 145°F (63°C) in the thickest part, then a 3-minute rest
Up next · Part 3 of 3
2 variations · storage & make-ahead · 3 answers · printable card
Tips, FAQ & printable recipe (Part 3)← Back to the ingredients (Part 1)