Dinner · Part 2 of 3: Instructions
Slow Cooker Cranberry Jalapeno Pork Tenderloin Step-by-step instructions
- Prep
- Cook
- Total
- Serves
- 4
Before you start
Before starting, ensure the slow cooker insert is clean and dry. Check that the pork tenderloin is properly thawed and patted dry with paper towels. Prepare the fresh jalapenos by washing them thoroughly and slicing them into thin, uniform rings.
If you prefer a milder flavor, remove the seeds and membranes from the jalapenos before slicing.
Have your garlic powder and a can of whole berry cranberry sauce ready on the counter to streamline the assembly process. Proper preparation ensures that the assembly takes only a few moments.
Ingredients at a glance (4)
- 2 lbs pork tenderloin
- 2 whole jalapeno peppers, sliced into rings
- 1 tsp garlic powder
- 1 can (14 oz) whole berry cranberry sauce
Instructions
Seasoning the Pork
- Prepare the porkPlace the pork tenderloins into the base of the slow cooker, ensuring they are arranged side by side for even cooking. Sprinkle the garlic powder evenly over the top of the meat.Look for The pork should be laid flat in the bottom of the slow cooker.Tip Ensure the pork is fully thawed before placing it in the slow cooker to maintain food safety.
At the end of this phase, the pork should be arranged neatly in the slow cooker with the garlic powder evenly distributed. The meat should be ready for the addition of the aromatics and the cranberry glaze, which will provide the primary moisture for the cooking process.
Adding the Glaze
- Add aromatics and glazeScatter the sliced jalapeno rings over the seasoned pork. Spread the whole berry cranberry sauce over the top, making sure to cover the meat evenly so the sauce can braise the pork during the cooking process.Look for The sauce should be spread across the top surface of the tenderloins.Tip If preferred, you can mix the cranberry sauce and jalapenos in a bowl before spreading, but layering works perfectly fine.
The pork should be topped with a generous layer of the whole berry cranberry sauce and the sliced jalapenos. The sauce should be spread out to cover the meat surface adequately, ensuring that all parts of the tenderloin will be exposed to the flavorful mixture while it cooks.
Slow Cooking
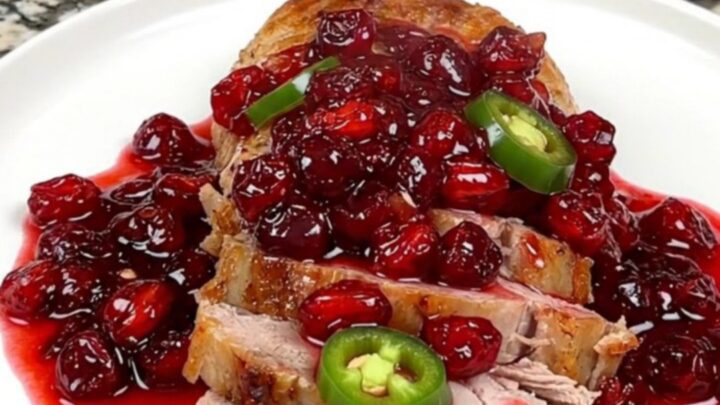
- Cook and serveCover and cook on low for 4 hours until the pork reaches an internal temperature of 145°F (63°C). Once finished, remove from the slow cooker, let the meat rest for at least 5 minutes, then slice and serve with the warm sauce.Look for The pork will be tender and easily sliced when finished.Safe temperature 145°F (63°C) internal temperature (steaks, chops and roasts)Tip Use a meat thermometer to ensure the pork has reached the safe temperature before serving.
After four hours of low cooking, the pork will be tender and infused with the cranberry and jalapeno flavors. The sauce will have thinned into a syrupy consistency, and the jalapenos will have softened, ready to be sliced and served alongside the juicy, perfectly cooked tenderloin.
Common mistakes
A common mistake is overcooking the pork tenderloin, which can lead to a dry and tough texture. While slow cookers are designed for long cooking times, pork tenderloin is a lean cut and does not require as much time as tougher cuts like pork shoulder.
Another mistake is failing to let the meat rest after cooking; slicing it immediately causes the juices to escape, which can lead to drier meat. Always use a thermometer to check for doneness rather than relying solely on the clock.
How to tell it’s done
The pork tenderloin is done when it reaches an internal temperature of 145°F (63°C) as measured by a meat thermometer inserted into the thickest part of the meat. It is essential to let the pork rest for at least 5 minutes after removing it from the slow cooker.
This resting period allows the juices to redistribute throughout the meat, resulting in a more tender and flavorful slice. The pork will be soft and moist to the touch when properly cooked.
- Steaks, chops and roasts: 145°F (63°C) in the thickest part, then a 3-minute rest
Up next · Part 3 of 3
2 variations · storage & make-ahead · 3 answers · printable card
Tips, FAQ & printable recipe (Part 3)← Back to the ingredients (Part 1)