Dinner · Part 2 of 3: Instructions
Slow Cooker Cranberry Barbecue Pulled Pork Step-by-step instructions
- Prep
- Cook
- Total
- Serves
- 6
Before you start
Before starting, ensure your slow cooker is clean and positioned on a stable, heat-resistant surface near an electrical outlet. Remove the pork from the refrigerator about 20 minutes before you begin to take the chill off, which helps it cook more evenly.
Have your measuring cups and spoons ready to portion the ingredients quickly. If your slow cooker has a removable ceramic insert, ensure it is fully dried before adding the meat to prevent any issues with heat distribution during the cooking cycle.
Ingredients at a glance (4)
- 3 lb pork butt
- 1 can jellied cranberry sauce
- 1 tbsp onion powder
- 1 cup barbecue sauce
Instructions
Preparation and assembly
- Prepare the slow cookerPlace the pork butt into the bottom of the slow cooker. Ensure the meat is positioned evenly to allow for consistent cooking throughout the process.Look for The pork fits snugly at the base of the slow cooker insert.Tip Trim any excess fat from the pork before placing it in the cooker to reduce grease.
The pork is securely placed in the slow cooker, and the cranberry and barbecue sauces are layered on top. Ensure the onion powder is distributed evenly to create a uniform flavor profile. At this stage, everything is ready for the slow, steady heat that will break down the meat fibers over the next several hours.
Slow cooking process
- Add the seasonings and sauceSpoon the jellied cranberry sauce directly over the pork. Sprinkle the onion powder evenly across the top, then pour the barbecue sauce over everything to coat the meat.Look for The sauce covers the meat completely.Tip Use a silicone spatula to get all the cranberry sauce out of the can.
During the cooking phase, the pork transforms from a firm roast into a tender, succulent protein. The kitchen will begin to smell savory and slightly sweet as the liquids simmer. Check that the lid is tightly sealed to maintain the necessary temperature and moisture levels for the duration of the cooking time.
Shredding and finishing
- Cook and serveCover the slow cooker and cook on low for 8 hours. Once finished, shred the pork using two forks. Ensure the pork reaches an internal temperature of 145°F (63°C) and let it rest for at least 3 minutes before serving.Look for The pork is tender and shreds easily with a fork.Safe temperature 145°F (63°C) internal temperature (steaks, chops and roasts)Tip Shred the meat directly in the slow cooker so it absorbs the juices.
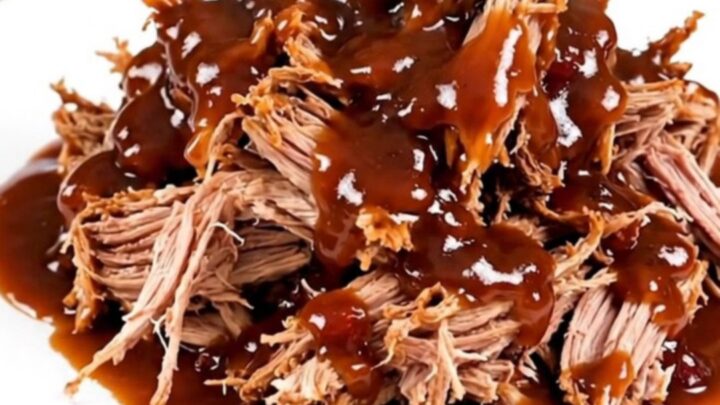
The final phase involves shredding the tender pork using two forks. The meat should pull apart easily, blending with the reduced sauce to create a rich, cohesive texture.
Ensure the mixture is hot throughout and properly combined before serving, and check for any remaining large pieces of fat that you may wish to discard.
Common mistakes
A common mistake is overcrowding the slow cooker, which can lead to uneven cooking and excess liquid that dilutes the flavor of the sauce. Avoid lifting the lid frequently during the cooking process, as this releases heat and moisture, significantly increasing the time needed to finish.
Additionally, ensure the pork is not frozen when added to the slow cooker, as this prevents it from reaching a safe internal temperature within the required timeframe. Always allow the meat to rest after cooking to retain its natural juices.
How to tell it’s done
The pork is perfectly done when the internal temperature reaches at least 145°F (63°C) and the meat pulls apart effortlessly with the pressure of a fork. The texture should be soft and tender, not tough or chewy.
Once the meat is shredded, it should be well-coated in the thickened sauce, with no signs of undercooked protein remaining. Always use a digital meat thermometer to verify the temperature in the thickest part of the roast to ensure it is safe and cooked to your preference.
- Steaks, chops and roasts: 145°F (63°C) in the thickest part, then a 3-minute rest
Up next · Part 3 of 3
2 variations · storage & make-ahead · 3 answers · printable card
Tips, FAQ & printable recipe (Part 3)← Back to the ingredients (Part 1)