Dinner · Part 2 of 3: Instructions
Slow Cooker Country Pork Stew for Easy Weeknight Dinners Step-by-step instructions
- Prep
- Cook
- Total
- Serves
- 6
Before you start
Before beginning, ensure your slow cooker is clean and placed on a flat, heat-resistant surface. Prepare your ingredients by cutting the pork shoulder into uniform bite-sized cubes, which helps them cook evenly.
Peel and chop the potatoes and carrots into similar-sized chunks. Having all ingredients measured and ready to go makes the assembly process fast and efficient, allowing you to get the slow cooker started with minimal preparation time.
Ingredients at a glance (5)
- 2 lb pork shoulder, cut into bite-size cubes
- 1 lb potatoes, cut into chunks
- 3 cups carrots, cut into chunks
- 1 packet brown gravy mix
- 2 cups chicken broth
Instructions
Preparation and assembly
- Assemble the stew basePlace the cubed pork shoulder into the bottom of the slow cooker. Add the potato chunks and carrot chunks on top of the meat in an even layer to ensure consistent cooking.Look for The pork should cover the bottom of the slow cooker completely.Tip Keep the vegetable chunks uniform in size to ensure they finish cooking at the same time as the pork.
The pork and vegetables should be neatly arranged in the slow cooker. The scene is ready for the liquid components, with the meat providing a solid foundation for the remaining ingredients. Ensure that the ingredients are not packed too tightly, allowing room for the broth to circulate during the cooking process.
Seasoning and starting
- Season and add liquidSprinkle the dry brown gravy mix evenly over the vegetables. Pour the chicken broth over the top of the ingredients. Cover the slow cooker with its lid.Look for Ensure the gravy mix is distributed across the surface to prevent clumping.Tip Do not stir the ingredients; the liquid will distribute the flavors as it simmers.
The gravy mix is spread evenly and the broth is poured over the top, creating the base for the sauce. The slow cooker is covered and the heat is set, signaling the start of the braising process. At this stage, everything is in place for the long, slow transformation of the ingredients into a cohesive, flavorful stew.
Final cook and serving
- Slow cook and serveCook on low for 8 hours or high for 4 hours. Once the pork reaches an internal temperature of 145°F (63°C), turn off the heat and let the stew rest for 5 minutes before serving.Look for The pork should be fork-tender and the gravy thickened.Safe temperature 145°F (63°C) internal temperature (steaks, chops and roasts)Tip Check that the vegetables are tender by piercing them with a fork before serving.
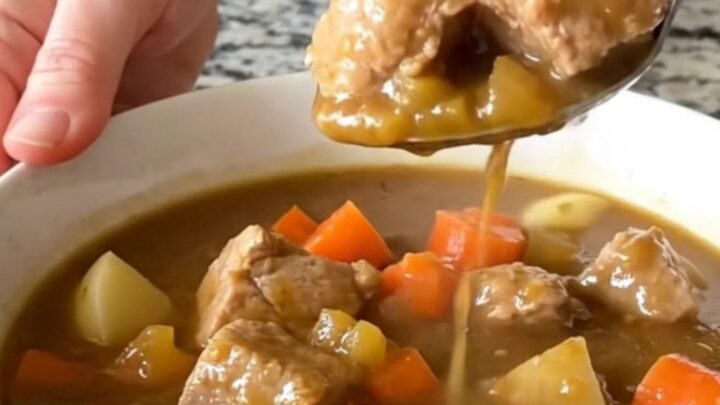
The stew is finished when the kitchen smells savory and the pork is incredibly tender. The sauce should be rich and uniform, with the potatoes and carrots perfectly softened. Check the internal temperature of the pork one last time to ensure it is safe and ready to be served hot.
Common mistakes
A common mistake is overcrowding the slow cooker, which can prevent even cooking and lead to uneven textures. Ensure there is enough room for the liquid to circulate.
Another frequent error is using high heat for too long, which can toughen the meat; sticking to the low setting is generally preferred for the best results.
Finally, avoid lifting the lid frequently during the cooking process, as this releases essential heat and steam, significantly increasing the total cooking time required.
How to tell it’s done
The pork stew is ready when the pork cubes are fork-tender and easily pull apart with a gentle touch. Use a meat thermometer to ensure the pork has reached an internal temperature of at least 145°F (63°C).
The gravy should be thick and glossy, coating the back of a spoon. If the sauce seems too thin, you can remove the lid for the final thirty minutes of cooking to allow some of the liquid to evaporate.
- Steaks, chops and roasts: 145°F (63°C) in the thickest part, then a 3-minute rest
Up next · Part 3 of 3
2 variations · storage & make-ahead · 3 answers · printable card
Tips, FAQ & printable recipe (Part 3)← Back to the ingredients (Part 1)