Dinner · Part 2 of 3: Instructions
Slow Cooker Cola Pork Chops for an Easy Weeknight Dinner Step-by-step instructions
- Prep
- Cook
- Total
- Serves
- 5
Before you start
Ensure the slow cooker is placed on a level, heat-resistant surface. Prepare the ingredients by slicing the yellow onion into thin half-moons and measuring out the brown sugar, cola, and ketchup.
Have all components ready to go before starting the assembly to keep the process efficient and organized.
Ingredients at a glance (5)
- 5 boneless pork chops
- 1 yellow onion, sliced into half-moons
- 1/4 cup brown sugar
- 1 cup cola
- 1/2 cup ketchup
Instructions
Assembly Phase
- Assemble the basePlace the five boneless pork chops into the bottom of the slow cooker insert. Ensure they are arranged in an even layer to promote uniform cooking throughout the process.Look for The pork chops should be fanned out across the bottom of the slow cooker insert without overlapping too much.Tip Using boneless chops allows for even cooking and easier serving once the dish is finished.
The pork chops should be fanned out in a single layer at the bottom of the cooker. Ensure the ingredients are layered sequentially as directed to allow the flavors to meld properly during the long, slow heat application process.
Seasoning Phase
- Layer onions and sugarDrape the sliced yellow onion half-moons over the top of the pork chops. Evenly sprinkle the brown sugar over the onions and pork to help create a sweet glaze.Look for The onions should be distributed evenly over the meat to ensure they soften and flavor the pork as it braises.Tip Slicing the onions into uniform half-moons helps them soften and melt into the sauce during the long cooking time.
The onions and brown sugar should be evenly distributed over the pork. The sugar will begin to dissolve into the juices released by the onions, setting the stage for the flavorful glaze that forms during the cooking cycle.
Braising Phase
- Add sauce and finishWhisk the cola and ketchup together in a small bowl until smooth. Pour the mixture over the pork and onions. Cover and cook on low for 6 hours until the pork reaches 145°F (63°C). Let the meat rest for 3 minutes before serving.Look for The sauce should be pourable and fully coat the ingredients once added to the slow cooker.Safe temperature 145°F (63°C) internal temperature (steaks, chops and roasts)Tip Ensure the lid is secure to keep the moisture inside, which helps the pork stay tender during the braising process.
The sauce should be poured evenly over the contents. Once the lid is placed, the slow cooker will maintain a steady temperature.
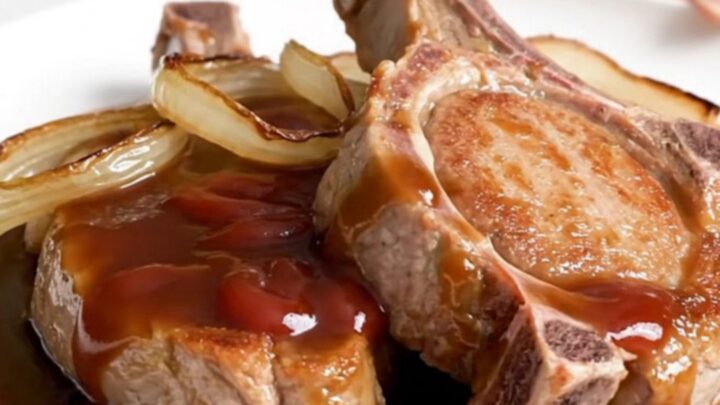
At the end, the pork should be tender, and the sauce should have thickened into a rich, sweet, and tangy coating.
Common mistakes
A common mistake is overcrowding the slow cooker, which can prevent the sauce from circulating and lead to uneven cooking. Ensure there is enough room for the liquid to surround the meat.
Another error is checking the dish too frequently; opening the lid lets out steam and heat, which significantly extends the cooking time and can affect the final tenderness of the pork.
How to tell it’s done
The pork chops are fully cooked when they reach an internal temperature of 145°F (63°C) as measured by a meat thermometer inserted into the thickest part.
The meat should be very tender and easily pierced with a fork. The sauce should be thick, glossy, and reduced slightly, with the onions completely softened and translucent.
- Steaks, chops and roasts: 145°F (63°C) in the thickest part, then a 3-minute rest
Up next · Part 3 of 3
2 variations · storage & make-ahead · 3 answers · printable card
Tips, FAQ & printable recipe (Part 3)← Back to the ingredients (Part 1)