Dinner · Part 2 of 3: Instructions
Slow Cooker Cola Barbecue Chicken Wings Step-by-step instructions
- Prep
- Cook
- Total
- Serves
- 4
Before you start
Before starting, ensure your slow cooker is clean and positioned on a level, heat-resistant surface. Dice the yellow onion into small, uniform pieces to ensure even distribution and texture.
If your chicken wings are frozen, thaw them in the refrigerator overnight; never thaw meat on the counter, as this can lead to bacterial growth.
Have all your ingredients measured and ready to go to make the assembly process seamless. Check that your slow cooker lid fits tightly to trap the heat and moisture during the cooking cycle.
Ingredients at a glance (4)
- 2 lb chicken wings
- 1 medium yellow onion, diced
- 1 tsp onion powder
- 1 cup cola barbecue sauce
Instructions
Assembly Phase
- Layering the ingredientsPlace the raw chicken wings into the bottom of the slow cooker insert. Scatter the diced yellow onion evenly over the top of the wings.Look for The chicken should be arranged in a single layer if possible for even cooking.Tip Removing excess moisture from the wings with paper towels before adding them helps the sauce adhere better.
At the end of this phase, the wings should be evenly spread at the bottom of the slow cooker, covered with a uniform layer of diced onions. The ingredients are now prepared for the seasoning stage. Ensure no onion pieces are left on the counter and that your workspace is clean, especially if you handled raw chicken.
Seasoning Phase
- Seasoning and saucingSprinkle the onion powder over the onions and wings. Pour the cola barbecue sauce over the entire mixture, ensuring the wings are well coated.Look for The sauce should cover most of the chicken pieces.Tip Use a spatula to gently turn the wings once to ensure every piece is thoroughly coated in the sauce.
The wings should be thoroughly coated in the cola barbecue sauce, with the onion powder distributed evenly across the surface. The slow cooker insert should look organized and ready for the heating process. Confirm that the lid is securely in place to begin the slow cooking cycle, ensuring no gaps allow steam to escape prematurely.
Cooking Phase
- Slow cooking to temperatureCover and cook on low for 4 hours. Ensure the chicken wings reach an internal temperature of 165°F (74°C). Let the wings rest for 5 minutes before serving.Look for The wings should be tender and the sauce thickened and glossy.Safe temperature 165°F (74°C) internal temperature (poultry)Tip Check the temperature at the thickest part of the wing to ensure it is cooked through safely.
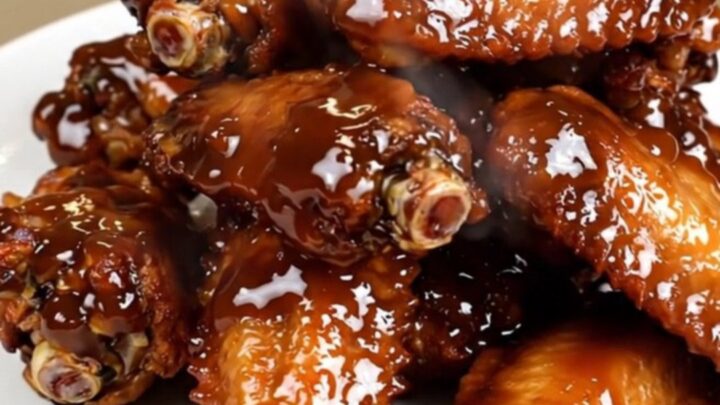
The kitchen should smell savory and slightly sweet as the sauce reduces and the chicken cooks. The wings should appear dark, glossy, and tender. Before serving, check the internal temperature to ensure the poultry is safe. The sauce should be thick enough to cling to the wings when lifted with tongs or a serving spoon.
Common mistakes
A common mistake is overcrowding the slow cooker, which can lead to uneven cooking and excess liquid accumulation. Ensure the wings are layered comfortably without being packed too tightly.
Another error is lifting the lid frequently during the cooking process; every time the lid is opened, heat escapes, which significantly increases the total cooking time and affects the final texture. Finally, avoid using a barbecue sauce that is overly thin, as it will not coat the wings properly even after the long cooking time.
How to tell it’s done
The wings are done when the meat is tender and easily pulls away from the bone. Using a digital meat thermometer, verify that the thickest part of the wing reaches at least 165°F (74°C).
The sauce should have thickened into a glossy, dark glaze that coats the wings thoroughly. If the sauce seems too thin, you can remove the lid for the final 30 minutes of cooking to help it reduce further, provided the chicken is already fully cooked and safe to eat.
- Poultry: 165°F (74°C) in the thickest part
Up next · Part 3 of 3
2 variations · storage & make-ahead · 3 answers · printable card
Tips, FAQ & printable recipe (Part 3)← Back to the ingredients (Part 1)