Dinner · Part 2 of 3: Instructions
Slow Cooker Cider Braised Beef Cheeks with Apples Step-by-step instructions
- Prep
- Cook
- Total
- Serves
- 4
Before you start
Before starting, ensure the beef cheeks are properly trimmed of any heavy surface fat or tough membrane. Peel and slice the yellow onion into uniform strips to ensure they soften evenly.
Prepare the apple wedges by removing the core and slicing them into thick segments that will hold their shape during the long cooking time. Have the measuring cup ready for the cider and ensure your slow cooker is clean and positioned on a stable, heat-resistant surface.
Ingredients at a glance (5)
- 2 lbs beef cheeks, trimmed
- 2 large apples, cored and cut into wedges
- 1 large yellow onion, thinly sliced
- 1 tbsp veal stock powder
- 1 cup dry cider
Instructions
Assembling the Ingredients
- Prepare the Slow Cooker BasePlace the raw beef cheek chunks into the bottom of the slow cooker insert. Ensure they are spread out in an even layer to promote consistent cooking throughout the long braising process.Look for Beef is arranged at the bottom of the cooker.Tip Pat the beef dry with paper towels before adding to the cooker for a cleaner look.
The ingredients should be layered carefully in the slow cooker. The beef goes at the bottom to ensure it stays submerged in the juices, while the apples and onions are placed on top to steam gently.
Check that the stock powder is sprinkled evenly, and ensure the cider is poured carefully to avoid splashing the sides of the ceramic insert.
The Braising Process
- Add Aromatics and LiquidsScatter the apple wedges and sliced onions directly over the beef. Sprinkle the veal stock powder evenly over the top of the ingredients, then pour the golden dry cider over the entire mixture until mostly submerged.Look for Liquid covers the beef and aromatics.Tip Ensure the stock powder is distributed evenly to prevent clumping.
During the long cooking phase, the slow cooker should remain undisturbed. The kitchen will begin to fill with the aroma of savory beef and sweet cider. Check the cooker after 7 hours to verify the beef is becoming tender and the liquid is beginning to reduce into a rich, flavorful sauce that will glaze the meat.
Final Glazing and Serving
- Slow Cook and ServeCover the slow cooker and cook on low for 8 hours. The beef is done when it reaches 145°F (63°C) and is fork-tender. Let the meat rest for at least 5 minutes before serving the glazed beef and melted apples on a plate.Look for Beef pulls apart easily with a fork.Safe temperature 145°F (63°C) internal temperature (steaks, chops and roasts)Tip If the sauce is too thin, remove the beef and reduce the liquid in a saucepan over medium-high heat.
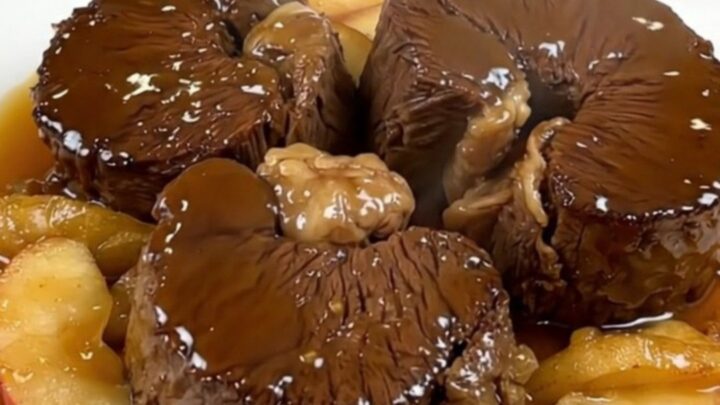
At the end of the cooking time, the beef should be extremely soft. Carefully remove the beef and apples from the cooker, allowing them to rest for 5 minutes. The sauce remaining in the pot should be thick and glossy. If it appears thin, transfer it to a saucepan to reduce further before serving over the tender, braised beef cheeks.
Common mistakes
A common mistake is overcrowding the slow cooker, which can lead to uneven cooking and excess liquid accumulation. Ensure the beef is arranged in a single layer for the best results.
Another error is checking the cooker too frequently; every time the lid is lifted, heat escapes and the cooking time increases. Keep the lid closed for the duration of the 8-hour cycle to maintain the internal temperature and moisture level.
How to tell it’s done
The beef is perfectly cooked when it is fork-tender and can be easily shredded or separated with minimal pressure. The internal temperature must reach at least 145°F (63°C) to ensure safety and ideal texture.
The apples should be soft and translucent, having absorbed the savory juices, and the onions should have completely melted into the sauce, creating a thick, glossy glaze that coats the meat thoroughly.
- Steaks, chops and roasts: 145°F (63°C) in the thickest part, then a 3-minute rest
Up next · Part 3 of 3
2 variations · storage & make-ahead · 3 answers · printable card
Tips, FAQ & printable recipe (Part 3)← Back to the ingredients (Part 1)