Dinner · Part 2 of 3: Instructions
Slow Cooker Chorizo and Pea Risotto for Effortless Weeknight Dining Step-by-step instructions
- Prep
- Cook
- Total
- Serves
- 4
Before you start
Before beginning, ensure all ingredients are measured and ready. Dice the raw chorizo into uniform, bite-sized pieces to ensure even cooking. If the chorizo comes in a casing, remove it before dicing.
Have the hot water ready in a glass measuring cup to minimize heat loss when adding it to the slow cooker insert. Clear a workspace near the slow cooker for seamless assembly.
Ingredients at a glance (5)
- 8 oz raw diced chorizo
- 1 1/2 cups arborio rice
- 1 bouillon cube, crumbled
- 4 cups hot water
- 1 cup frozen peas
Instructions
Layering the ingredients
- Prepare the slow cooker basePlace the raw diced chorizo into the bottom of the slow cooker ceramic insert. Scatter the arborio rice evenly over the chorizo layer, then sprinkle the crumbled bouillon cube across the top of the rice to ensure even seasoning distribution.Look for The chorizo is at the bottom with rice and bouillon layered on top.Tip Ensure the rice is spread in an even layer to prevent clumping during the initial cooking phase.
At this stage, the slow cooker contains the raw ingredients neatly layered. The chorizo is at the base, topped with dry rice and the crumbled bouillon. Everything is ready for the addition of the hot water. Check that the insert is clean and positioned correctly on the base before proceeding to the next step.
Slow cooking the risotto
- Add liquid and cookPour the hot water over the rice and chorizo mixture. Cover the slow cooker with its lid and set to cook on high for approximately two hours, or until the rice is tender and the liquid has been absorbed into a creamy consistency.Look for The liquid should be bubbling gently and the rice should appear soft and opaque.Safe temperature 160°F (71°C) internal temperature (ground meat)Tip Using pre-heated water helps the slow cooker reach the target temperature faster, reducing total cooking time.
During this phase, the aroma of smoky chorizo and savory bouillon fills the kitchen. The rice slowly absorbs the hot water, swelling and releasing starch. The mixture should be bubbling gently under the lid. At the end of this phase, the rice should be tender, and the liquid should have reduced to a thick, creamy sauce.
Adding peas and resting
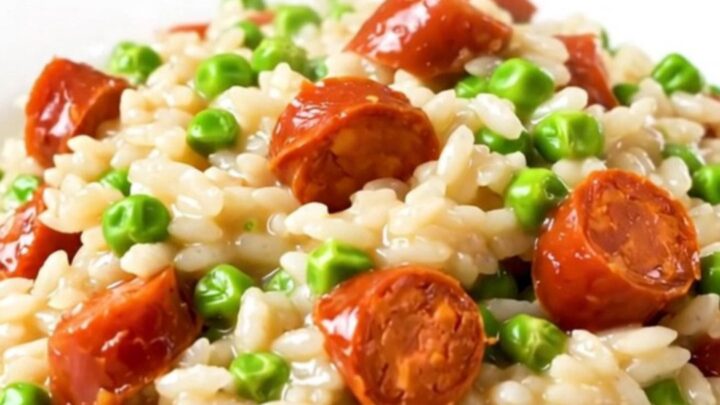
- Finish and serveStir in the frozen peas during the final five minutes of cooking. Once the peas are heated through and the risotto reaches the desired glossy texture, turn off the heat and let the dish rest for five minutes before serving on individual plates.Look for The risotto should be glossy, creamy, and hold its shape slightly on a spoon.Tip If the risotto appears too dry, add a splash of hot water or broth to loosen the consistency before serving.
In the final minutes, the vibrant green peas are stirred in to add color and sweetness. The risotto should look glossy and cohesive.
After turning off the heat, the brief resting period allows the flavors to meld and the final consistency to settle, ensuring the dish is perfectly creamy and ready for serving on a warm plate.
Common mistakes
A common mistake is using the wrong type of rice; long-grain or basmati rice will not release enough starch, resulting in a watery, separate-grained dish rather than creamy risotto.
Overcooking the rice can lead to a mushy texture, so monitor the slow cooker toward the end of the cooking time. Additionally, failing to add enough liquid can cause the rice to burn at the bottom of the insert, so ensure the rice is fully submerged.
How to tell it’s done
The risotto is done when the arborio rice is tender but still offers a slight resistance when bitten, commonly referred to as al dente. The chorizo must reach an internal temperature of at least 160°F (71°C).
The final dish should have a glossy, creamy appearance where the rice grains are suspended in a thick, flavorful sauce. If the mixture appears too thick, stir in small increments of hot water until the desired consistency is reached.
- Ground meat: 160°F (71°C) in the thickest part
Up next · Part 3 of 3
2 variations · storage & make-ahead · 3 answers · printable card
Tips, FAQ & printable recipe (Part 3)← Back to the ingredients (Part 1)