Dinner · Part 2 of 3: Instructions
Slow-Cooker Chili Lime Butter Shrimp with Lemon and Capers Step-by-step instructions
- Prep
- Cook
- Total
- Serves
- 4
Before you start
Before starting, pat the shrimp dry with paper towels and arrange them in the slow cooker. Thinly slice the lemon and measure out the capers, white wine, butter, and cilantro.
If using a block of butter, melt it in the microwave or on the stovetop until just liquid. Have all ingredients ready so the layering process is quick and seamless.
Ingredients at a glance (9)
- 2 lb large peeled, deveined shrimp
- 1 large lemon, thinly sliced
- 3 tbsp capers, drained
- 1/2 cup dry white wine
- 1/2 cup unsalted butter, melted
- chili lime seasoning, to taste
- 1/4 cup fresh cilantro, chopped
- cooked white rice, for serving
- lemon wedges, for serving
Instructions
Layer and Season
- Layer the Shrimp and AromaticsPlace the peeled and deveined shrimp in an even layer in the bottom of a 6-quart slow cooker. Scatter the lemon slices and capers over the shrimp, then pour the white wine evenly over the top.Look for The shrimp should be in a single layer, with lemon slices and capers distributed evenly.Tip Use raw, not cooked, shrimp so they poach gently in the sauce.
- Mix the Chili Lime ButterIn a small bowl, stir the melted butter with the chili lime seasoning until well combined. Pour the seasoned butter over the shrimp and aromatics, then sprinkle with the chopped cilantro.Look for The butter mixture should be smooth and evenly drizzled over the shrimp.Tip Adjust the amount of chili lime seasoning to taste—start with 1 teaspoon and add more if desired.
The shrimp should be in a single layer on the bottom of the slow cooker, with lemon slices, capers, and white wine distributed evenly.
The chili lime butter should be drizzled over the top, and the cilantro scattered. The aroma is fresh and citrusy with a hint of spice.
Slow Cook
- Slow Cook on LowCover the slow cooker and cook on low for 1 1/2 to 2 hours, until the shrimp are pink, opaque, and cooked through. Do not stir during cooking to keep the shrimp tender.Look for The sauce will be bubbling gently around the edges, and the shrimp will be pink and firm.Safe temperature 145°F (63°C) internal temperature (shellfish)Tip Cooking on low prevents the shrimp from becoming rubbery.
After 1 1/2 to 2 hours on low, the sauce should be gently bubbling and the shrimp should be pink and opaque. The butter and wine will have melded into a glossy, fragrant sauce. Do not lift the lid too often, as that releases heat and extends cooking time.
Serve
- Serve Over RiceUsing a slotted spoon, transfer the shrimp and aromatics to a serving platter or individual plates. Spoon some of the chili lime butter sauce over the top. Serve hot with steamed white rice and lemon wedges on the side.Look for The shrimp should be glossy with sauce, and the rice should be fluffy.Tip Squeeze fresh lemon juice over the shrimp just before eating for extra brightness.
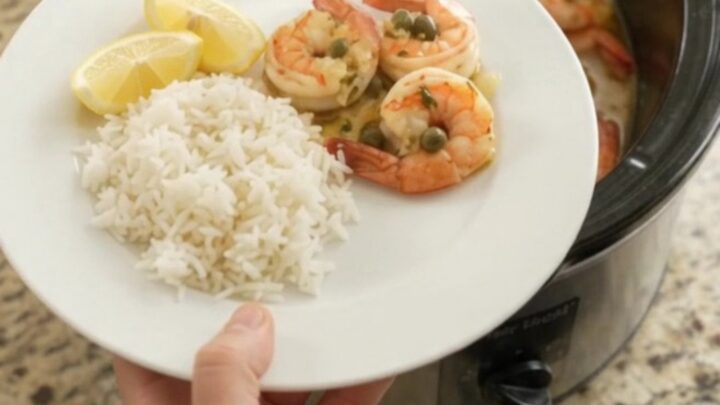
The shrimp are tender and coated in a shiny, buttery sauce. The lemon slices are soft and the capers have plumped up. Serve immediately over rice with lemon wedges, spooning extra sauce over each portion.
Common mistakes
One common mistake is using a high heat setting, which can cause the shrimp to cook too quickly and become tough. Always cook on low.
Another mistake is stirring the shrimp during cooking, which can break them apart; let them cook undisturbed. Finally, be careful not to add too much chili lime seasoning—start with a small amount and taste the sauce before serving.
How to tell it’s done
The shrimp are done when they are pink, opaque, and curl into a loose 'C' shape. The internal temperature should reach 145°F (63°C) when measured with an instant-read thermometer inserted into the thickest part of a shrimp.
The sauce will be hot and bubbling around the edges. Do not overcook, as the shrimp will become tough and rubbery.
- Shellfish: 145°F (63°C) in the thickest part
Up next · Part 3 of 3
4 variations · storage & make-ahead · 5 answers · printable card
Tips, FAQ & printable recipe (Part 3)← Back to the ingredients (Part 1)