Appetizers · Part 2 of 3: Instructions
Slow Cooker Chili Cheese Dip for Easy Entertaining Step-by-step instructions
- Prep
- Cook
- Total
- Serves
- 8
Before you start
Before you begin, ensure your slow cooker is clean and positioned on a stable, heat-resistant surface. Check that the power cord is accessible and clear of any spills. Prepare the cheese by cutting it into uniform 1-inch cubes; consistent sizing is crucial for even melting.
If your green chiles are canned, drain them thoroughly to avoid adding excess liquid that might thin the dip too much. Gather all your ingredients and measuring tools before starting to ensure the assembly process goes smoothly and quickly.
Ingredients at a glance (4)
- 20 oz canned beef chili
- 4 oz canned diced green chiles, drained
- 1 tsp onion powder
- 16 oz melting cheese, cut into 1-inch cubes
Instructions
Layering the ingredients
- Layer the BasePour the canned beef chili into the base of the slow cooker insert. Use a spatula to spread it into an even layer, ensuring it covers the bottom completely to prevent the cheese from scorching during the cooking process.Look for the chili is evenly spread across the bottom of the slow cookerTip ensure the ceramic insert is clean and dry before adding the chili to ensure even heating.
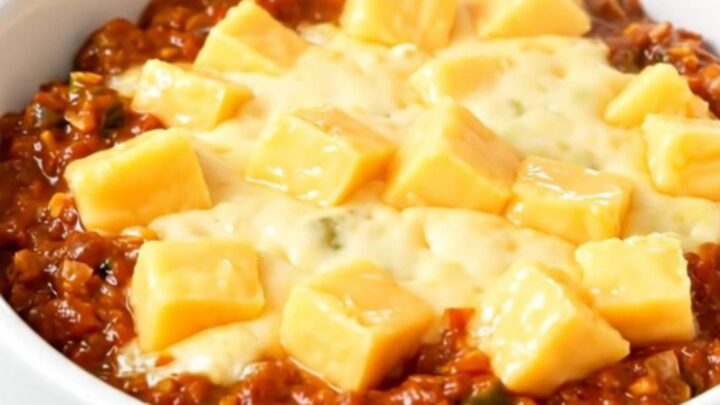
At this stage, the base of the slow cooker should be neatly covered with the chili. The green chiles, seasoning, and cheese cubes should be layered clearly on top. Ensure the cheese is distributed evenly so that no large clumps are left in one area, which helps facilitate faster and more uniform melting once the slow cooker is activated.
Assembling the dip
- Add Seasonings and CheeseScatter the drained diced green chiles over the chili layer. Sprinkle the onion powder evenly over the top. Finally, distribute the cubed melting cheese across the entire surface to create a thick, consistent layer of cheese that will melt into the chili.Look for the cheese cubes are distributed evenly in a single layerTip cut the cheese into uniform cubes to ensure everything melts at the same speed.
Ensure all ingredients are properly layered before closing the lid. The dip should look like a well-structured stack of ingredients inside the slow cooker. Double-check that you have added the onion powder, as it is easy to miss this small amount during the assembly process. Once the lid is secured, you are ready to begin the heating phase.
Heating and finishing
- Cook and ServeCover the slow cooker and cook on low for 2 hours until the cheese is completely melted and the dip is steaming. Stir well before serving to combine the ingredients into a smooth, thick dip that reaches a safe internal temperature of 160°F (71°C) for the ground meat component.Look for the cheese is fully melted and the mixture is glossy and hotSafe temperature 160°F (71°C) internal temperature (ground meat)Tip stirring halfway through can help speed up the melting process if needed.
The final dip should be completely homogeneous, with the chili and melted cheese fully incorporated. The texture should be thick and spreadable. Before serving, give the mixture a thorough stir to ensure all flavors are combined.
The dip should be steaming hot and appear smooth, signaling it is ready to be transferred to a serving bowl or left in the slow cooker on a warm setting.
Common mistakes
A common mistake is using a cheese that does not melt well, such as an aged or hard cheese, which can result in a grainy or lumpy texture. Another error is failing to cut the cheese into uniform cubes, which leads to uneven melting times.
Avoid opening the lid too frequently during the cooking process, as this releases heat and moisture, which can significantly extend the cooking time and potentially dry out the edges of the dip.
How to tell it’s done
The dip is considered done when the cheese has completely melted into the chili base and the mixture is heated through. The consistency should be thick, smooth, and glossy.
Use a food thermometer to ensure the internal temperature of the dip reaches 160°F (71°C) to confirm that the ground meat within the chili has been safely heated. It should look uniform and smell savory and rich, with no unmelted cheese chunks remaining.
- Ground meat: 160°F (71°C) in the thickest part
Up next · Part 3 of 3
2 variations · storage & make-ahead · 3 answers · printable card
Tips, FAQ & printable recipe (Part 3)← Back to the ingredients (Part 1)