Dinner · Part 1 of 3: Ingredients
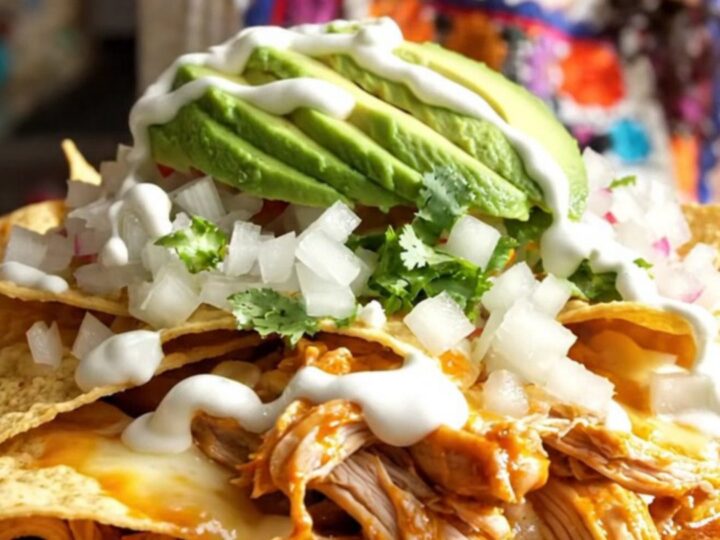
Easy Slow Cooker Chilaquiles Rojos with Shredded Chicken
- Prep
- Cook
- Total
- Serves
- 6
Discover the ultimate time-saving dinner hack that brings vibrant Mexican flavors straight to your table without the hassle of stovetop cooking. This slow cooker recipe transforms simple pantry staples into a comforting, cheesy feast that the whole family will love. By utilizing the slow cooker for both the chicken and the final assembly, you achieve deep flavor and perfect texture with minimal cleanup. It is the ideal solution for busy weeknights when you crave something hearty, flavorful, and satisfyingly warm.
Chilaquiles are a staple of Mexican home cooking, traditionally made by simmering tortilla pieces in a flavorful salsa until softened. This simplified version uses a slow cooker to infuse the chicken with smoky guajillo sauce, creating a rich base for the dish.
Once the chicken is perfectly tender, the addition of crunchy corn tortilla chips and melty Oaxaca cheese creates a wonderful contrast in textures. This recipe is designed for ease, allowing you to prepare a delicious, restaurant-style meal with just a few minutes of active effort, making it perfect for both brunch and dinner occasions.
Ingredients
Main
- 2 lb chicken breast
- 28 oz red guajillo enchilada sauce
- 1 bag thick-cut corn tortilla chips
- 3 cups shredded Oaxaca cheese
Garnish
- sliced avocado, for serving
- Mexican crema, for serving
- diced onion, for serving
- fresh cilantro, for serving
- fresh lime wedges, for serving
Why this recipe works
The slow cooking process is essential for breaking down the chicken fibers, resulting in incredibly tender, shredded meat that absorbs the smoky flavors of the guajillo sauce. By cooking the chicken directly in the sauce, you ensure that every bite is seasoned perfectly from within, providing a deep, complex foundation that defines the dish. This method eliminates the need for precooking or browning, streamlining the workflow while maximizing the depth of flavor that only long, slow simmering can achieve effectively.
Folding the tortilla chips into the sauce at the end of the cooking process is the secret to maintaining the right balance of texture. This technique allows the chips to soften slightly while retaining their structural integrity, providing that signature chilaquiles mouthfeel.
The final fifteen-minute heating phase ensures the Oaxaca cheese reaches a perfect, molten state, binding the components together. This carefully timed approach prevents the chips from becoming overly soggy, ensuring a delightful experience that mimics traditional preparation methods without the intensive stovetop monitoring.
Notes and substitutions
When selecting ingredients, opt for high-quality, thick-cut corn tortilla chips that are specifically designed for dipping or chilaquiles. These chips are sturdier than standard thin restaurant chips and will hold up better to the sauce without dissolving completely.
For the cheese, authentic Oaxaca cheese is ideal for its superior melting properties and mild, creamy flavor. If you cannot find it, low-moisture mozzarella or Monterey Jack are excellent alternatives that provide a similar stretch and melt, ensuring the final dish remains beautifully cheesy and satisfying.
The choice of equipment is straightforward, as a standard slow cooker with a capacity of at least four to six quarts works perfectly for this recipe. If you prefer a more intense flavor, you can customize the sauce by adding a pinch of cumin or smoked paprika, though the guajillo base is naturally flavorful on its own.
Always remember to handle raw chicken carefully, ensuring that your preparation area is thoroughly cleaned after handling to maintain food safety standards in your kitchen while you prepare this delicious, hearty meal for your household.
- Oaxaca cheese: Low-moisture mozzarella or Monterey Jack cheese
- Guajillo enchilada sauce: Any red enchilada sauce of choice
Equipment
- Slow cooker
- Tongs
- Cutting board
- Knife
- Serving spoon
Up next · Part 2 of 3
3 steps · 4 h 15 min of cooking · what to look for at each stage
Step-by-step instructions (Part 2)