Dinner · Part 2 of 3: Instructions
Slow Cooker Chicken with Fennel and Pastis Step-by-step instructions
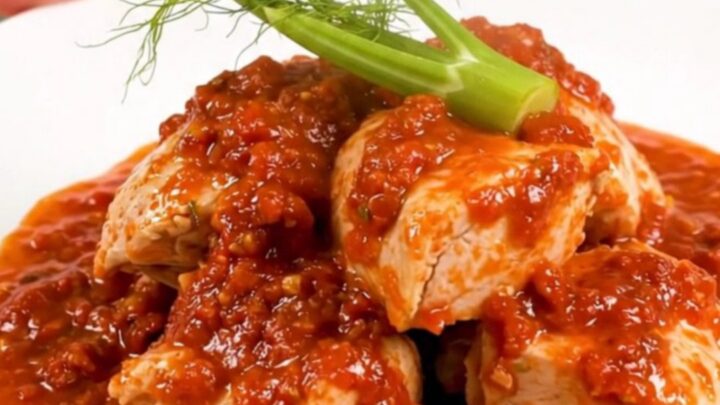
- Prep
- Cook
- Total
- Serves
- 4
Before you start
Before starting, ensure all ingredients are ready for assembly. Thoroughly wash the fennel bulbs and remove any tough outer layers if necessary. Slice the fennel into thin, uniform strips to ensure even cooking.
If you are handling raw chicken, prepare your workspace by clearing any unnecessary items, and remember to wash your hands, the cutting board, and the knife immediately after contact to prevent cross-contamination.
Ingredients at a glance (5)
- 4 lbs chicken thighs, bone-in and skin-on
- 2 bulbs fennel, thinly sliced
- 1 cube bouillon cube, crumbled
- 2 cups crushed tomato sauce
- 2 tbsp pastis
Instructions
Layering the ingredients
- Prepare the basePlace the chicken thighs into the bottom of the slow cooker, ensuring they are in an even layer. Arrange the thinly sliced fennel bulbs over the chicken pieces to provide aromatics during the cooking process.Look for Chicken is arranged in a single layer at the bottom of the cooker.Tip Ensure the fennel is sliced thinly to allow it to soften completely during the long cook time.
At this stage, the slow cooker should be neatly layered with chicken at the bottom and sliced fennel on top. The ingredients should look fresh and organized. Ensure the power cord is clear of any heat sources and the slow cooker is placed on a stable, heat-resistant surface before you turn the appliance on to begin the cooking process.
Seasoning and saucing
- Season and pourCrumble the bouillon cube evenly over the fennel and chicken. In a measuring cup, mix the crushed tomato sauce with the pastis, then pour the mixture over the ingredients in the slow cooker to coat everything thoroughly.Look for The sauce covers the chicken and fennel evenly.Tip Use a whisk to ensure the bouillon is fully crumbled before sprinkling.
Once the bouillon is crumbled and the tomato-pastis mixture is poured over the top, the ingredients should look unified.
There is no need to stir the contents, as the slow cooker will distribute the heat and moisture evenly. Ensure the lid is securely closed to trap the steam and aromas inside, which is essential for the slow-cooking method.
Cooking to completion
- Cook and serveCover the slow cooker and cook on low for 4 hours until the chicken is tender and reaches an internal temperature of 165°F (74°C). Allow the chicken to rest for 5 minutes before serving.Look for Chicken is fork-tender and the sauce has thickened slightly.Safe temperature 165°F (74°C) internal temperature (poultry)Tip Check the internal temperature at the thickest part of the thigh away from the bone.
At the end of the cooking time, the kitchen should be filled with the fragrant, herbal scent of fennel and anise. The sauce will have thickened slightly and turned a rich, savory color. Before serving, verify the doneness with a thermometer to ensure the chicken is perfectly cooked, tender, and safe to eat for everyone at the table.
Common mistakes
A common mistake is using chicken breasts instead of thighs, which will likely result in dry, stringy meat after four hours of cooking. Another error is failing to crumble the bouillon cube sufficiently, which can lead to concentrated pockets of saltiness.
Finally, avoid lifting the lid too frequently during the cooking process, as each time you open the slow cooker, significant heat escapes, which can extend the cooking time and impact the final tenderness of the ingredients.
How to tell it’s done
The dish is fully cooked when the chicken reaches an internal temperature of 165°F (74°C) as measured by a meat thermometer inserted into the thickest part of the meat.
The chicken should be easily pierced with a fork, and the fennel should be translucent and tender. Always let the chicken rest for at least 5 minutes before serving to allow the juices to redistribute for the best texture.
- Poultry: 165°F (74°C) in the thickest part
Up next · Part 3 of 3
2 variations · storage & make-ahead · 3 answers · printable card
Tips, FAQ & printable recipe (Part 3)← Back to the ingredients (Part 1)