Dinner · Part 2 of 3: Instructions
Slow Cooker Chicken Picadillo for a Hearty Weeknight Meal Step-by-step instructions
- Prep
- Cook
- Total
- Serves
- 4
Before you start
Before you begin, ensure your chicken thighs are trimmed of any excess fat and cut into uniform, bite-size pieces. Peeling the potatoes and cutting them into cubes of a similar size to the chicken will ensure they cook at the same rate.
Prepare your measuring cups and spoons in advance so that adding the spices and sauce becomes a seamless process. Clear a space on your counter for the slow cooker and ensure it is plugged into a safe, dry outlet away from the edge of the surface.
Ingredients at a glance (7)
- 1 1/2 lb chicken thighs, cut into bite-size pieces
- 2 cups potatoes, peeled and cut into small cubes
- 1/2 cup green olives, pitted
- 1/4 cup raisins
- 1 tsp ground cumin
- 1 tsp dried oregano
- 15 oz tomato sauce
Instructions
Layering the ingredients
- Assemble the ingredientsPlace the bite-size chicken thigh pieces into the bottom of the slow cooker insert. Evenly scatter the cubed potatoes, green olives, and raisins over the chicken to ensure a balanced flavor distribution throughout the dish.Look for Chicken is at the bottom layerTip Ensure the chicken pieces are relatively uniform in size for even cooking.
At this stage, your slow cooker should be filled with the raw chicken, potatoes, olives, and raisins. Ensure the ingredients are arranged in an even layer.
The goal is to set the foundation for the braising process, so check that everything fits comfortably without overfilling the insert.
Adding aromatics and sauce
- Season and add liquidSprinkle the ground cumin and dried oregano evenly over the ingredients in the slow cooker. Pour the tomato sauce over the top, ensuring it covers the chicken and vegetables to keep everything moist during the braising process.Look for Sauce covers all ingredients completelyTip Do not stir the ingredients; the slow cooker will meld the flavors perfectly.
The spices should be evenly distributed and the tomato sauce should be poured over the top. At this point, the slow cooker is ready to be covered. Check that the lid is tightly sealed to ensure a proper environment for the braising process to begin effectively.
Slow cooking to perfection
- Slow cook and serveCover the slow cooker and cook on low for 4 hours. Once the time is up, verify that the chicken reaches an internal temperature of at least 165°F (74°C). Allow the dish to rest for 5 minutes before serving to let the sauce thicken and flavors settle.Look for Chicken is tender and cooked throughSafe temperature 165°F (74°C) internal temperature (poultry)Tip Check the potatoes for tenderness; they should be soft enough to pierce with a fork.
After four hours, the kitchen should smell savory and aromatic. Check that the chicken is tender and the sauce has thickened. Once you confirm the internal temperature, the dish is ready to rest before serving, allowing the flavors to meld into the final, delicious result.
Common mistakes
Avoid the temptation to lift the lid frequently during the cooking process. Each time the lid is removed, heat escapes, which significantly increases the cooking time and can lead to uneven results.
Another common mistake is over-salting the dish; remember that the green olives are naturally salty, so it is better to taste the finished dish and add a small amount of salt only if truly necessary after the cooking cycle is complete.
How to tell it’s done
The chicken is perfectly done when it is fork-tender and pulls apart easily. Using a digital meat thermometer, ensure the thickest pieces of chicken have reached an internal temperature of at least 165°F (74°C).
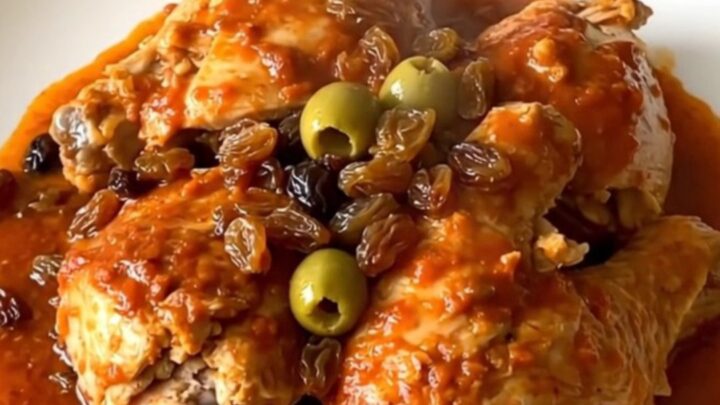
The potatoes should be completely soft and offer no resistance when pierced with a knife. The sauce should have a thickened, rich consistency that coats the back of a spoon, and the raisins should be plump and tender from absorbing the tomato sauce.
- Poultry: 165°F (74°C) in the thickest part
Up next · Part 3 of 3
2 variations · storage & make-ahead · 3 answers · printable card
Tips, FAQ & printable recipe (Part 3)← Back to the ingredients (Part 1)