Dinner · Part 2 of 3: Instructions
Slow Cooker Cherry Chipotle Chicken Thighs Step-by-step instructions
- Prep
- Cook
- Total
- Serves
- 4
Before you start
Before beginning, ensure your slow cooker insert is clean and dry. Remove the chicken thighs from the refrigerator about 20 minutes before cooking so they are not ice-cold when they hit the slow cooker. Peel and thinly slice the red onion.
Gather your chipotle powder and cherry sauce so everything is ready to assemble.
Having all your ingredients prepped and within reach makes the assembly process seamless and ensures you can get the slow cooker running in just a few minutes, leaving the rest of the work to the appliance while you handle other tasks.
Ingredients at a glance (4)
- 4 lbs bone-in skin-on chicken thighs
- 1 large red onion, sliced
- 1 tbsp chipotle powder
- 1 cup dark red cherry sauce
Instructions
Assembly
- Prepare the slow cookerArrange the chicken thighs in the slow cooker insert, placing them skin-side up to ensure even cooking and better texture. Scatter the sliced red onion over the chicken thighs, ensuring an even distribution so the flavor permeates the meat during the long, slow cooking process.Look for Chicken thighs are arranged in a single layer with onions distributed on top.Tip Do not overcrowd the slow cooker to ensure the heat circulates properly.
The chicken thighs should be arranged in the slow cooker with the skin facing up. The red onions are scattered over the top. Everything looks organized and ready for the seasoning and sauce application.
Seasoning
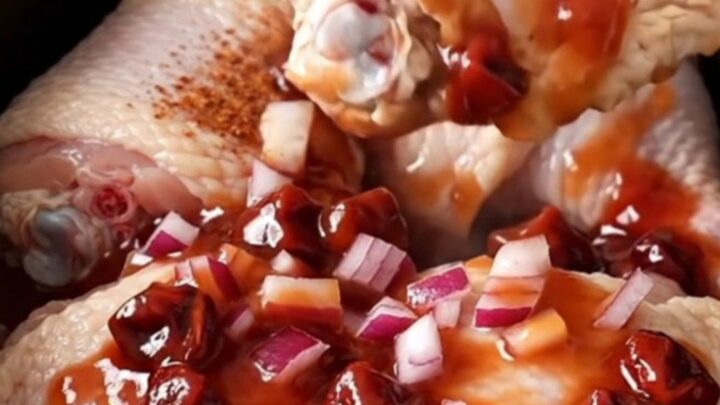
- Season and add sauceSprinkle the chipotle powder evenly over the chicken and onions to add a smoky depth. Pour the dark red cherry sauce over the entire mixture, ensuring the chicken is coated for maximum flavor absorption as it simmers in the slow cooker.Look for The cherry sauce covers the chicken and the chipotle powder is visible.Tip Use a silicone spatula to get all the sauce out of the bowl.
The chipotle powder is dusted over the chicken and onions, providing an aromatic base. The cherry sauce is spooned over the top, creating a vibrant, dark red layer that promises deep flavor.
Cooking
- Cook and serveCover and cook on low for 4 hours until the chicken is tender and fully cooked. Verify the internal temperature of the thickest part of the thigh reaches 165°F (74°C). Let the chicken rest for 5 minutes before serving to ensure the juices redistribute.Look for The chicken skin is soft, the meat is opaque white throughout, and the sauce is thickened.Safe temperature 165°F (74°C) internal temperature (poultry)Tip Check the temperature with a meat thermometer to ensure food safety.
The chicken is fully cooked, tender, and coated in a thickened, glossy cherry chipotle sauce. The meat is opaque white, and the onions are soft and caramelized, signaling the dish is ready.
Common mistakes
A common mistake is using a sauce that is too thin, which results in a watery dish rather than a rich glaze. If you notice your sauce is too thin at the end of the cooking time, you can remove the chicken and simmer the sauce on the stovetop for a few minutes to thicken it.
Another mistake is skipping the rest period; letting the chicken sit is essential for texture. Finally, avoid lifting the lid too often, as this releases heat and moisture, significantly increasing the cooking time and potentially drying out the meat during the long process.
How to tell it’s done
The chicken is done when the meat is opaque and pulls away easily from the bone. Using a meat thermometer is the most reliable way to ensure safety; insert it into the thickest part of the thigh, making sure not to touch the bone. The internal temperature must reach at least 165°F (74°C).
The skin will be very soft, and the cherry chipotle sauce will have thickened into a dark, flavorful glaze that coats the chicken beautifully. Always allow the meat to rest for at least 5 minutes before serving to ensure the juices remain inside.
- Poultry: 165°F (74°C) in the thickest part
Up next · Part 3 of 3
2 variations · storage & make-ahead · 3 answers · printable card
Tips, FAQ & printable recipe (Part 3)← Back to the ingredients (Part 1)