Dinner · Part 2 of 3: Instructions
Slow Cooker Cheesy Broccoli Rice Chicken Thighs Step-by-step instructions
- Prep
- Cook
- Total
- Serves
- 4
Before you start
Before starting, ensure your slow cooker insert is clean and dry. Gather all your ingredients, including the chicken, frozen broccoli, ranch seasoning, and cheddar soup.
If you are serving this with rice, start cooking your rice on the stovetop or in a rice cooker so it is ready just as the chicken finishes its cooking cycle. Having your ingredients ready to assemble prevents unnecessary delays and helps you get the meal into the slow cooker quickly.
Ingredients at a glance (4)
- 4 pieces boneless skinless chicken thighs
- 2 cups frozen broccoli florets
- 1 packet ranch seasoning mix
- 1 cup condensed cheddar cheese soup
Instructions
Layering the Base
- Assemble the IngredientsPlace the boneless skinless chicken thighs in the bottom of the slow cooker insert in a single flat layer. Scatter the frozen broccoli florets evenly over the chicken pieces to ensure they cook consistently.Look for Chicken is arranged in a flat layer.Tip Ensure the chicken is not overlapping too much so it cooks evenly in the slow cooker.
The chicken should be arranged in a single, even layer at the bottom of the slow cooker. This ensures that the meat is fully exposed to the heat and the liquids that will form during the cooking process. The broccoli should be distributed evenly across the top to ensure uniform steaming throughout the meal.
Adding Seasonings and Sauce
- Season and Add SauceSprinkle the entire contents of the ranch seasoning packet over the chicken and broccoli. Pour the condensed cheddar cheese soup mixture evenly over the top of the ingredients. Cover the slow cooker with its lid.Look for Cheese soup is poured over the top.Tip Distribute the seasoning evenly for a balanced flavor in every bite.
The ranch seasoning should be spread evenly over the ingredients to ensure every bite is well-seasoned. The cheddar soup should be poured carefully to cover the mixture, creating a blanket that will melt down and combine with the juices to form a rich, savory sauce as it heats up during the slow cooking process.
Final Slow Cooking
- Slow Cook and ServeCook on low for 4 hours until the chicken reaches an internal temperature of 165°F (74°C). Allow the chicken to rest for 5 minutes before serving over warm fluffy rice. Ensure any leftovers are refrigerated within 2 hours.Look for Chicken is tender and cooked through.Safe temperature 165°F (74°C) internal temperature (poultry)Tip Check the temperature with a meat thermometer to ensure safety.
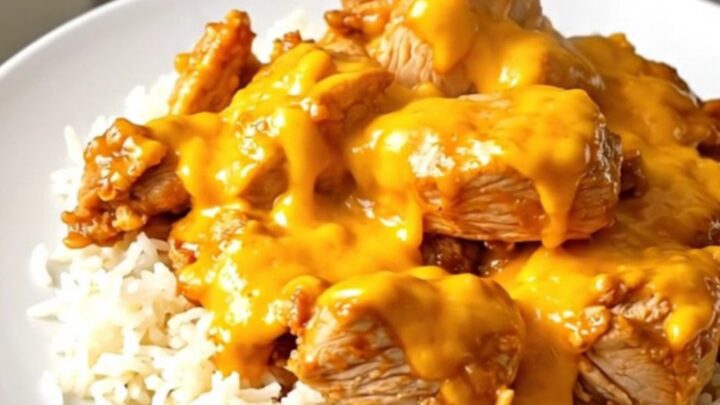
The dish is finished when the chicken is tender and reaches an internal temperature of 165°F (74°C). The sauce should appear smooth and creamy, having incorporated the ranch seasoning and the juices from the chicken.
The broccoli should be tender but not falling apart, maintaining a pleasant texture that complements the creamy sauce.
Common mistakes
A common mistake is overcrowding the slow cooker or using cuts of meat that are too lean, which can lead to dry results. Avoid lifting the lid during the cooking process, as this releases essential heat and steam, significantly increasing the total cooking time and potentially affecting the final texture of the broccoli.
Additionally, ensure you do not add too much extra liquid, as the soup and the moisture from the chicken and vegetables provide enough liquid for a perfect sauce.
How to tell it’s done
The chicken is perfectly cooked when it reaches an internal temperature of 165°F (74°C) as measured by a meat thermometer. At this stage, the chicken should be tender enough to pull apart easily with a fork, and the sauce should be thick, creamy, and bubbling.
If the meat offers resistance, continue cooking for another 20 minutes before checking again. Let the chicken rest for 5 minutes to allow the juices to redistribute before serving over your prepared rice.
- Poultry: 165°F (74°C) in the thickest part
Up next · Part 3 of 3
2 variations · storage & make-ahead · 3 answers · printable card
Tips, FAQ & printable recipe (Part 3)← Back to the ingredients (Part 1)