Dinner · Part 2 of 3: Instructions
Slow Cooker Cheddar Spinach Artichoke Turkey Breast Step-by-step instructions
- Prep
- Cook
- Total
- Serves
- 4
Before you start
Before starting, pat the turkey breast cutlets dry with paper towels and season lightly with salt and pepper if desired. Drain the artichoke hearts and give them a rough chop if they are whole. Measure out the spinach, cheddar, and butter so everything is ready to layer.
No need to pre-cook anything—this is a true dump-and-go meal. Have a 5 to 6 quart slow cooker ready, and if you plan to serve over rice, start it before the turkey is done so everything is hot at the same time.
Ingredients at a glance (6)
- 1 1/2 lb boneless, skinless turkey breast cutlets
- 4 cups fresh baby spinach leaves
- 1 can (14 oz) artichoke hearts, drained and quartered
- 1 can (10.5 oz) condensed cream of chicken soup
- 1 1/2 cups shredded sharp yellow cheddar cheese
- 2 tbsp unsalted butter, cut into small pieces
Instructions
Layer and Cook
- Layer the IngredientsPlace the turkey breast cutlets in the bottom of the slow cooker, spreading them out evenly. Scatter the fresh spinach leaves over the turkey, then add the quartered artichoke hearts on top. Spoon the condensed cream of chicken soup over the vegetables and turkey, spreading it as evenly as possible. Sprinkle the shredded sharp cheddar cheese over the soup layer, then dot with the butter pieces.Look for The slow cooker is filled with layers of turkey, greens, artichokes, soup, cheese, and butter.Tip Do not stir the ingredients before cooking. The layers will meld as they cook.
- Cover and Cook on LowCover the slow cooker with the lid and cook on low heat for 4 hours, or until the turkey is tender and easily shreds with a fork. Avoid opening the lid during cooking to keep the heat and moisture inside.Look for After 4 hours, the turkey should be fork-tender and the sauce bubbling around the edges.Safe temperature 165°F (74°C) internal temperature (poultry)Tip If the slow cooker runs hot, check at 3 1/2 hours to prevent overcooking.
At the end of phase 1, the slow cooker is filled with distinct layers: turkey on the bottom, then spinach and artichokes, topped with soup, cheese, and butter.
As it cooks, the spinach will wilt and the cheese will melt, creating a bubbling, fragrant sauce. The turkey should be tender and easily pierced with a fork. The aroma is savory and rich, with hints of cheddar and herbs from the soup.
Shred and Season
- Shred the TurkeyOnce the turkey is fully cooked and reaches an internal temperature of 165°F (74°C), use two forks to shred the turkey breast directly in the slow cooker. Stir the shredded turkey into the creamy sauce, making sure it is fully coated.Look for The turkey shreds easily and is coated in a thick, cheesy sauce.Tip Shred while the turkey is still warm for the best texture.
- Season and AdjustTaste the mixture and season with salt and black pepper if desired. If the sauce seems too thick, stir in a splash of chicken broth or milk to reach the desired consistency.Look for The sauce is creamy and seasoned to taste.Tip The condensed soup adds salt; season lightly first.
After shredding, the turkey is broken into bite-sized pieces and fully coated in the creamy sauce. The spinach is wilted into the mixture, and the artichokes are tender. The sauce should be thick enough to cling to the turkey but still spoonable. Season carefully, as the soup and cheese add salt. The dish looks like a creamy, chunky pot pie filling, ready to be served.
Serve and Enjoy
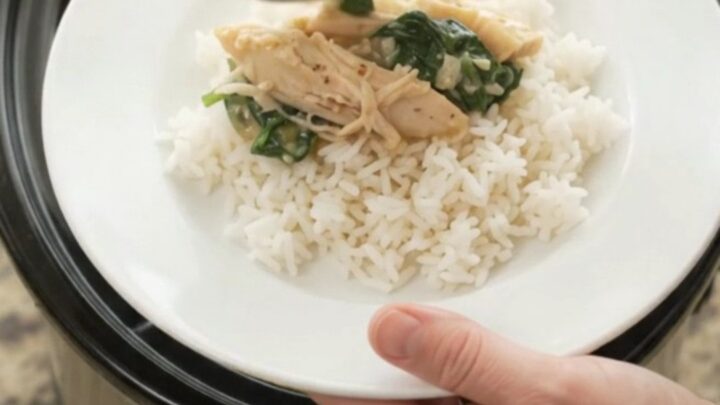
- Serve over RiceSpoon the hot turkey mixture over steamed jasmine rice or your favorite grains. Garnish with extra shredded cheddar or fresh herbs if desired, though the dish is delicious as is.Look for The creamy turkey mixture is served over fluffy rice.Tip For a low-carb option, serve over cauliflower rice or alongside roasted vegetables.
The final dish is a generous spoonful of creamy turkey mixture over steamed rice. The cheese sauce is glossy and rich, the turkey is moist and tender, and the spinach and artichokes add color and texture. The aroma is comforting and cheesy. Serve immediately while hot, and enjoy the satisfaction of a meal that came together with minimal effort.
Common mistakes
One common mistake is lifting the lid to check on the food, which releases heat and extends cooking time. Trust the slow cooker and wait until the minimum cook time has passed. Another pitfall is using low-quality cheese that doesn't melt smoothly; always shred your own from a block for the best texture.
Overcooking can make the turkey dry, so check at the lower end of the time range. Finally, resist the urge to stir the layers before cooking—the layering helps the flavors develop.
How to tell it’s done
The turkey is done when it is fork-tender and shreds easily, and the internal temperature registers 165°F (74°C) on an instant-read thermometer. The sauce should be bubbling gently around the edges and have thickened slightly.
The spinach will be wilted and the cheese fully melted and incorporated. If the sauce seems too thin, let it cook uncovered for an additional 15 minutes to reduce. If too thick, stir in a little broth or milk to loosen it.
- Poultry: 165°F (74°C) in the thickest part
Up next · Part 3 of 3
4 variations · storage & make-ahead · 5 answers · printable card
Tips, FAQ & printable recipe (Part 3)← Back to the ingredients (Part 1)