Dinner · Part 2 of 3: Instructions
Slow-Cooker Carolina Vinegar and Crushed Pepper Country Ribs Step-by-step instructions
- Prep
- Cook
- Total
- Serves
- 4
Before you start
Before starting, ensure your slow cooker is clean and placed on a heat-resistant surface. Gather all ingredients and measure the spices carefully. Pat the pork ribs dry with paper towels to help the rub adhere better to the surface.
Have a pair of sturdy tongs ready for transferring the meat, and ensure you have enough space in your refrigerator if you are preparing the rub in advance.
Ingredients at a glance (7)
- 4 lb boneless country-style pork ribs
- 2 tbsp brown sugar
- 1 tbsp paprika
- 1 tsp black pepper
- 1 cup apple cider vinegar
- 1/4 cup ketchup
- 1 tbsp crushed red pepper flakes
Instructions
Seasoning the Meat
- Season the RibsCombine the brown sugar, paprika, and black pepper in a small bowl. Rub the mixture thoroughly over all sides of the boneless country-style pork ribs to ensure an even coating of flavor.Look for The ribs should be evenly coated in the spice rub before placing them into the slow cooker vessel.Tip Ensure the spices are massaged into the meat for the best flavor penetration.
The ribs should be thoroughly coated in the spice rub, with no dry patches of sugar or paprika visible. The aroma of the paprika and black pepper should be noticeable as you prepare the meat for the slow cooker vessel.
Slow Simmering Process
- Layer and SimmerPlace the seasoned ribs into the ceramic slow cooker. Pour the apple cider vinegar, ketchup, and crushed red pepper flakes over the top of the meat. Cover the slow cooker and cook on the low setting for exactly 7 hours. Ensure the meat reaches an internal temperature of 145°F (63°C) and let the meat rest at least 3 minutes before serving.Look for The ribs are ready when they are tender and shred easily with a fork.Safe temperature 145°F (63°C) internal temperature (steaks, chops and roasts)Tip Do not lift the lid during the first 6 hours to maintain the consistent cooking temperature.
As the ribs simmer, the liquid in the pot will begin to bubble gently. You should smell the sharp, tangy aroma of the apple cider vinegar beginning to mingle with the spice rub. The meat will start to soften as it absorbs the liquid.
Final Basting and Serving
- Baste and ServeOnce the cooking time is complete, carefully open the lid. Baste the ribs with the accumulated juices from the bottom of the pot. Serve the ribs immediately while hot, ensuring any leftovers are cooled within two hours before refrigerating.Look for The sauce should be bubbling and the meat should be pulling apart effortlessly.Tip If the sauce is too thin, you can remove the ribs and reduce the liquid in a saucepan over medium heat.
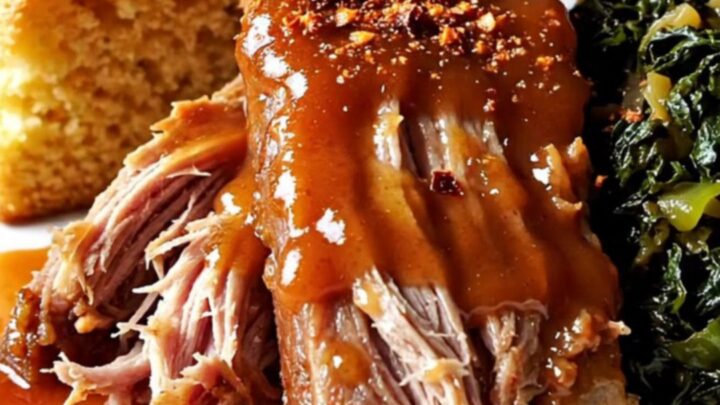
The ribs should be incredibly tender and look glossy from the vinegar mop sauce. The liquid at the bottom of the pot should be reduced and fragrant. Ensure the meat is hot throughout before plating it for immediate service.
Common mistakes
A common mistake is lifting the lid too frequently, which releases essential heat and steam, significantly increasing the cooking time. Avoid over-crowding the slow cooker, as this can lead to uneven cooking.
Additionally, ensure the ribs are not placed in the pot while they are still frozen; they should be thawed completely before seasoning.
Finally, failing to let the meat rest after cooking can result in a loss of moisture, making the pork feel drier than intended.
How to tell it’s done
The ribs are done when they reach an internal temperature of at least 145°F (63°C). Visually, the meat should be pulling away from the edges and should yield easily when poked with a fork.
It should be tender enough to shred, but still hold its structure. Always allow the meat to rest for at least 3 minutes after removing it from the heat to allow the juices to redistribute for the best texture.
- Steaks, chops and roasts: 145°F (63°C) in the thickest part, then a 3-minute rest
Up next · Part 3 of 3
2 variations · storage & make-ahead · 3 answers · printable card
Tips, FAQ & printable recipe (Part 3)← Back to the ingredients (Part 1)