Desserts · Part 2 of 3: Instructions
Easy Slow Cooker Caramel Apple Dump Cake Step-by-step instructions
- Prep
- Cook
- Total
- Serves
- 8
Before you start
Before starting, ensure your slow cooker insert is clean and dry. Gather all your ingredients so they are within reach, as the assembly process is very quick. If you choose to use nuts, chop them into small, uniform pieces to ensure they distribute evenly across the surface.
No special prep is required for the cake mix or apple filling, as they are used directly from their containers. Having everything ready will allow you to assemble the dessert in less than five minutes, making it an ideal choice for last-minute entertaining or quick evening cravings.
Ingredients at a glance (4)
- 2 cans apple pie filling
- 1/2 cup chopped pecans
- 1 box yellow cake mix
- 1/4 cup caramel syrup
Instructions
Layering the base
- Layering the basePour the two cans of apple pie filling evenly into the bottom of a 6-quart slow cooker. Ensure the filling is spread out to cover the entire base of the ceramic insert for even cooking.Look for The apples should form a consistent layer at the bottom of the cooker.Tip Spread the filling gently to avoid splashing the sides of the slow cooker.
The apple pie filling should be spread smoothly across the bottom of the slow cooker. Ensure the layer is uniform, as this provides the liquid base for the entire dessert.
Once the apples are in place, the surface should be relatively flat, providing a stable foundation for the remaining ingredients.
Adding the toppings
- Adding the toppingsScatter the chopped pecans uniformly over the apple filling. Once the nuts are distributed, shake the dry yellow cake mix directly from the packet over the top of the apples and nuts. Finish by drizzling the caramel syrup evenly across the entire surface of the dry cake mix.Look for The cake mix should be evenly distributed without any large dry clumps remaining on top.Tip Use a spoon to lightly level the cake mix if it piles up in the center.
The pecans, cake mix, and caramel should be layered systematically. The cake mix must completely cover the apples and nuts, and the caramel should be drizzled in a pattern that reaches most areas of the top. Check that no large, dry mounds of cake mix remain, as these will not cook properly.
Cooking the dessert
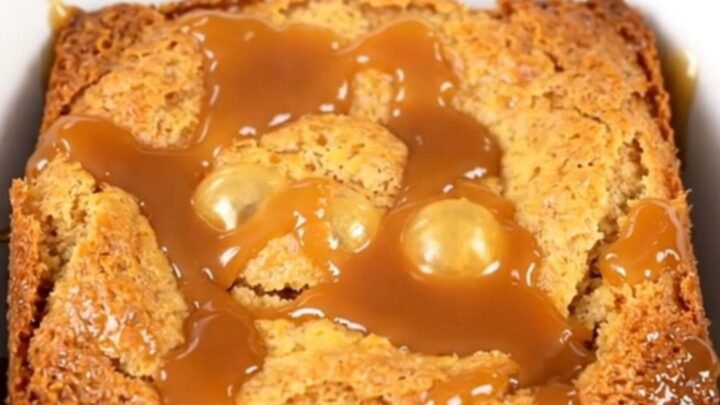
- Cooking the dessertCover the slow cooker with the lid and cook on high for three hours. The dump cake is finished when the edges are bubbling and the top is golden brown. Let the dessert rest for ten minutes before serving to allow the sauce to thicken slightly.Look for The edges will show a rich, bubbly caramel sauce and the top will appear golden.Tip Avoid lifting the lid frequently to ensure the temperature stays consistent for the cake to set.
At the end of the cooking phase, the entire surface should appear golden and the edges should be bubbling with a rich, dark sauce. The aroma of baked apples and caramel should be prominent. If the center still looks powdery, give it an additional fifteen minutes to finish setting.
Common mistakes
A common mistake is stirring the ingredients together during assembly. The magic of a dump cake lies in the layering, which allows the cake mix to steam and the caramel to create a sauce. If you mix the ingredients, the final texture will be gummy rather than light and cake-like.
Another mistake is lifting the lid too often during the cooking process. This releases heat and steam, which are essential for cooking the cake mix properly and ensuring the dessert sets as it should.
How to tell it’s done
The dump cake is done when the edges are bubbling vigorously and the caramel sauce has thickened. The top should appear golden and set, with no patches of dry cake mix visible.
A simple visual check is enough to determine doneness, as the fruit-based nature of this dish does not require internal temperature testing. Allow the cake to rest for ten minutes after turning off the heat; this step is crucial for the sauce to settle and reach the ideal consistency for serving.
Up next · Part 3 of 3
2 variations · storage & make-ahead · 3 answers · printable card
Tips, FAQ & printable recipe (Part 3)← Back to the ingredients (Part 1)