Dinner · Part 2 of 3: Instructions
Slow Cooker Buttery Herb Beef Shanks and Baby Potatoes Step-by-step instructions
- Prep
- Cook
- Total
- Serves
- 4
Before you start
Ensure the slow cooker insert is clean and dry. Gather all ingredients, measuring the herbs and broth precisely. If the beef shanks are very cold, let them sit at room temperature for about 20 minutes before starting.
Prepare the potatoes by washing them thoroughly; if they are large, halve them, but keep them whole if they are small baby potatoes for the best texture.
Ingredients at a glance (4)
- 4 bone-in beef shank rounds
- 1.5 lb baby gold potatoes
- 2 tbsp herb seasoning blend
- 1 cup buttery beef broth
Instructions
Assembly Phase
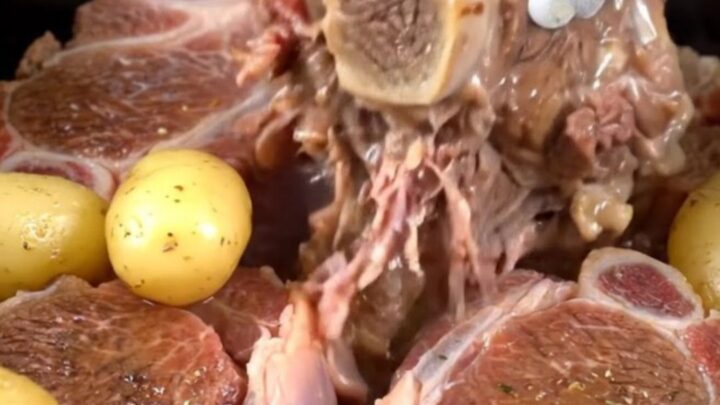
- Prepare the Slow CookerPlace the beef shank rounds into the bottom of the slow cooker insert. Arrange the baby gold potatoes around and on top of the beef slices to ensure even cooking throughout the process.Look for Beef is arranged in a single layer at the bottom.Tip Ensure the beef shanks are not overcrowded to allow even heat distribution.
The beef shanks should be arranged in a single layer at the bottom of the insert. The potatoes should be distributed around the meat, ensuring they are not piled too high. The insert should feel stable and ready for the liquid components.
Seasoning Phase
- Season and Add LiquidsSprinkle the herb seasoning blend evenly over the beef and potatoes. Pour the buttery beef broth over the ingredients, ensuring the herbs are well-distributed and the liquid coats the potatoes.Look for Liquid covers the base of the insert.Tip Use a whisk to combine the butter and broth before pouring for better emulsification.
The herbs should be evenly distributed over the beef and potatoes.
When the buttery broth is added, it should settle at the bottom, creating a pool that will slowly rise as the ingredients release their own juices during the cooking process.
Cooking and Finishing Phase
- Slow Cook and ServeCover the slow cooker and cook on low for 8 hours until the beef reaches an internal temperature of 145°F (63°C). Let the meat rest for 5 minutes before serving with the potatoes and sauce.Look for Beef is fork-tender and pulls away easily from the bone.Safe temperature 145°F (63°C) internal temperature (steaks, chops and roasts)Tip Check the internal temperature in the thickest part of the meat away from the bone.
The beef should look soft and braised, with the meat pulling away slightly from the bone. The liquid should be bubbling gently, and the kitchen should smell savory and fragrant. Verify the temperature before serving.
Common mistakes
Avoid lifting the slow cooker lid during the cooking process, as this releases heat and steam, significantly increasing the total cooking time and potentially resulting in unevenly cooked meat.
Also, ensure the beef is not trimmed of too much fat before cooking, as this fat is essential for keeping the meat moist during the long braising process in the slow cooker.
How to tell it’s done
The beef is perfectly cooked when it is fork-tender, meaning it flakes apart easily with the slightest pressure. The internal temperature must reach at least 145°F (63°C).
The potatoes should be soft throughout but still hold their shape without turning mushy. The broth will have reduced slightly, creating a glossy, flavorful sauce that coats the ingredients.
- Steaks, chops and roasts: 145°F (63°C) in the thickest part, then a 3-minute rest
Up next · Part 3 of 3
2 variations · storage & make-ahead · 3 answers · printable card
Tips, FAQ & printable recipe (Part 3)← Back to the ingredients (Part 1)