Dinner · Part 2 of 3: Instructions
Slow Cooker Butter Bath Corn on the Cob Step-by-step instructions
- Prep
- Cook
- Total
- Serves
- 4
Before you start
Before beginning, ensure your corn is husked and all silk is thoroughly removed. You will need a clean slow cooker and a glass measuring cup to accurately portion the water.
Having your butter sliced ahead of time will make the assembly process much faster and more efficient, allowing you to get the slow cooker started immediately without any unnecessary delays in your meal preparation sequence.
Ingredients at a glance (4)
- 4 ears fresh corn cobs, husked and halved
- 1/2 cup unsalted butter, sliced
- 1 tbsp garlic powder
- 1 cup water
Instructions
Preparing the slow cooker assembly
- Assemble the cornPlace the husked and halved corn cobs into the slow cooker insert. Arrange them side by side so they fit snugly in a single layer at the bottom of the vessel.Look for The corn should be arranged neatly in the bottom of the slow cooker without being overly crowded.Tip Ensure the cobs are husked completely and all silk is removed for the best texture.
At this stage, the corn is neatly arranged in the bottom of the slow cooker. The butter slices are distributed across the surface, and the garlic powder is dusted over the top. The water has been added to the correct level, creating a fragrant base that is ready for the slow, gentle heat of the cooker to begin the infusion process.
Seasoning and liquid addition
- Add flavorings and liquidDistribute the butter slices evenly over the top of the corn cobs. Sprinkle the garlic powder over the butter and corn. Pour the water into the slow cooker until the cobs are approximately half covered.Look for The water level should reach about halfway up the sides of the corn cobs to facilitate steaming and poaching.Tip Do not submerge the corn completely, as this may dilute the butter flavor too much during the cooking process.
The corn sits partially submerged in the water and butter mixture. As the heat begins to rise, the butter will melt, creating a delicious poaching liquid.
The garlic powder will hydrate in the warm liquid, ensuring that the aroma permeates the entire slow cooker, signalling that the cooking process is proceeding exactly as intended for a flavorful outcome.
Finishing the cooking process
- Slow cook and serveCover the slow cooker with the lid. Cook on low heat for 3 hours until the corn is tender and heated through. Carefully remove the corn with tongs and serve immediately while hot.Look for The corn is finished when the kernels are bright yellow, tender, and easily pierced with a fork.Tip Using tongs is essential to prevent splashing the hot garlic-butter liquid when retrieving the cobs.
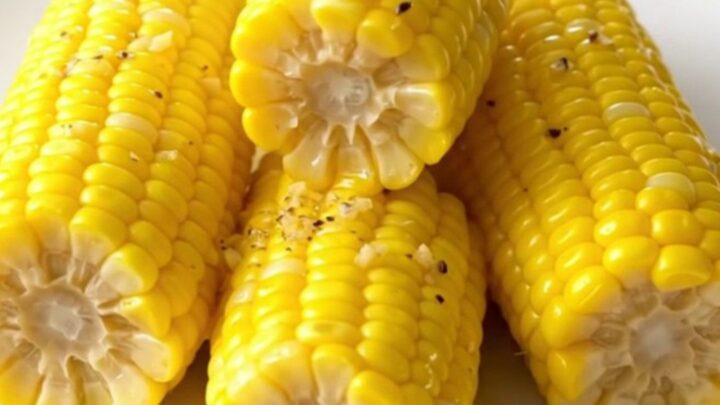
The corn has reached a state of perfect tenderness. The kernels are bright and plump, having absorbed the rich garlic butter. The liquid in the bottom of the cooker should be fragrant and slightly thickened with the rendered butter. Once the corn is retrieved with tongs and placed on a serving plate, it is ready to be enjoyed immediately while hot.
Common mistakes
A common mistake is overcrowding the slow cooker, which can prevent the butter and garlic from circulating effectively around every cob.
Another error is using too much water; the goal is a concentrated butter bath, not a diluted broth, so stick to the recommended amount to ensure the flavors remain bold and rich. Finally, avoid lifting the lid too frequently, as this releases heat and moisture, significantly increasing the cooking time required.
How to tell it’s done
The corn is considered done when the kernels are vibrant yellow and tender to the bite. When you pierce a kernel with a sharp knife or a fork, it should offer very little resistance and release a small amount of sweet, milky liquid.
The overall texture should be soft yet retain a pleasant snap, indicating that it has been cooked through without reaching a mushy consistency.
Up next · Part 3 of 3
2 variations · storage & make-ahead · 3 answers · printable card
Tips, FAQ & printable recipe (Part 3)← Back to the ingredients (Part 1)