Dinner · Part 2 of 3: Instructions
Slow-Cooker Bulgogi Chicken Thighs for Easy Weeknight Dinners Step-by-step instructions
- Prep
- Cook
- Total
- Serves
- 4
Before you start
Before starting, ensure your chicken is clean and cut into uniform strips to guarantee even cooking. Have your onion sliced thinly to allow it to melt into the sauce. Prepare a clear workspace for your slow cooker, ensuring it is placed on a heat-resistant surface.
Check that you have all your ingredients measured out and ready to go, which makes the assembly process fast and seamless, allowing you to get the slow cooker running in just a few moments.
Ingredients at a glance (4)
- 2 lb boneless skinless chicken thighs, cut into strips
- 1 large yellow onion, thinly sliced
- 2 tbsp brown sugar
- 1 cup store-bought bulgogi sauce
Instructions
Layering the ingredients
- Assemble the ingredientsPlace the chicken thigh strips into the bottom of the slow cooker crock, spreading them out into an even layer. Arrange the thinly sliced onions over the top of the chicken. Sprinkle the brown sugar evenly over the onions and finally pour the bulgogi sauce over the entire mixture.Look for The slow cooker is filled with layers of chicken, onions, and the sauce.Tip Ensure the chicken is cut into uniform strips for even cooking throughout the process.
At the start, the slow cooker contains raw chicken strips at the base, topped with layers of thinly sliced onions, a sprinkle of brown sugar, and a generous pour of bulgogi sauce.
Everything should be arranged neatly to ensure that the flavors distribute evenly as the cooking process begins. The scene should look organized, with the sauce beginning to settle into the bottom of the crock, ready to slowly braise the chicken into tenderness.
Slow-braising process
- Slow cook the chickenCover the slow cooker with its lid and set it to cook on the low setting for four hours or on the high setting for two hours. This slow-braising process allows the chicken to become tender while absorbing the deep, savory flavors of the bulgogi sauce.Look for The sauce is bubbling and the chicken is fully cooked through.Tip Avoid lifting the lid frequently as this releases heat and increases the required cooking time.
During the cooking phase, the slow cooker should be covered, allowing the low, consistent heat to transform the ingredients. You will notice the aroma of savory, sweet bulgogi sauce filling the kitchen as the chicken releases its juices. The onions will soften significantly, and the sauce will begin to reduce. Check that the appliance is set correctly to ensure the braising proceeds at the right pace without drying out the contents.
Final check and serving
- Check temperature and serveCheck that the chicken has reached an internal temperature of 165°F (74°C) using a meat thermometer inserted into the thickest piece. Once cooked, let the chicken rest for 5 minutes before serving to ensure the best texture and flavor distribution.Look for The chicken is tender and the sauce has thickened slightly.Safe temperature 165°F (74°C) internal temperature (poultry)Tip Check the temperature in multiple spots to ensure safety.
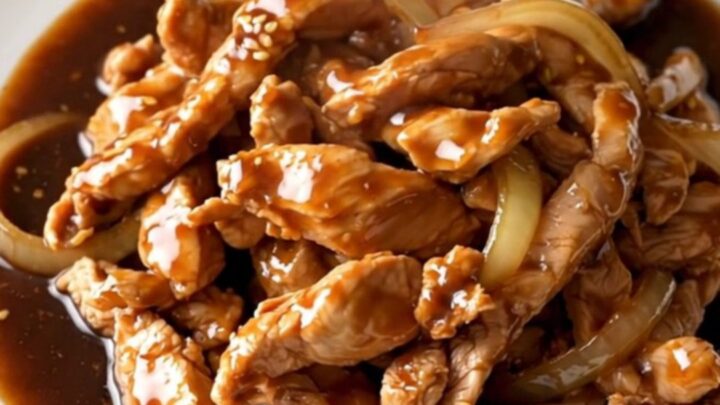
Once the timer concludes, the chicken should be tender, succulent, and coated in a rich, flavorful glaze. Perform a temperature check to ensure it has reached the required 165°F (74°C). The sauce should be pourable but thick enough to coat the back of a spoon. If the sauce appears too thin, it can be reduced further on the stove, but usually, the slow-cooker method results in a perfect consistency ready for immediate serving.
Common mistakes
A common mistake is overcrowding the slow cooker, which can lead to uneven cooking and excess liquid that dilutes the sauce's flavor. Another pitfall is lifting the lid too often, which causes significant heat loss and extends the cooking time unnecessarily.
Finally, failing to trim excess fat from the chicken thighs can result in an overly greasy sauce; taking a moment to remove large pieces of visible fat before cooking will lead to a much cleaner, more refined final dish.
How to tell it’s done
The chicken is perfectly done when it is opaque throughout and pulls apart easily with a fork. Using a digital meat thermometer is the most reliable way to confirm safety; ensure the chicken reaches an internal temperature of 165°F (74°C).
At this point, the sauce should have a glossy, thickened consistency, and the onions should be soft and translucent, indicating that the flavors have fully melded together during the braising process.
- Poultry: 165°F (74°C) in the thickest part
Up next · Part 3 of 3
2 variations · storage & make-ahead · 3 answers · printable card
Tips, FAQ & printable recipe (Part 3)← Back to the ingredients (Part 1)