Dinner · Part 2 of 3: Instructions
Slow Cooker Brown Sugar Pepper Soda Ham Step-by-step instructions
- Prep
- Cook
- Total
- Serves
- 8
Before you start
Before beginning, ensure your slow cooker insert is clean and dry. Take the ham out of the refrigerator approximately 30 minutes before you plan to start cooking to help it come closer to room temperature, which encourages more even heating.
Verify that you have enough space in your kitchen for the slow cooker, away from any heat-sensitive surfaces, and keep your serving platter and a carving fork ready for when the ham finishes its resting period.
Ingredients at a glance (3)
- 1 whole spiral-sliced bone-in ham
- 2 cups dark brown sugar
- 12 oz pepper soda
Instructions
Preparation and Setup
- Prepare the HamPlace the spiral-sliced ham cut-side down into the slow cooker basin. Ensure it sits flat against the bottom for even heating throughout the cooking process.Look for The ham should fit snugly inside the slow cooker insert without pushing against the sides excessively.Tip If the ham is too tall for the lid to close, you can trim the bottom slightly or use a larger slow cooker.
At this stage, the ham should be positioned securely in the slow cooker with the cut side facing down. The setup is simple, focusing on ensuring the ham sits stable within the basin.
Check that the lid fits properly, and confirm that your workspace is organized before proceeding to add the glaze ingredients, as this ensures a smooth transition into the active cooking phase.
Applying the Glaze
- Add Glaze IngredientsPack the dark brown sugar firmly over the top of the ham, allowing it to fall between the pre-cut spiral slices. Pour the pepper soda over the top, letting it run down the sides into the base of the insert.Look for The sugar should be evenly distributed to ensure every slice gets coated during the cooking cycle.Tip Pour slowly to ensure the soda reaches the bottom of the insert rather than just rinsing the sugar off the top.
Once the brown sugar is packed and the pepper soda is poured, the focus shifts to ensuring the glaze is evenly distributed. Look for the sugar sinking between the slices and the soda pooling at the bottom. The ingredients should look well-integrated, creating a base that will caramelize perfectly as the ham warms. Ensure no large clumps of sugar remain on top of the bone.
Slow Cooking to Perfection
- Slow Cook and ServeCover and cook on low for 4 to 6 hours. Once the internal temperature reaches 145°F (63°C), remove the ham carefully. Let the meat rest for at least 10 minutes before slicing and serving with the reduced pan juices.Look for The ham is ready when the meat is steaming and the glaze has transformed into a rich, syrupy consistency.Safe temperature 145°F (63°C) internal temperature (steaks, chops and roasts)Tip Use a meat thermometer inserted into the thickest part of the meat, avoiding the bone, to verify the temperature.
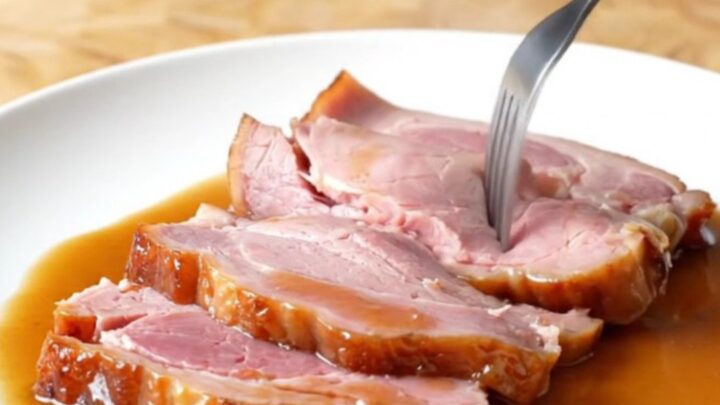
The ham is ready when it is steaming and the glaze has thickened into a rich, amber-colored sauce. Check the internal temperature with a thermometer to confirm it has reached 145°F (63°C). The meat should appear tender and the slices should be slightly separated by the glaze. After resting, the ham is ready to be transferred to a platter for carving and serving.
Common mistakes
A common mistake is cooking the ham at too high a temperature; always use the low setting to ensure the meat stays tender. Do not skip the resting period, as this is essential for the texture of the meat and the stability of the glaze.
Another error is failing to ensure the sugar is packed between the slices, which can lead to uneven sweetness. Finally, avoid lifting the lid frequently during the cooking process, as each opening releases heat and extends the overall cooking time.
How to tell it’s done
The ham is finished when it is heated through completely and the glaze has reduced into a thick, syrupy consistency. Use a digital meat thermometer to confirm the internal temperature reaches at least 145°F (63°C) in the thickest part of the meat, avoiding the bone for an accurate reading.
Once this temperature is achieved, allow the meat to rest for at least 10 minutes to let the juices redistribute, ensuring each serving remains moist and flavorful.
- Steaks, chops and roasts: 145°F (63°C) in the thickest part, then a 3-minute rest
Up next · Part 3 of 3
2 variations · storage & make-ahead · 3 answers · printable card
Tips, FAQ & printable recipe (Part 3)← Back to the ingredients (Part 1)