Dinner · Part 2 of 3: Instructions
Slow Cooker Brown Sugar Bourbon Chicken Drumsticks Step-by-step instructions
- Prep
- Cook
- Total
- Serves
- 4
Before you start
Before starting, ensure all ingredients are ready and the slow cooker is placed on a stable, heat-resistant surface near an outlet. Remove the chicken from the refrigerator about 15 minutes before cooking to take the chill off, which helps with even heat distribution.
Chop the green onions cleanly and have the barbecue sauce measured out in a glass cup for easy pouring. Check that the slow cooker base is clean and free of debris, and ensure the lid is available and ready to create a proper seal for the duration of the cooking time.
Ingredients at a glance (4)
- 2 lb chicken drumsticks
- 3 stalks green onions, chopped
- 1 packet brown sugar bourbon seasoning
- 1 cup barbecue sauce
Instructions
Preparation and Seasoning
- Prepare the Slow CookerPlace the raw chicken drumsticks into the base of the slow cooker, ensuring they are arranged in an even layer to promote consistent cooking throughout the process.Look for The chicken should be evenly distributed across the bottom of the cooker.Tip Avoid overcrowding the slow cooker to ensure the heat circulates properly.
- Season the ChickenScatter the chopped green onions over the drumsticks, then evenly sprinkle the brown sugar bourbon seasoning packet over the top of the chicken to ensure every piece is coated.Look for The seasoning should be evenly distributed over the surface of the meat.Tip Use your hands to gently toss the chicken if needed to ensure the seasoning reaches the sides.
At the end of this phase, the chicken should be arranged in the slow cooker with the green onions and seasoning evenly distributed over the surface. The meat should be ready for the addition of the barbecue sauce, and the slow cooker should be positioned correctly on the counter. Ensure that no chicken is overlapping excessively, as this can hinder the cooking process. Once everything is layered, you are ready to add the sauce and begin the slow cooking cycle, marking the transition into the active heat phase.
Slow Cooking
- Add the SaucePour the barbecue sauce over the seasoned drumsticks, making sure to cover all the pieces thoroughly. Cover the slow cooker with its lid and set to cook on high for 4 hours.Look for The sauce should coat the chicken completely before the lid is closed.Tip Ensure the lid is sealed tightly to lock in moisture and heat.
During this phase, the slow cooker maintains a consistent, high heat that gently cooks the chicken in the barbecue sauce. As the time progresses, you will notice the aroma of the bourbon seasoning and barbecue sauce filling the kitchen.
The sauce will begin to bubble and combine with the natural juices released by the chicken, creating a rich, aromatic environment. It is crucial to keep the lid on throughout this entire duration to ensure the internal temperature is reached safely and the meat becomes perfectly tender, avoiding any unnecessary heat loss.
Finishing and Resting
- Finish CookingOnce the cooking time is complete, verify that the internal temperature of the chicken has reached 165°F (74°C). Carefully remove the drumsticks from the slow cooker and let them rest for at least 5 minutes before serving.Look for The chicken should be tender, glossy, and steaming.Safe temperature 165°F (74°C) internal temperature (poultry)Tip Use a meat thermometer inserted into the thickest part of the drumstick, avoiding the bone.
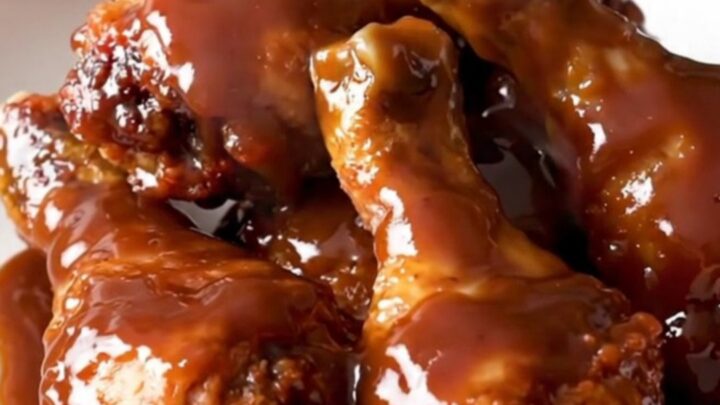
At the conclusion of the cooking time, the chicken should be visibly tender, with the skin looking glossy and coated in a thickened barbecue glaze. The sauce in the bottom of the cooker should appear reduced and flavorful. After verifying the internal temperature of 165°F (74°C), remove the chicken and let it rest. During the rest, the meat will firm up slightly and the juices will settle, ensuring every bite is moist. The final dish should look appetizing and ready to be served immediately after the brief resting period.
Common mistakes
A common mistake is overcrowding the slow cooker, which prevents the heat from circulating evenly and can result in some pieces being undercooked while others become mushy. Another error is lifting the lid too frequently during the cooking process, which releases the steam and heat, significantly increasing the total cooking time required.
Additionally, failing to verify the internal temperature with a thermometer can lead to safety concerns or overcooked, dry meat. Finally, ensure the sauce is poured evenly over all the chicken pieces rather than just in the center, as this helps achieve a consistent glaze across the entire batch during the slow cooking cycle.
How to tell it’s done
The chicken is done when the meat is tender and easily pulls away from the bone, and the internal temperature reaches 165°F (74°C) as measured with a digital meat thermometer inserted into the thickest part of the drumstick. Avoid touching the bone with the thermometer probe to get an accurate reading.
The sauce should be thickened, glossy, and coating the drumsticks thoroughly, creating a rich, dark glaze that clings to the skin. Allow the chicken to rest for 5 minutes after removing it from the heat to allow the juices to redistribute, ensuring the best possible texture and flavor before serving the meal to the table.
- Poultry: 165°F (74°C) in the thickest part
Up next · Part 3 of 3
2 variations · storage & make-ahead · 3 answers · printable card
Tips, FAQ & printable recipe (Part 3)← Back to the ingredients (Part 1)