Dinner · Part 2 of 3: Instructions
Slow Cooker Brown Sugar Barbecue Country-Style Ribs Step-by-step instructions
- Prep
- Cook
- Total
- Serves
- 4
Before you start
Before beginning, ensure your slow cooker is clean and placed on a flat, heat-resistant surface. Have all your ingredients measured and ready to go. If your ribs are particularly large, you may want to cut them into individual serving pieces to ensure they fit comfortably in the cooker.
Ensure that you have a meat thermometer available to check the internal temperature, which is essential for ensuring the pork is cooked safely and reaches the desired level of tenderness.
Ingredients at a glance (4)
- 3 lb pork country-style ribs
- 1 large yellow onion, sliced
- 1/2 cup brown sugar
- 1 1/2 cups barbecue sauce
Instructions
Preparation and assembly
- Assemble the ingredientsPlace the pork country-style ribs into the base of the slow cooker, arranging them in an even layer. Scatter the sliced onions over the top of the ribs to ensure they soften and release their aromatics during the long cooking process.Look for Ribs are evenly distributed at the bottom of the cooker.Tip Layering the onions underneath or between the ribs helps infuse the meat with flavor as they steam.
The ribs should be arranged neatly in the bottom of the slow cooker, covered with a layer of sliced onions.
This initial setup provides the foundation for the flavors to develop as the cooker heats up. Ensure the onions are distributed evenly to maximize their aromatic contribution to the sauce.
The slow cooking process
- Season and glazeSprinkle the brown sugar evenly over the ribs and onions. Pour the barbecue sauce over the entire mixture, ensuring the ribs are well-coated. Cover the slow cooker with the lid and set to cook on low for 8 hours.Look for Barbecue sauce coats the ribs and sugar is fully distributed.Tip Do not stir the mixture, as the slow cooker will naturally circulate the juices and sauce.
As the ribs cook, the kitchen will begin to fill with the savory, sweet aroma of barbecue sauce and caramelized onions. The liquid level will rise as the pork releases its juices, blending with the sugar and sauce to create a rich braising liquid that will tenderize the meat thoroughly.
Final resting and serving
- Finish and serveCheck the internal temperature of the ribs with a meat thermometer. Ensure they reach at least 145°F (63°C) for food safety. Once cooked, remove the ribs, let them rest for at least 5 minutes, and serve with the thickened sauce from the slow cooker.Look for Ribs are tender and reach the safe internal temperature.Safe temperature 145°F (63°C) internal temperature (steaks, chops and roasts)Tip If the sauce is too thin, you can reduce it in a saucepan over medium heat for several minutes.
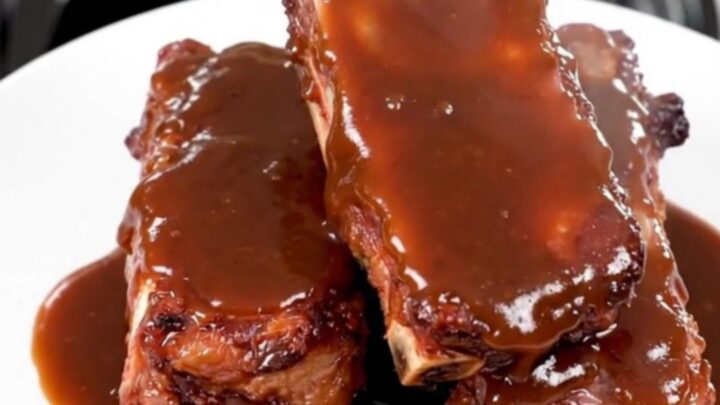
The ribs should be tender, glossy, and coated in a thick, dark barbecue glaze. Before serving, verify the internal temperature has reached 145°F (63°C). Allowing the meat to rest for a few minutes is crucial, as it lets the juices redistribute, resulting in a more flavorful and tender bite.
Common mistakes
A common mistake is overcrowding the slow cooker, which can lead to uneven cooking and excess liquid that dilutes the sauce. Ensure the ribs are arranged in a single, even layer for the best results.
Another error is checking the cooker too frequently; every time the lid is lifted, heat escapes and the cooking time increases. Trust the process and keep the lid closed until the final hour of cooking to ensure the temperature remains consistent throughout.
How to tell it’s done
The ribs are done when they reach an internal temperature of at least 145°F (63°C) and the meat is tender enough to be easily pierced with a fork. The texture should be soft and yielding, with the barbecue sauce thickened into a glossy, sticky glaze that clings to the meat.
If the meat still feels firm or rubbery, continue cooking for another 30 to 60 minutes, as country-style ribs benefit from the extra time to break down fully.
- Steaks, chops and roasts: 145°F (63°C) in the thickest part, then a 3-minute rest
Up next · Part 3 of 3
2 variations · storage & make-ahead · 3 answers · printable card
Tips, FAQ & printable recipe (Part 3)← Back to the ingredients (Part 1)