Dinner · Part 2 of 3: Instructions
Slow Cooker Brown Butter Sage Stuffing Step-by-step instructions
- Prep
- Cook
- Total
- Serves
- 8
Before you start
Before beginning, ensure all ingredients are measured and ready. The celery and onions should be diced finely to ensure they cook through at the same rate as the bread.
Prepare the brown butter by heating butter in a small saucepan over medium heat until it turns a deep amber color and smells nutty, then stir it into the warm broth. Have the slow cooker insert clean, dry, and ready on the counter to streamline the assembly process.
Ingredients at a glance (5)
- 8 cups bread cubes
- 1 cup diced celery
- 1 cup diced white onion
- 1 tbsp rubbed sage
- 2 cups amber broth with brown butter
Instructions
Layering the ingredients
- Prepare the slow cooker basePlace the bread cubes into the stoneware insert of the slow cooker. Scatter the diced celery and onion evenly over the top of the bread cubes to ensure balanced flavor throughout the dish.Look for The bread should fill the insert without being packed down too tightly.Tip Ensure the celery and onions are diced to a uniform size for even cooking.
The bread cubes, diced celery, and onions should be distributed evenly across the base of the slow cooker insert. The layers should look uniform, with the vegetables visible among the bread to ensure they are well-integrated.
No excessive packing should occur, as this could lead to uneven cooking and dense spots in the finished dish. Ensure the slow cooker is placed on a flat, stable surface before starting the assembly.
Seasoning and hydrating
- Season and hydrateSprinkle the rubbed sage over the vegetable and bread mixture. Slowly pour the amber broth containing the nutty brown butter over the entire contents, ensuring that the liquid is distributed as evenly as possible to moisten all the cubes.Look for The broth should soak into the bread cubes, making them moist but not completely submerged in liquid.Tip Whisk the brown butter into the broth thoroughly before pouring for a consistent nutty flavor.
After sprinkling the sage and pouring the brown butter broth, the mixture should look well-moistened. The sage should be distributed evenly so it does not clump. The broth will naturally settle toward the bottom of the insert, which is normal. Check that no large, dry pockets of bread remain on the surface; if so, use a spoon to gently lift and turn the bread to ensure complete saturation before covering.
Cooking and finishing
- Cook and serveCover the slow cooker and cook on low for 3 hours. Once finished, fluff the stuffing gently with a fork before serving warm on a plate to maintain the texture of the bread.Look for The stuffing is done when the bread is soft and moist, with edges that have turned light golden and slightly toasted.Tip Let the stuffing rest for about 10 minutes before serving so the flavors settle and the moisture distributes evenly.
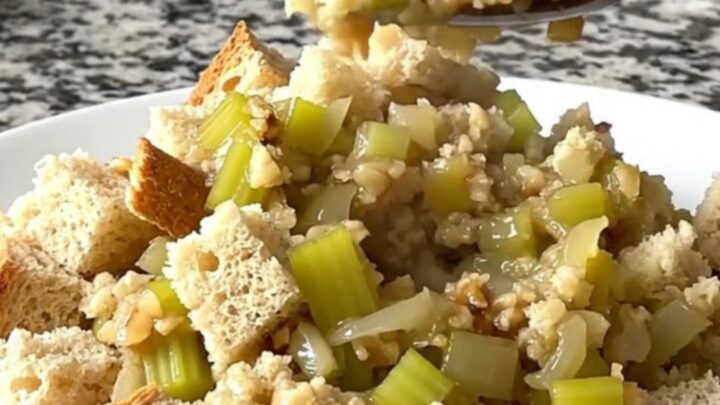
At the end of the cooking time, the stuffing should be fragrant with sage and butter. It will appear slightly reduced in volume and the bread should hold its shape without being mushy. The celery and onions will be soft and translucent. A gentle fluffing with a fork will reveal the internal texture, which should be consistent throughout. The dish is now ready to be transferred to a serving plate and enjoyed immediately.
Common mistakes
A common mistake is overcrowding the slow cooker, which can prevent the stuffing from cooking evenly. Ensure the bread cubes are distributed loosely. Another error is neglecting to brown the butter properly; if the butter is only melted, the dish will lack the signature nutty depth.
Finally, using bread that is too fresh can lead to a gummy texture, so always use day-old or lightly toasted bread cubes to maintain the best possible consistency throughout.
How to tell it’s done
The stuffing is done when the bread cubes are soft, moist, and have absorbed the majority of the liquid. The celery and onions should be completely tender. If the stuffing appears too dry, add a splash of extra broth.
If it seems too wet, remove the lid for the final 20 minutes of cooking to allow excess moisture to evaporate. There is no protein to monitor for temperature, so rely on the texture of the bread and vegetables.
Up next · Part 3 of 3
2 variations · storage & make-ahead · 3 answers · printable card
Tips, FAQ & printable recipe (Part 3)← Back to the ingredients (Part 1)