Dinner · Part 2 of 3: Instructions
Slow-Cooker Boursin Tortellini with Pepperoni and Sausage Step-by-step instructions
- Prep
- Cook
- Total
- Serves
- 8
Before you start
Before you begin, make sure your slow cooker is clean and ready. Remove the casings from the Italian sausage and crumble it into bite-size pieces. Slice the pepperoni if it isn't pre-sliced. Measure out the marinara sauce and have the cheeses ready.
No need to pre-cook anything—everything goes into the pot raw and cooks together. This is a true dump-and-go meal, so the prep is minimal. If you have time, let the Boursin come to room temperature for easier spreading, but it's not necessary.
Ingredients at a glance (6)
- 4 oz thick-cut pepperoni, sliced
- 1 lb Italian sausage, casings removed
- 20 oz refrigerated three-cheese tortellini
- 24 oz crushed San Marzano marinara sauce
- 1 wheel garlic-and-fine-herbs Boursin cheese
- 1 1/2 cups shredded Italian fontina cheese
Instructions
Layer and Set
- Layer the MeatPlace the sliced pepperoni and crumbled Italian sausage in the bottom of a 7-quart slow cooker. Spread them into an even layer.Look for The bottom of the slow cooker is covered with meat.Tip Use kitchen shears to snip the sausage directly into the pot for easy clean-up.
- Add the TortelliniDump the refrigerated tortellini over the meat in the slow cooker. No need to stir—just let it sit on top.Look for Tortellini forms a second layer over the meat.Tip Keep the tortellini refrigerated until just before adding to ensure they hold their shape.
- Pour the MarinaraPour the crushed San Marzano marinara sauce evenly over the tortellini. Use a spatula to scrape out every bit from the jar.Look for The sauce covers the tortellini completely.Tip Choose a high-quality marinara for the best flavor since it's a key component.
At the end of this phase, all ingredients are in the slow cooker, layered in order. The pot looks full but not overflowing. The pepperoni and sausage are on the bottom, tortellini in the middle, and sauce and cheeses on top.
The Boursin wheel sits prominently in the center, surrounded by shredded fontina. This is the 'before' state—nothing is cooked yet, but the colors are vibrant and inviting.
Slow Cook
- Top with CheesesPlace the wheel of Boursin cheese in the center of the slow cooker. Sprinkle the shredded fontina evenly over the top.Look for The Boursin sits in the middle, and fontina covers the surface.Tip Let the Boursin soften at room temperature for 10 minutes to make it easier to spread if desired.
- Cook on LowCover the slow cooker and cook on low for 4 hours, or until the sausage is cooked through and the tortellini are tender. Do not stir during cooking to keep the layers intact.Look for The sauce is bubbling, and the cheese is melted and golden around the edges.Safe temperature 160°F (71°C) internal temperature (ground meat)Tip Resist the urge to lift the lid—each peek adds 15 minutes to the cooking time.
After 4 hours on low, the slow cooker is bubbling gently. The sauce has darkened and thickened, and the cheese on top is melted and starting to brown at the edges. The aroma is rich with garlic, herbs, and tomato. The sausage is cooked through, and the tortellini are tender. The Boursin has melted into the sauce, creating a creamy, pinkish hue. Everything looks cohesive and ready to stir.
Combine and Serve
- Stir GentlyOnce cooked, gently stir the mixture to combine the creamy Boursin and fontina into the sauce. The sauce will turn silky and pink.Look for The sauce is creamy and well combined, with cheese strings when lifted.Tip Use a large spoon and fold rather than stir to keep the tortellini intact.
- Serve HotLadle the tortellini into bowls or onto plates. Serve immediately, garnished with extra pepperoni or fresh herbs if desired.Look for Steaming bowls of creamy tortellini are ready to enjoy.Tip Pair with a simple green salad and garlic bread for a complete meal.
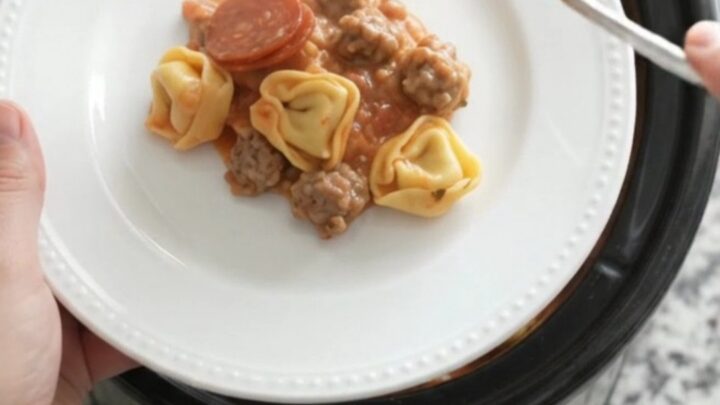
After stirring, the sauce is silky and smooth, with no visible lumps of Boursin. The tortellini are coated in a creamy tomato-cream sauce, with bits of pepperoni and sausage throughout. The fontina is fully melted, creating a stretchy, cheese-pull effect. The dish is piping hot and ready to serve. It looks like a hearty, comforting pasta bake that's both rustic and elegant.
Common mistakes
One common mistake is lifting the lid too often to stir or check on the food. This releases heat and extends cooking time. Another is using dried tortellini, which can absorb too much liquid and become gummy. Stick with refrigerated or frozen.
Overcooking can cause the tortellini to break apart and the cheese to separate. Finally, don't skip the resting time after cooking—letting the dish sit for 10 minutes allows the sauce to thicken and the flavors to meld.
How to tell it’s done
The dish is done when the sausage is cooked through and reaches an internal temperature of 160°F (71°C). The tortellini should be tender but not mushy, and the sauce should be bubbling and thickened. The cheese on top will be melted and slightly golden.
To check, insert an instant-read thermometer into the center of the slow cooker, avoiding any cheese pockets. The pasta should offer no resistance when pierced with a fork. If the sauce seems thin, let it cook uncovered for an additional 15 minutes.
- Ground meat: 160°F (71°C) in the thickest part
Up next · Part 3 of 3
4 variations · storage & make-ahead · 5 answers · printable card
Tips, FAQ & printable recipe (Part 3)← Back to the ingredients (Part 1)